Contents
Guide
Watercolor
WITH Me
IN THE
FOREST

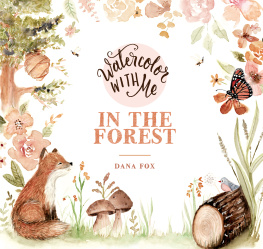
Watercolor WITH Me
IN THE FOREST
DANA FOX

The author and publisher have provided this e-book to you for your personal use only. You may not make this e-book publicly available in any way.
Copyright infringement is against the law. If you believe the copy of this e-book you are reading infringes on the authors copyright, please notify the publisher at: http://us.macmillanusa.com/piracy. To everyone with a creative, colorful spirit and a sense of childlike imagination.
 Watercolor with Me in the Forest
 is a watercolor project book that allows you to create beautiful artwork and learn a little something as you do it.
It was designed to let your creativity shine through while making the idea of watercolor painting a little less terrifying for beginners. This book will guide you step-by-step through creating each of the paintings shown. On the left, youll see a faint sketch of the image. On the right, you will find the tips, instructions, color palettes, and tools required to complete the artwork. Youll notice that the pages are perforated, turning this book into a collection of removable wall art that you can display proudly. The projects are broken up into four main sections: Wet on Dry Wet on Wet Painting Fur Ink and Wash Youll be able to learn about these techniques before you start painting so you can confidently put that brush to paper.
Supplies youll likely need: - Round watercolor brushes (sizes 2 to 6) - Fine detail brush - Watercolor paint - Clean water - Mixing palette - Permanent ink pen - White gel pen - Paper towels
Try it
 LIGHTEST
 LIGHT
LIGHT DARKER
 DARKEST
The first paintings in this book are done using a wet-on-dry technique. This simply means that the paper is not wet prior to touching your brush to it. Wet on dry allows you to have more control over where your paint goes, and it allows you to add detail and achieve sharp, crisp lines. When painting on a dry surface, you want to make sure that your brush is holding enough water so the paint mixture can flow freely. Without enough water in your mix, youll end up with a dry brush effect. With all watercolor techniques, the amount of water versus pigment (paint) will determine how light or dark the color appears on your paper.
The more water, the more translucent the paint will bethus making it lighter in color. The less water, the more opaque or vibrant the color will appear. Wet on dry is also a technique used when you want to build up layers, adding paint to dry layers of previously painted areas. You can create textures and finer details this way because you have control over the placement and dont have to worry about the paint flowing into other areas. On the opposite page, fill in each square with a mix of your paint and water. Start with a very diluted mixture (more water with less pigment), and gradually increase the amount of pigment (less water) in each box.
Then, fill in the circle with a single light color. Let it dry completely. Now, apply a second layer onto the bottom half to see how building layers can increase the intensity or darkness of the painting. 

Acorns have a lot of texture to them. Using shadows, highlights and lines to mimic that look is what youll try to do here. By using different shades of brown, youll create layers of wet-on-dry washes to really build up those darker areas.
The bottom half of the acorns should appear streaky like the texture of a real acorn.
Colors

YELLOW OCHRE

RAW UMBER

BURNT UMBER
Supplies

Round brush (size 6 works well)

3 colors of paint 1. Working on the bottom half of the acorns first, fill the areas with a light wash of Raw Umber mixed with Yellow Ochre. 2. After a few minutes, once dry, add a second wash of the same color. 3. 3.
Add another layer using Burnt Umber around the bottom, top and sides of the acorn. You can blend any harsh edges out with water. 4. Fill the acorn tops with a light wash of Burnt Umber, and then apply additional layers as you did previously, darkening shadowed areas such as the center and sides of the tops. 5. Let the previous layer dry once again, and create a scale-like pattern in the top of the acorns with a thin brush tip and Burnt Umber.
Try to keep the paint lighter in areas where the paint is lighter, and darker where the shadows have formed. 6. Fill in the acorn stems with Burnt Umber and youre done! 

Caterpillars come in a variety of colors, so feel free to use whatever hues speak to you for this exercise! The black details can be done with ink instead of paint, if you prefer. White accents can be added with a white pen or a more opaque paint such as acrylic or gouache.
Colors

SAP GREEN

RAW UMBER

IVORY BLACK





![Anna Koliadych [Анна Колядыч] - 15-Minute Watercolor Masterpieces: Create Frame-Worthy Art in Just a Few Simple Steps](/uploads/posts/book/305450/thumbs/anna-koliadych-a-k.jpg)



 The author and publisher have provided this e-book to you for your personal use only. You may not make this e-book publicly available in any way. Copyright infringement is against the law. If you believe the copy of this e-book you are reading infringes on the authors copyright, please notify the publisher at: http://us.macmillanusa.com/piracy. To everyone with a creative, colorful spirit and a sense of childlike imagination.
  Watercolor with Me in the Forest is a watercolor project book that allows you to create beautiful artwork and learn a little something as you do it.
  LIGHTEST
 LIGHT
LIGHT DARKER
 DARKEST
 The first paintings in this book are done using a wet-on-dry technique. This simply means that the paper is not wet prior to touching your brush to it. Wet on dry allows you to have more control over where your paint goes, and it allows you to add detail and achieve sharp, crisp lines. When painting on a dry surface, you want to make sure that your brush is holding enough water so the paint mixture can flow freely. Without enough water in your mix, youll end up with a dry brush effect. With all watercolor techniques, the amount of water versus pigment (paint) will determine how light or dark the color appears on your paper.
 Acorns have a lot of texture to them. Using shadows, highlights and lines to mimic that look is what youll try to do here. By using different shades of brown, youll create layers of wet-on-dry washes to really build up those darker areas.
  YELLOW OCHRE
  RAW UMBER
  BURNT UMBER
  Round brush (size 6 works well)
 Caterpillars come in a variety of colors, so feel free to use whatever hues speak to you for this exercise! The black details can be done with ink instead of paint, if you prefer. White accents can be added with a white pen or a more opaque paint such as acrylic or gouache.
  SAP GREEN
  RAW UMBER
  IVORY BLACK