Unauthorized copying, arranging, adapting, recording, Internet posting, public performance,
or other distribution of music in this publication is an infringement of copyright.
Infringers are liable under the law.
7777 W. Bluemound Rd.
Hal Leonard Australia Pty. Ltd.
Introduction
Congratulations on your decision to learn how to play guitar! This book is a great introduction to simple guitar chords and songs. If you've never played guitar or any other instrument, A Quick Guide to Guitar Chords is an excellent place to begin because it doesn't require you to have any prior musical experience. Many of the examples in this book have been simplified to get you playing immediately, without having to learn how to read traditional music.
This book begins with a quick introduction: how to hold the guitar and how to read chord diagrams-just the very basics to get you started. The next chapter contains chords that only require one finger, plus examples from real songs that you can play right away. From there, we'll progress to simple two-finger chords with accompanying song examples. The chapter after that explores full three-finger chords-the basic guitar chords used to play hundreds of songs in many different styles.
Be patient and take your time in the beginning; once you've learned the basics and can change chords smoothly, you'll be well on your way. The final section of this book contains five complete songs that can be played by using the chords you've learned in the previous chapters. By the time you finish this book, you'll be equipped with all the chords you'll need to continue your musical journey. Grab your guitar and let's get started!
CHORDS
Getting Started
Holding the Pick
Hold the pick in your hand by gripping it firmly between your thumb and first finger. Keep the rest of your hand relaxed and your fingers slightly curved and out of the way. You can strum the strings with a downstroke (downward motion) or an upstroke (upward motion).
Fret-Hand Position
Keep your hand relaxed and your fingers arched. The first joint of your thumb and your fingertips are the only parts of your hand that should be touching the guitar. Avoid gripping the neck like a baseball bat; your palm should not be touching the guitar neck.
Place the first joint of your thumb on the back of the guitar neck. Curl your fingers so that only your fingertips are touching the strings.
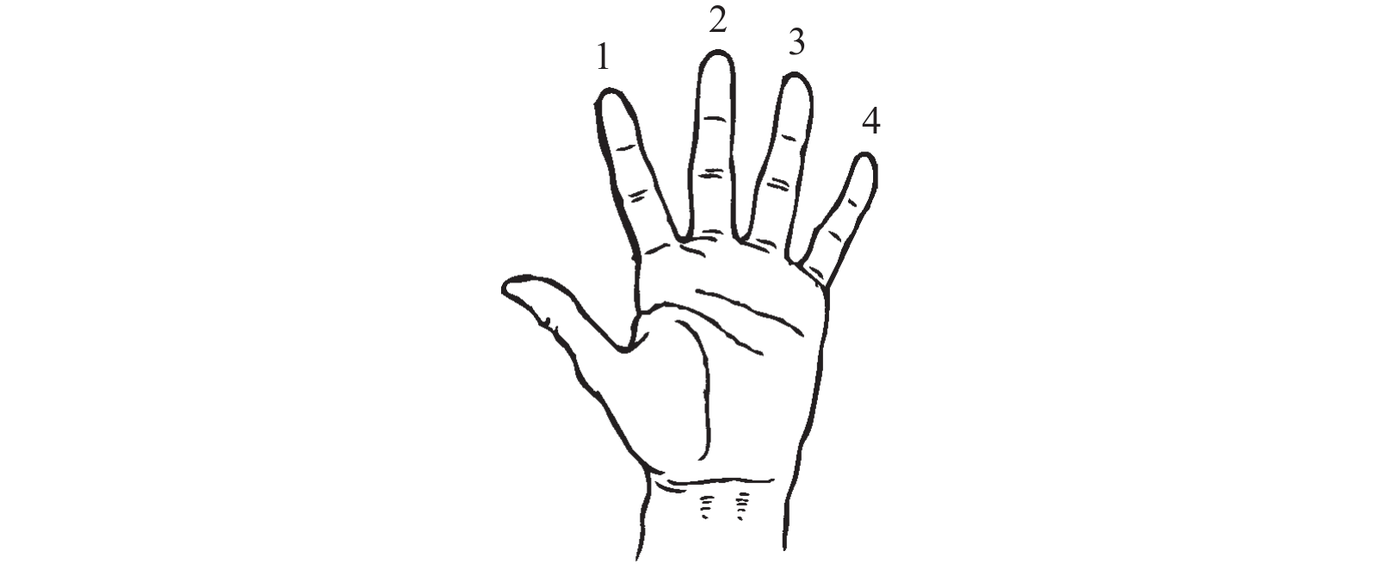
To indicate chord fingerings, numbers are assigned to the fingers of your fret hand (1 = index, 2 = middle, 3 = ring, 4 = pinky).
Reading Chord Diagrams
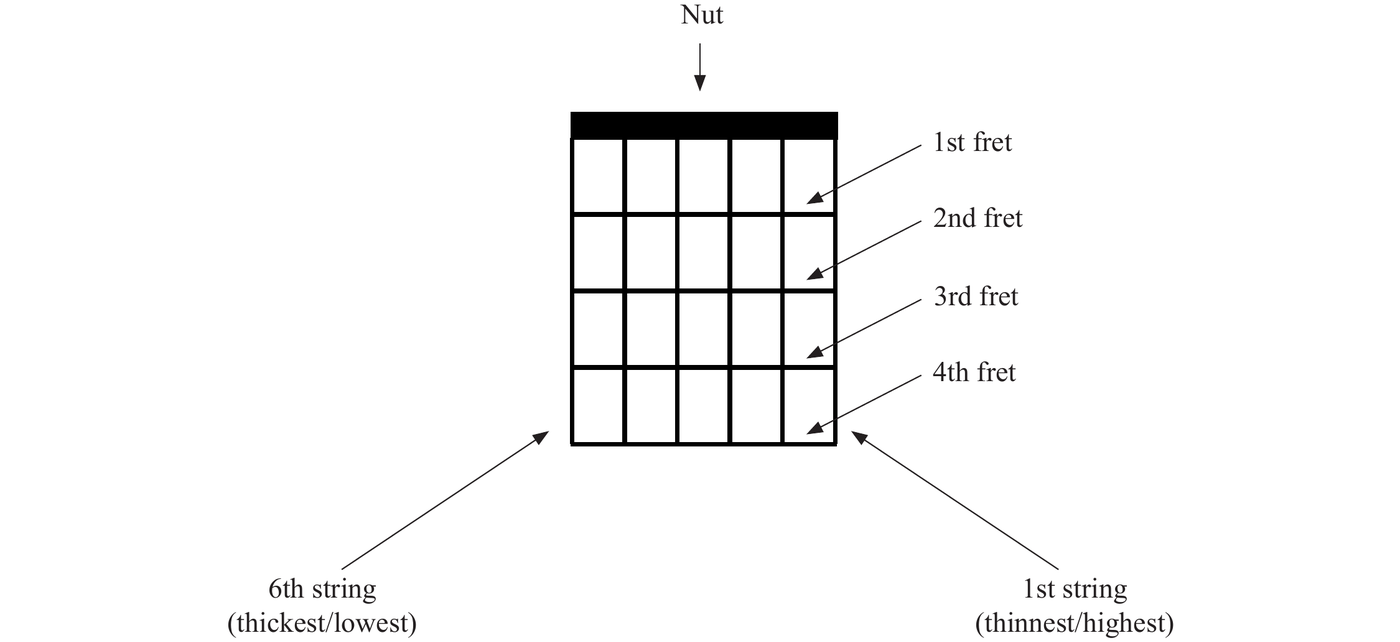
Chords are taught in this book by using graphic representations of the fretboard, or chord diagrams . The vertical lines in the diagrams represent the strings; the horizontal lines represent the frets. The thick horizontal line at the top of the diagram represents the nut. Chord diagrams visually correspond to the guitar as if you stood the guitar up from floor to ceiling and looked directly at the fretboard.
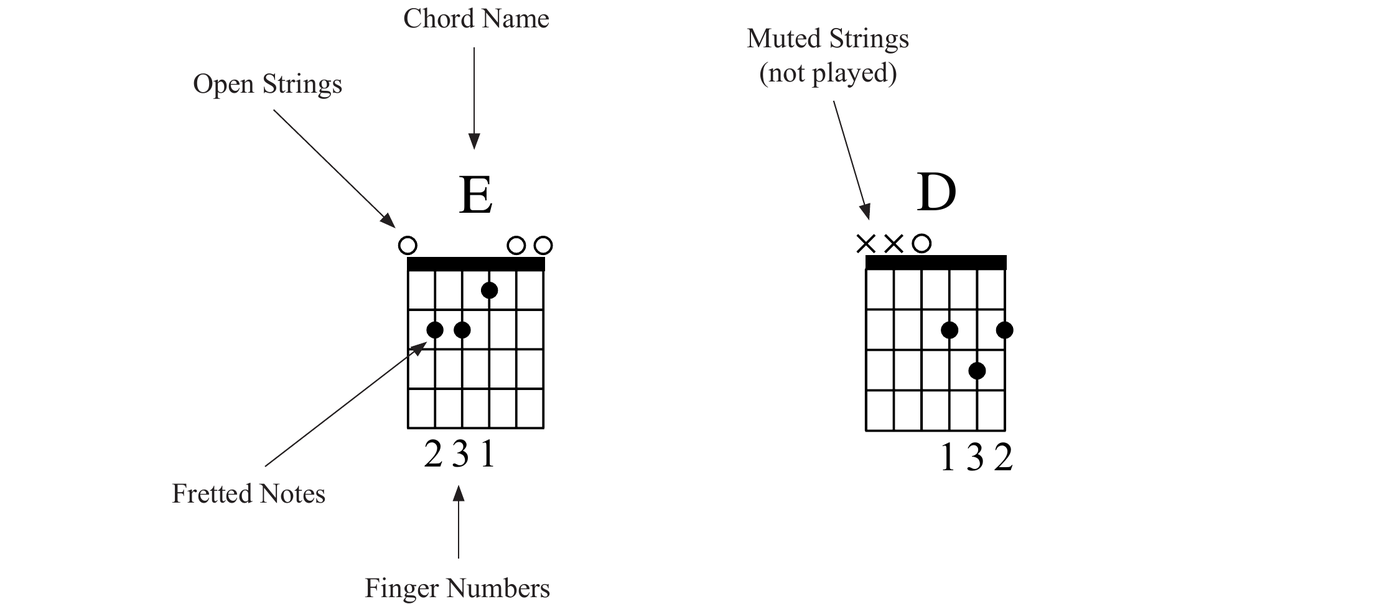
The following symbols are placed on the chord diagrams to show you how to finger the chords:
- The black dots on the diagram indicate which notes are fretted (pressed down) with fingers.
- The fingers used to fret each note are shown underneath the chord diagram.
- The "O" above the diagrams indicate which strings are strummed open (with no fingers touching them).
- An "X" above the diagram indicates that the string should be muted or not strummed.
One-Finger Chords
Let's get started with some simple chords that only require one finger. The chords in this chapter are simplified versions of the full, open chords that we'll get to later on. For now, these will get you started so you can play some songs right away.
When fretting a note, press down firmly with just your fingertip; be careful not to touch any of the other surrounding strings and accidentally mute them. Strum only the strings that are required, as indicated in the chord diagrams. To confirm that you're fretting the notes properly, pick each string individually to hear if they're ringing out cleanly.
C and G Chords
For the C chord, fret the note on the second string with your first finger and strum only the highest three strings. For the G chord, fret the note on the first string with your third finger and strum only the highest four strings.
Practice changing from chord to chord in a smooth, even motion to prepare you for playing songs.
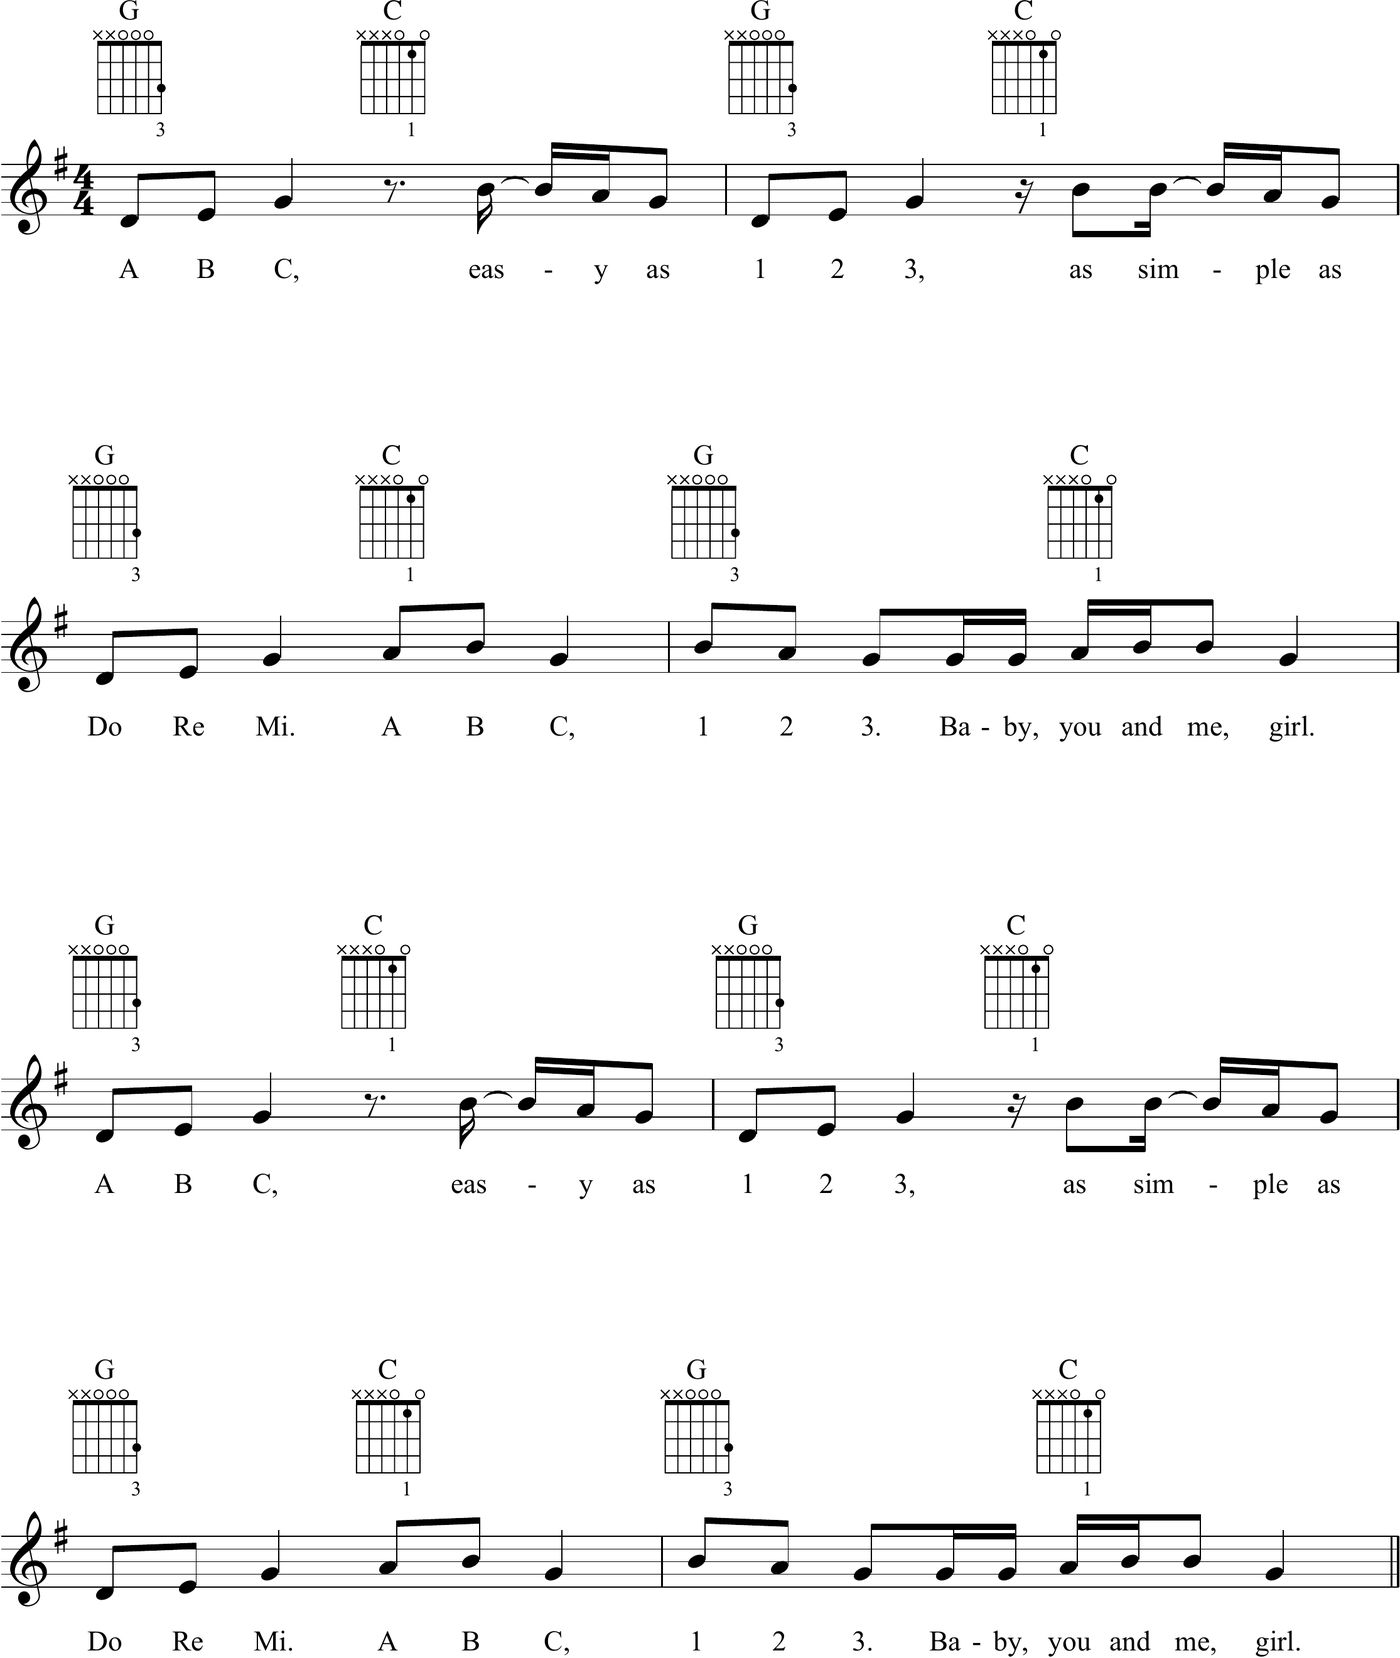
In the example below, strum each chord four times in a downward motion before changing to the next one. Count along in time and change chords without a pause or hesitation at the beginning of each measure.
ABC - The Jackson 5
Words and Music by Alphonso Mizell, Frederick Perren, Deke Richards and Berry Gordy
Copyright 1970 Jobete Music Co., Inc.
Copyright Renewed
All Rights Administered by Sony/ATV Music Publishing LLC, 424 Church Street, Suite 1200, Nashville, TN 37219
International Copyright Secured All Rights Reserved
G7 Chord

