Contents
 | Photo Tips |
I have been travelling around Australia, making images, since 1990. I have been to almost all the major regions on this rather vast continent, and some of them, like the Kimberley, I have been back to repeatedly. In fact, the only place of significance I have yet to visit is Cape York, but no doubt Ill get there in the not-too-distant future.
During that time I have found that while some places are pretty much as youd imagine, there are other locations that surpass all expectations, places which, with a little bit of extra effort, reveal hidden nooks and crannies, new vistas and a fantastic variety of potential images.
Take Purnululu National Park in northern Western Australia, for example. Its an amazing place: the huge beehive domes are quite overwhelming and the scale of the rock buttresses on the western side has to be seen to be believed. From a photographers point of view, its surprisingly challenging to photograph, precisely because it is so amazing. It is almost too easy to shoot the obvious images and to forget about composition, the quality of the light, and all the elements that can result in really memorable images. Purnululu does not give up its images easily: you have to work at it, look for new angles, wait for the light to be just so and, above all, take time to understand its many moods.
Modern cameras make it relatively easy to get satisfactory images of most subjects, but, as with many creative activities, there are subtleties to understand or mater. In this book, I explain how to deal with difficult subjects, how to see new opportunities and, most importantly of all, how to make your images transcend the ordinary.
I hope this book inspires you to hit the road and head out with your camera gear, ready to make some wonderful images. Have fun, and maybe Ill see you on the road somewhere
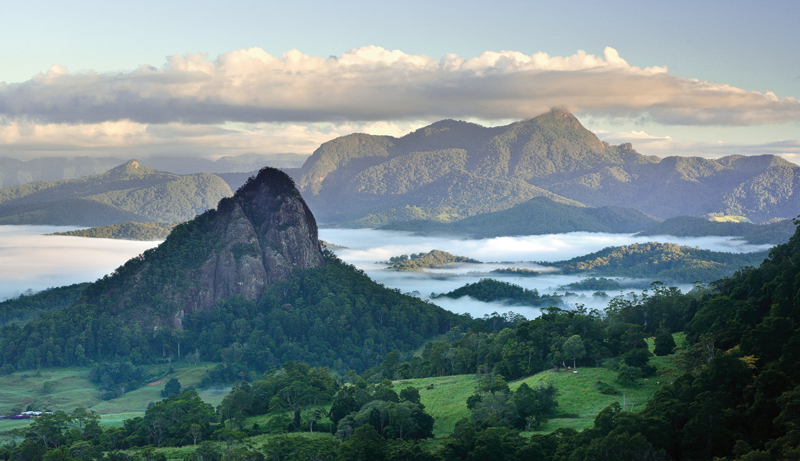
This picture of Mount Warning and Doughboy Hill was shot early in the morning from one of the trails in Nightcap National Park. As the sun rose, it illuminated the main flank of the mountain while the foreground remained in shadow. The eye can easily handle this sort of brightness range but the camera has trouble with a highlight-to-shadow range of more than about 200:1. In this case, it was a choice of washed-out sky or black featureless shadows in the valley.
There are two solutions to this problem, one best suited for film and the other for digital captures.
Graduated Filters
A neutral density (ND) graduated filter is half clear and half grey. You position the filter in such a way in front of the lens that the grey part darkens the sky while the clear part lets the shadows expose normally. ND grads come in a variety of strengths, normally 1, 2 or 3 stops or 0.3, 0.6 and 0.9, depending on the manufacturers unit of measurement.
To use the filters, set the exposure for the shadows by using manual mode and pointing the camera down to take a meter reading. Then re-compose the image, slide the filter on and adjust it until the grey region is over the brightest parts of the scene. Now make the exposure and bracket by 1 stop either side of your setting.
Digital Blending
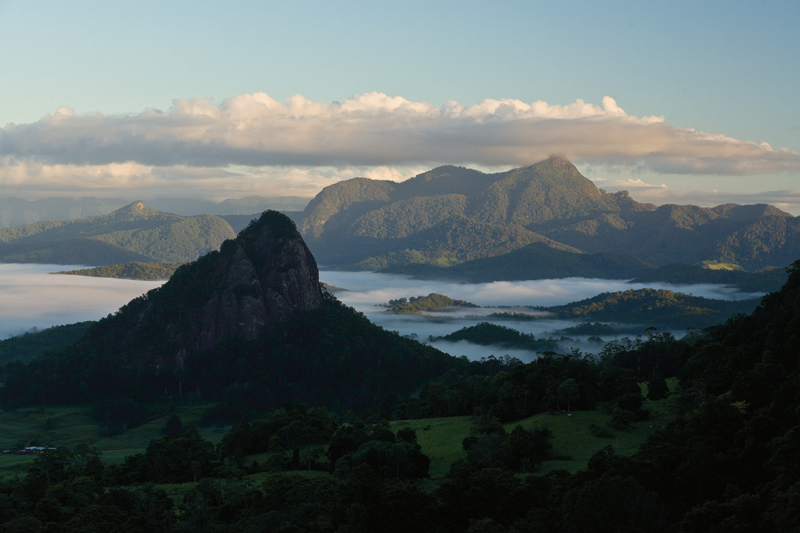
Digital cameras can handle a wide range of brightness and make it easy to combine two different exposures in a single frame. Youll need a tripod to ensure that you shoot two identical frames.
Simply shoot two shots of the same subject: overexposing one shot by one stop and underexposing the other by one stop.
Then, working on the computer, combine the two hots into one, using the bright areas of one frame with the dark areas of the other.
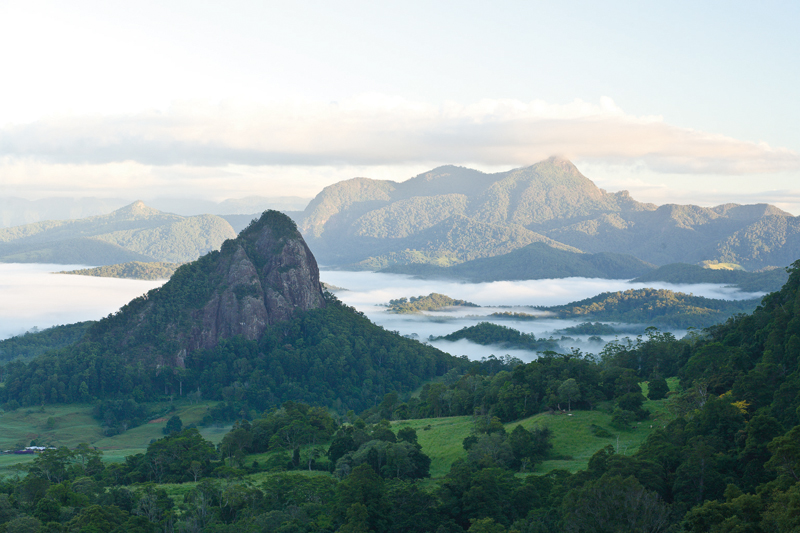
The simplest method is to drag one image onto another in Photoshop (while holding down the Shift key), making a single image with two layers in perfect alignment. Then use the erase tool to remove the top part of the image to reveal the darker version below.

1/500thsecond. Even with such a fast shutter speed the water drops are still short lines rather than points.
Successful waterfall images must take into account the fact that the water is moving while the rest of the image is not. This may sound obvious but the difference between a waterfall photographed at a shutter speed high enough to freeze the water and one taken with a low shutter speed to blur the water is quite dramatic.

1/60thsecond. This is still a relatively quick shutter speed but, as you can see, the water drops have recorded as long lines while still being recognisable as falling water.
Try photographing a waterfall with a four-second exposure on a tripod. During that time each water drop is recorded as a white track on the image rather than a single white spot. This is where the misty white appearance of waterfalls comes from. Too long an exposure will not allow enough time for each drop to record at all and the water will get fainter and fainter. As a rule of thumb, exposures of between half a second and 20 seconds should work well.
Recording water drops with a faster shutter speed gives a different effect, as seen here. As to which is better, well thats up to the photographer, but its worth noting that with rainforests being quite dark it is often not possible to use a high shutter speed anyway and the misty plume is the inevitable result.
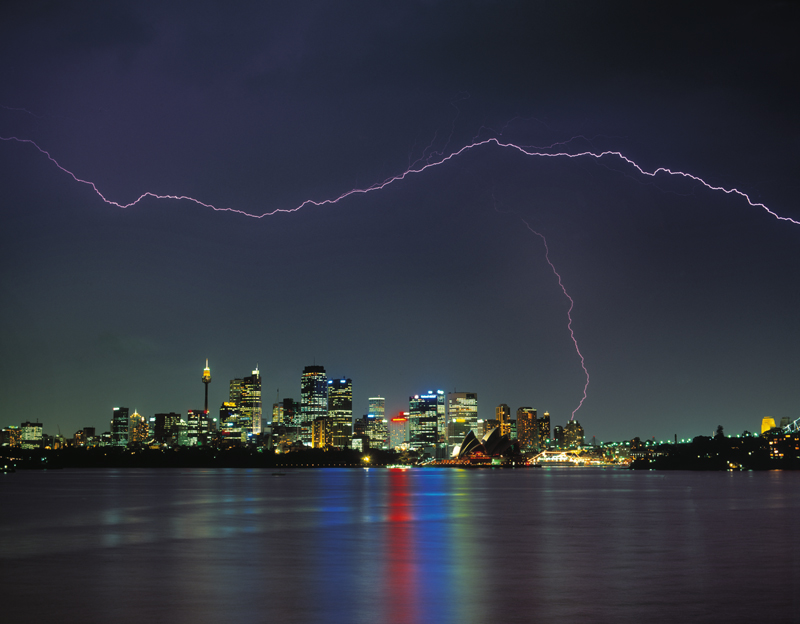
This image of Sydney during a thunderstorm was taken from Cremorne Point at the ferry jetty. This position gives an uninterrupted view of the city skyline with plenty of sky, so was ideal for lightning images.
There are two main problems to overcome with these sorts of images when and where to shoot. When will the lightning flash occur and where will the flash be both of these are out of the photographers control, so you need to make an educated guess as to what might occur.
Watching the storm for a while will probably give you a clue where the strikes are concentrated, and very roughly how frequent they are. That information allows you to calculate an exposure that will be long enough to capture some flashes, but not so long that the image is overexposed. It will also show you the direction in which to point the camera, making sure to include loads of sky.
At night its a lot easier to get successful images of lightning because a typical night shot of a city might involve a shutter speed of 15 seconds at f8 while still exposing the skyline correctly. Thats plenty of time for some flashes to occur whilst the shutter is open.
Then its a case of keeping the camera exposing for as many shots as possible while the lightning rages around you. Luckily, with digital captures you cannot run out of film and pixels are free, so just keep shooting and sooner or later youll capture the classic shot.











 | Photo Tips |


