C harcoal P ainting
Basic Tools and Techniques
Edwin M. Mallari
Copyright 2012 Edwin M. Mallari All Rights Reserved This book contains material protected under Federal and International Copyright Laws and Treaties. No part of this publication may be reproduced in any form or by any means, electronic or mechanical, including photocopying or recording without written permission from the author .
Introduction
Charcoal is one of the simplest materials used in art. It is inexpensive and can be mix with other dry media. It is very suitable for portraits although it can be use as well on still life, pet portrait and even landscape or nature.
Charcoal has always been my choice of media mainly because of its simplicity yet impressive result. Charcoal is also very forgiving and minor mistakes are easy to erase.
I was twelve years old when I become very interested in charcoal painting. During that time, I have been looking for a publication on the tools and techniques on charcoal painting using brushes with no success. It was one summer vacation when I saw an artist working on his charcoal painting. I was so amazed by his works. Upon negotiation, he agreed to be my private tutor. By the time I was fourteen or two years after I took the lessons, I was getting some commissions.
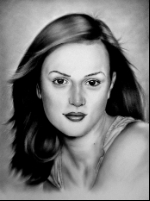
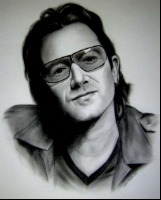
Thirty years later, I wanted to buy a book on charcoal painting for a friend of mine who happened to saw my methods of using brushes for shading. I was surprised not finding a book with the same methods I was doing. There are some tutorials on the internet but not very elaborate. Some tutorials will demonstrate how it was done but there no detailed discussion on the actual materials and techniques. It was then that I decided to document my own techniques in charcoal painting.
In this book, I will be talking about the actual tools and techniques in shading. I will cover only the human portrait with illustration of the step-by-step progression. Each step will have a detailed discussion of what was done and how it was done in order for you to understand better and so you too can paint a realistic portrait in charcoal.
Prior to the actual portrait painting, I will discuss some very basic techniques in shading with all the materials that you may need.
You can use the same technique s in this book on graphite pencils and soft pastels.
I will not be discussing how to do a primary sketch or outline of a subj ect as it is a different topic. It is a skill that you have to develop and will not be covered in this book. You must be at the least capable of drawing the outline of the face and its elements. It will be hard, although not impossible, to do a charcoal painting without the outline of the subject at first.
I will discuss only doing portraits from photograph and not live portrait. This can be an advantage to you and your subject. Your subject might not want to sit and pose for two or three hours. You as the artist can take your time while working on photos instead of live subject.
It is important that you consider this book as a basic or general idea on how to do a charcoal portrait. Afterwards, you can develop your own techniques and tools.
I invite you to have fun and learn how to paint a portrait in charcoal.
Chapter 1
Tools and Materials
Paper
The type of paper that you can use can be of personal choice, but there are some types of papers that I would recommend. Shown below is Canson watercolor paper. It is lightly textured which actually adds more artistic result to your work. The fibers of Canson watercolor paper remains intact even with repetitive brush strokes and rubbing, making it very ideal for charcoal. The size I recommend is 15 in. x 20 in. which provides adequate workspace and makes it easier to show the details.
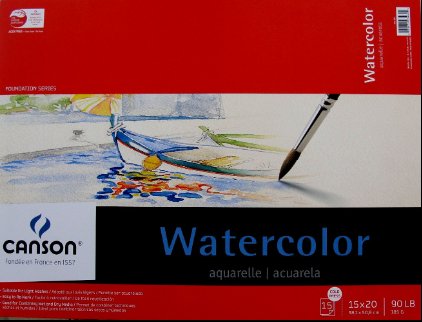
Figure 1 Canson Watercolor Paper 15x20 Coldpress
Heres another type of paper that would be ideal for charcoal, the Bristol paper Series 400 from Strathmore. It holds the charcoal very well and it can handle numerous reworking. It is smoother than Canson watercolor paper so it is very ideal for beginners.
When choosing the type of papers, the texture must not be so smooth that charcoal does not seem to adhere into the paper. The texture of the paper must not be so rough either that it is hard to make smooth shading.
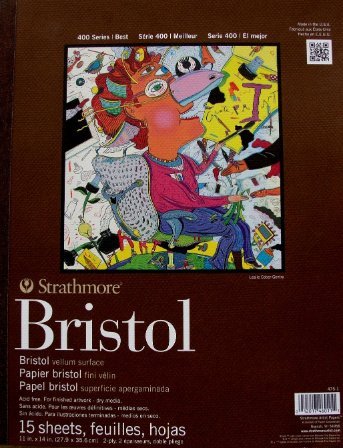
Figure 2 Strathmore Bristol Paper Series 400
Type of Brushes
Here are some types of brushes that are essential for shading. First, we will discuss the types of brush by type and its use, then the size and type that I recommend.
Figure 3
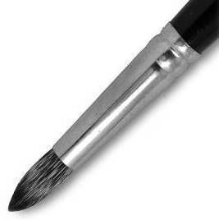
Figure 4
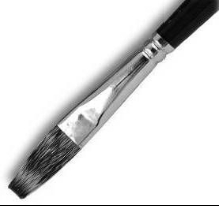
Figure 5
Recommended Brushes
Here are the types of brushes that I recommend. I will describe the brushes according to the material it is made of and measurement, not by brush numbering since different manufacturers have different sizes on their brushes. After you have done a portrait or two, you will probably be able to tell exactly what size of brush would work the best for you.
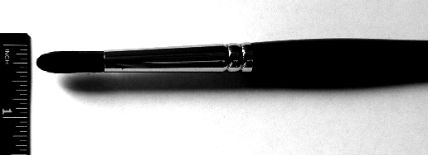
Figure 6 Synthetic Round Brush
Shown above is a synthetic round brush made of fine nylon measuring about of an inch. I use the synthetic brush due to its stiffness which makes it perfect in shading larger areas. The length of the bristles is close to one inch from the ferrule or the metal holding the bristles.
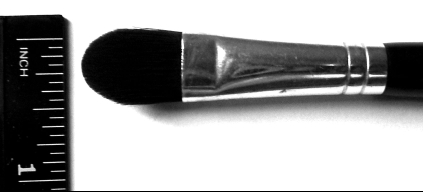
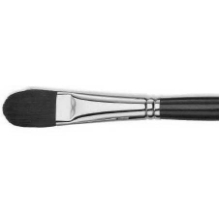
Figure 7 Filbert Brush
Shown above is a filbert red sable brush measuring of an inch in wide and 3/4 inch in length.

Figure 8 Flat Brush
Shown above is a flat red sable brush measuring 1/8 of an inch in wide and 3/16 of an inch in length.

