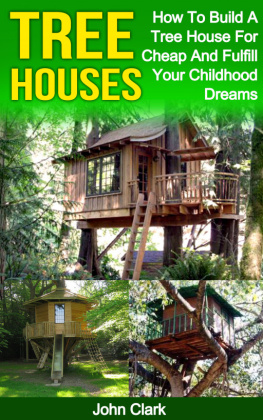
Tree Houses
How To Build ATreehouse For Cheap And Fulfill Your Childhood Dreams
Introduction
I want to thank you andcongratulate you for downloading the book, Tree Houses: How to Build a Tree House for Cheap and FulfillYour Childhood Dreams .
As a child, you probably have seen movies orTV shows and read movies where tree houses were involved. Whileoriginally built for leisure, tree houses could also serve as workspaces, and as protection against wild animals, among others.
In the 1990s, a surge in the need for treehouses flourished not only because tree houses could be used forrest and relaxation, but also because disposable homes werebecoming a trendand thats why a lot of people wanted their owntree houses. You probably have even dreamed about having your owntree house to play with too, right?
Well, nows the time for you to make yourown tree house!
This book contains information on how tomake your own tree house using affordable but high qualitymaterials, and will take you on a step-by-step process on how to doit.
What are you waiting for?
Read this book now and find out how!
Thanks again for downloading this book, Ihope you enjoy it!
Copyright 2015 by JohnClark - All rights reserved.
This document is geared towards providingexact and reliable information in regards to the topic and issuecovered. The publication is sold with the idea that the publisheris not required to render accounting, officially permitted, orotherwise, qualified services. If advice is necessary, legal orprofessional, a practiced individual in the profession should beordered.
- From a Declaration of Principles which wasaccepted and approved equally by a Committee of the American BarAssociation and a Committee of Publishers and Associations.
In no way is it legal to reproduce,duplicate, or transmit any part of this document in eitherelectronic means or in printed format. Recording of thispublication is strictly prohibited and any storage of this documentis not allowed unless with written permission from the publisher.All rights reserved.
The information provided herein is stated tobe truthful and consistent, in that any liability, in terms ofinattention or otherwise, by any usage or abuse of any policies,processes, or directions contained within is the solitary and utterresponsibility of the recipient reader. Under no circumstances willany legal responsibility or blame be held against the publisher forany reparation, damages, or monetary loss due to the informationherein, either directly or indirectly.
Respective authors own all copyrights notheld by the publisher.
The information herein is offered forinformational purposes solely, and is universal as so. Thepresentation of the information is without contract or any type ofguarantee assurance.
The trademarks that are used are without anyconsent, and the publication of the trademark is without permissionor backing by the trademark owner. All trademarks and brands withinthis book are for clarifying purposes only and are the owned by theowners themselves, not affiliated with this document.
Chapter 1: What YouNeed
Of course, you first have to prepare thematerials that youll be using. Basically, you will need:
Materials Needed:
Two 8 lengths of 2 x 8 Pressure TreatedLumber ($19.00)
Two 8 x galvanized lag screws withwashers ($15online/ $9.00 for lag screws + $5.00 for washers (25piece box) at Home Depot)
Three 10 x galvanized lag screws withwashers ($15online/ $9.00 for lag screws + $5.00 for washers (25piece box) at Home Depot)
Three 10 x 2 x 4 Pressure Treated Lumber($12.00)
Six 8 lengths 2 x 6 Pressure Treated Lumber($29.22)
Six 12 lengths 1 x 6 Pressure TreatedDecking Material ($97.32)
Nails ($49.78/ 4000 piece box)
Deck screws ($29.98/5lb pack)
Pulley (for inch rope) ($11.98/each)
8 galvanized rafter ties ($6.08)
8 galvanized joist hangers ($6.88)
Tarp ($5 to $13.00 and up)
Estimated Cost: $305.94!
You see, it actually would not cost youmuch, and the best part is that you can buy most of the materialsfrom Home Depot. Others are available online, and you can get thetarp from Amazonor use whatever you have at home!
Tools Needed
Aside from the aforementioned materials,there are also a couple of tools you need to construct your treehouse. These tools are:
Hammer ($6.97)
Level ($99.00)
Saw ($10.98)
Tape Measure ($9.97)
Square ($7.94)
Adjustable Wrench ($42.72)
Jigsaw ($39.97)
Cordless Drill ($99.00)
You could also keep the following inhandy:
Miter Saw ($179.00)
Router ($179.00)
Table Saw ($129.00)
Estimated Cost: $803.35
Again, you can get almost everything fromHome Depot; better if you already have them at home.
Estimated Total Cost: $1109.29
That estimated total cost is for the wholeproject already, but of course, the price could be even lower ifyou already have some of the tools and materials!
Chapter 2: Choose YourTree(s)
First, you have to decide how many treesyoure going to build your tree house on.
Here are some tips that could help youchoose the right treeor treesto use:
Choose a tree with 12 diameter trunk for astandard 8 x 8 tree house. If you have no idea how to calculatetree diameter, you can do so by wrapping a measuring tape aroundthe trunk until the space where you want to establish the treehouse, then divide the number you see on the measuring tape by 3.14(pi) and youll get the diameter.
Using more than 1 tree might mean that youcould build a bigger tree house, and that you would need lessbracing.
Good tree choicesinclude apple, ash, oak,beech , and fir. Its always best to go inbetweennever choose a tree thats too young or too old, andconsider its height, too.
Damaged trees are ofcourse, a no-no. Check whether infestation is already evident inthe roots or on the trunk. You wouldnt want your tree house to beunstable, and you have to make sure that its able to withstandwind damage and the like. Sycamore and Elm are no-nos because they are quite susceptible todiseases. Also avoid trees that are situated on slopes, haveshallow roots, and short lifespan, as well.
Branch angle and thickness are important,too. When it comes to support system for your tree house, you haveto take the angle of thickness of branches into consideration.Trees that grow in 90-degree angles are considered to be thestrongest.
Try seeking the help ofarborists to see which trees would be suitable for your tree house.They could also help care for the tree, as theyreconsidered treesurgeons !
Chapter 3: TheDesign
Next, of course, you have to work on thedesign of your tree house.
You can choose to make your own design, butif you feel like you are not skilled enough, you could ask treehouse design makers to do so for you. Usually, this costs around$150 per consultation.
Anyway, since youll be using the tree housefor your own desires, you could definitely just draw the design (itdoesnt have to be perfect!), and then just ask your friends andcolleagues for help just to smooth things out, and so you wouldnthave problems with construction.
Heres what else you have to keep inmind:
Try to make a scale model of your treehouse. You can do so using pieces of cardboard. This way, it wouldbe easy for you to see potential problems, and work on designingsomething better before you actually put the tree house up.
Always think about tree growth. You alwayshave to remember to give the tree enough space to growbecause itreally will keep growing and you wouldnt want the structure ofyour house to be disrupted. Try to research on the growth rate ofthe tree you chose to use.
Next page


