Sewing for Baby: 11 Small Sewing Projects for Your Little One
Copyright 2014 by Prime Publishing LLC
All rights reserved. No part of this book may be reproduced or transmitted in any form or by any means, electronic or mechanical, including photocopying, recording, or by any information storage or retrieval system, without written permission from the publisher, except in the case of brief quotations embodied in critical articles and reviews.
Trademarks are property of their respective holders. When used, trademarks are for the benefit of the trademark owner only.
Published by Prime Publishing LLC, 3400 Dundee Road, Northbrook, IL 60062 www.primecp.com

Free Sewing Projects
Letter from the Editor
Hi Sewists,
Having a baby is a wonderful experience that all parents cherish. However, those little ones can be quite expensive. From diapers to cribs, having a baby means you have to stock up on a lot of merchandise.
With this free eBook, you will discover amazing sewing projects for your baby. Whether you are having a boy or a girl (or twins!), these baby sewing projects are sure to save you some money by allowing you to make some inexpensive clothing for your growing baby. Also included are some great projects for accessories for your baby: things like a hilarious bib, a mobile, and even shoes. Whatever your baby needs, you are sure find a pattern in this eBook for them. Let your little one be the most stylish on the block with these cute sewing projects.
You can find additional beginner sewing projects and more at www.AllFreeSewing.com .
Our eBooks, like all our sewing projects, are absolutely FREE to members of our sewing community. Please feel free to share with family and friends and ask them to sign up at our website for our
free e-mail newsletter .
Happy Sewing,
The Editors of AllFreeSewing
www.AllFreeSewing.com
DIY Baby Clothes
Pretty Baby DIY Peasant Top
By Rachel from Once Upon a Sewing Machine
Let your little lady have some boho flair with this precious Pretty Baby DIY Peasant Top. Easily crafted from two different fabrics, the possibilities are endless with this free kids' clothes pattern. It can be created in solid colors or prints. If you are looking for a cute baby dress instead, all you have to do is make the shirt a little longer. Any little girl would look cute in this quick and easy pattern.

Materials:
Fabric for suggested pattern and measurements please see here .
Typical sewing supplies
Instructions :
First cut your pieces. Follow the pattern instructions to have two main body pieces, and two sleeves (cut at the short sleeve mark).

Attach both of your sleeves right sides together to your front.
Repeat with the back. Turn 1/4 then another 1/4 and hem.
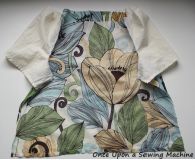
Sew your side seams. Go from the bottom hem all the way up to the bottom of the sleeve in one continuous stitching line. Hem the bottom of your shirt by turning under 1/4 and then 1/2 again.
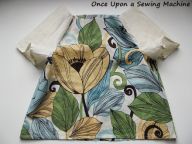
Create your casing. Start by turning your fabric over 1/4, then another 3/4 to create your casing. Stitch the bottom edge all the way around. Leave a spot open to feed in your elastic.
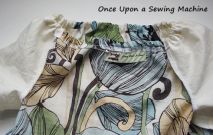
Insert your elastic and feed it all the way through. Try on and adjust to your desired length. Sew your elastic together. Sew closed your casing. Update: 17-18 of elastic will work well for the sizes 12 months to 4T /. If you prefer 1/2 and 3/8 will also work.
Tiny Tummy Tunic
By Rachel from Once Upon a Sewing Machine
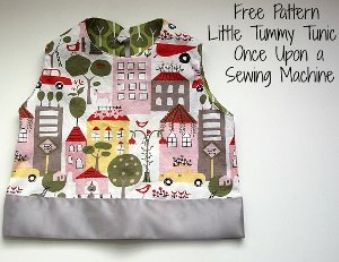
The secret to dressing a toddler or baby is dressing them in layers. This keeps them toasty and warm as well as makes your life much easier. As soon as something spills, you can just remove and replace the top layer instead of everything else. This Tiny Tummy Tunic was designed exactly for this purpose. Looking precious over long or short sleeved onesies, this kids' sewing pattern can be created with just about any fabric for any season.
Materials :
1/2- 3/4 yard of fabric (this tutorial uses a woven, but if you want to use a knit you should size down)
1 button
3 of 1/8 elastic or elastic thread
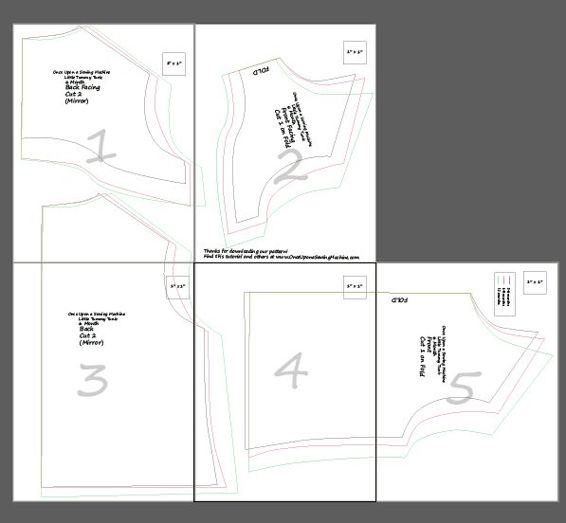
3-6 month, 6-9 month, 12 month free pattern (see below)
Use a 3/8 allowance through out.
Instructions :
Sew both your shoulders (RST).
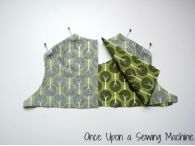
Repeat with your facings. Finish the bottom of your facing pieces. You can serge them, use pinking shears or put a tiny hem in.
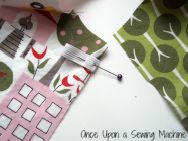
Baste your elastic loop to the back of your garment. Drop it down about an inch from the top, adjust your loop size based on the size of your button.
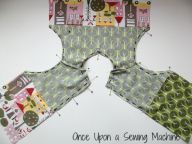
Lay your facings RST with your garment. You are going to sew the around the armholes and up the back around the neck and back down.
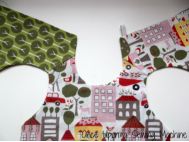
Clip your corners and your curves and turn! Then press, press, press.
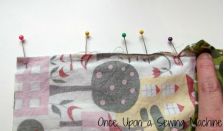
Match your back seam right sides together. Sew from the bottom all the way up to meet your previous sewing line. You may have to lift your facings to make sure you dont catch them.
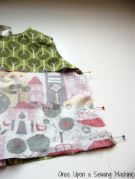
Pin your side seams. Make sure to match your facings right sides together also underneath the arm. You will sew the entire side seam continuously and then fold your facing back down. Repeat for the other side seam.
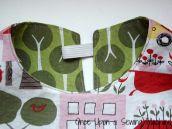
Top stitch the neck line and armholes. Sew on a button.
And finish your hem using your desired method. Suggested: 1/4, press, roll another 1/4, hem.
When you layout your pattern, it should look like this:
