Table of Contents
Guide
Pages

If you are an Annies customer and have a question about the instructions on a pattern you have purchased, please visit:
http://www.anniescatalog.com/pages/customer_care/pattern_services.html
Table of Contents
Pattern & Color Chart Instructions
The pattern is provided in two formats: detailed written instructions and a color chart with matching color key. Use the format you prefer.
The written instructions specify the yarn color and stitch count. Read all instructions to assist with comprehension of the written format. Detailed written instructions and a symbol diagram are included for the border of the blanket.
If following the color chart, a foundation row of 122 single crochet must be completed before chart instructions begin.
The chart is worked with 60 stitches per row and a total of 125 rows (not counting the foundation row)
Each square on the chart instructions represents one mini V-stitch (see figure below; red mini V-stitch represents 1 square).

Each row will begin with a chain-2 and end with a half double crochet in top of the beginning chain of the prior row, these stitches are not shown on the color chart.
When working from the color chart, row 1 will begin with a chain-2, skip one stitch, [mini V-stitch in next stitch, skip next stitch], repeat between [ ] across the row, ending with a half double crochet in the last stitch and turn (refer to above chart).
For all remaining rows, begin with a chain-2, work each mini V-stitch between the half double crochets of the mini V-stitch of the prior row (do not work in the top of the stitch). At the end of each row work a half double crochet in the top of the beginning chain of the previous row.
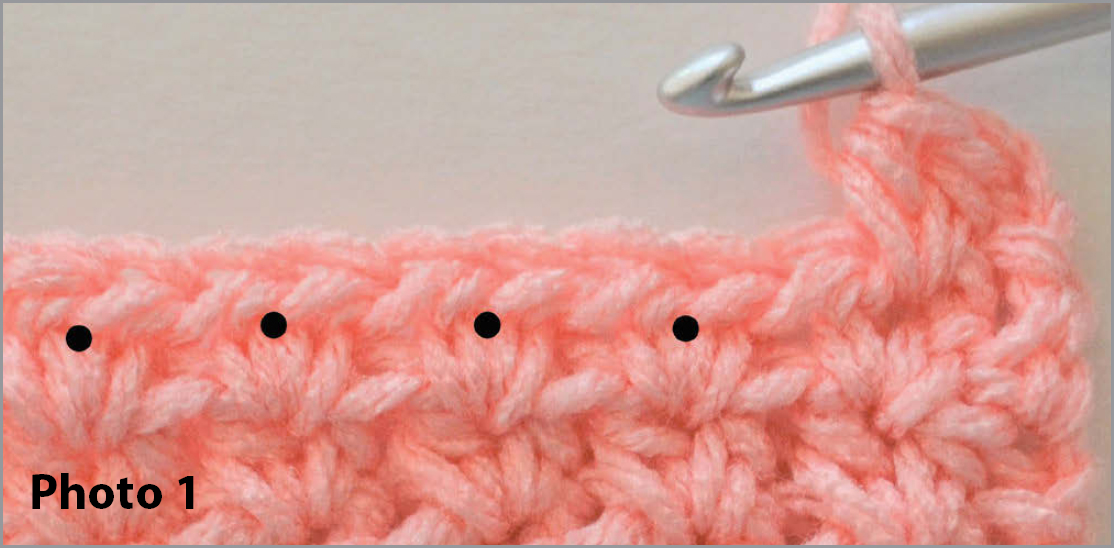
The placement of the mini V-stitch is in the space between half double crochets of the prior rows mini V-stitches, not in top of the half double crochets. (See Photo 1)
Color Change Instructions
When pattern (written or color chart) indicates to change yarn color, change yarn in last step of prior stitch.
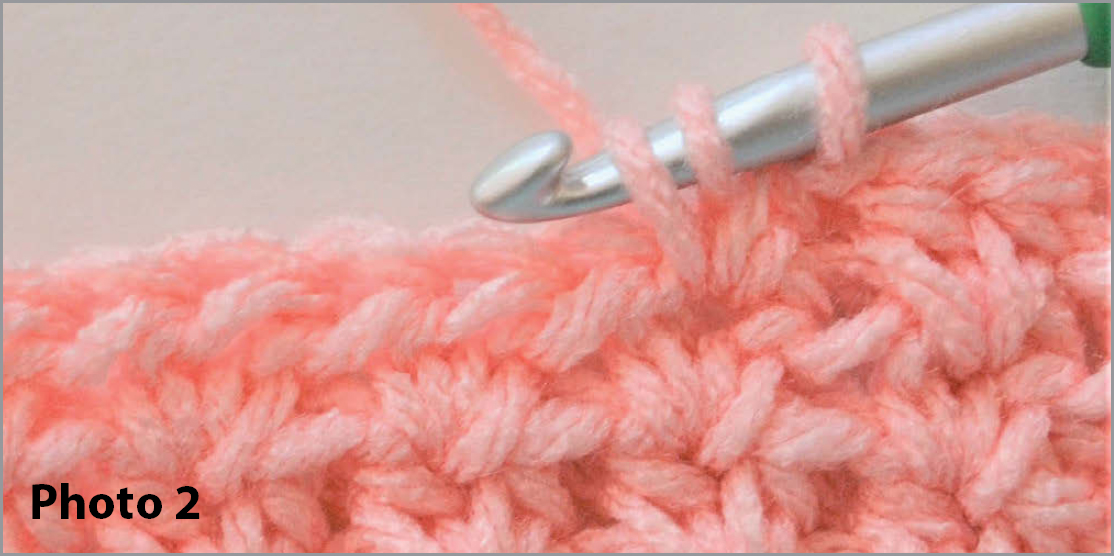
When working mini V-stitch, work the first half double crochet in main color (MC). (See Photo 2)
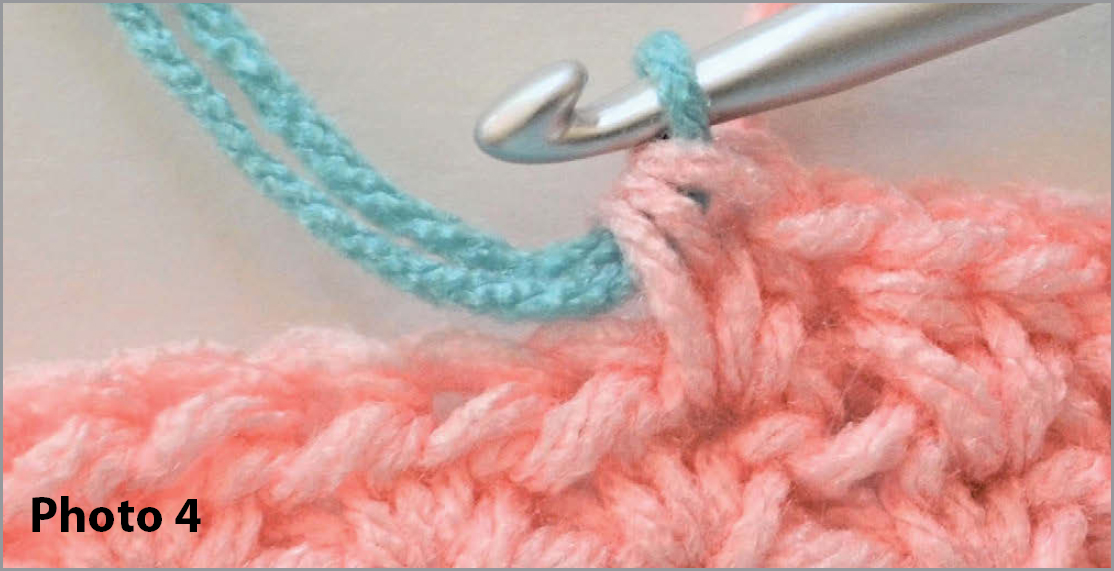
For second half double crochet, yarn over, insert hook, pull up a loop, drop MC, yarn over with contrasting color (CC) (See Photo 3),

pull through all 3 loops on hook. (See Photo 4)
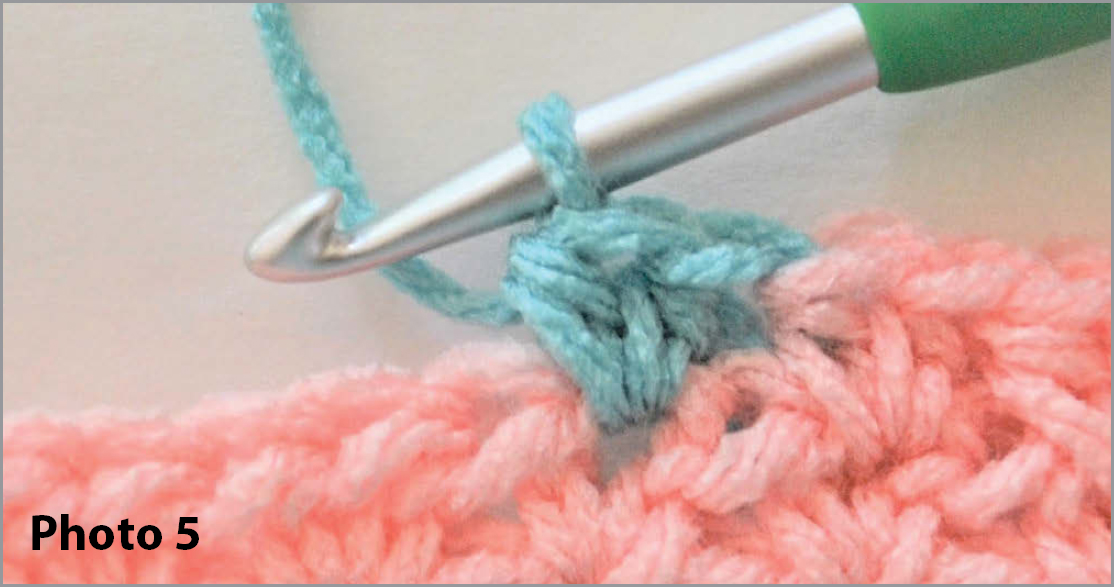
Complete the next mini V-stitch in the CC. (See Photo 5)
How to Hide Yarn When Carrying Color Up to Next Row
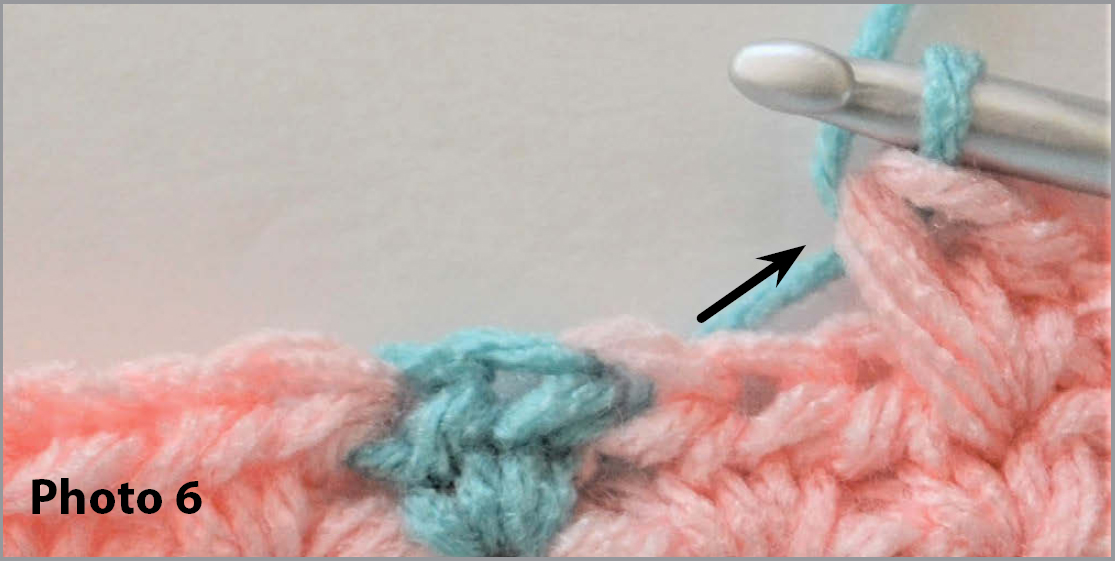
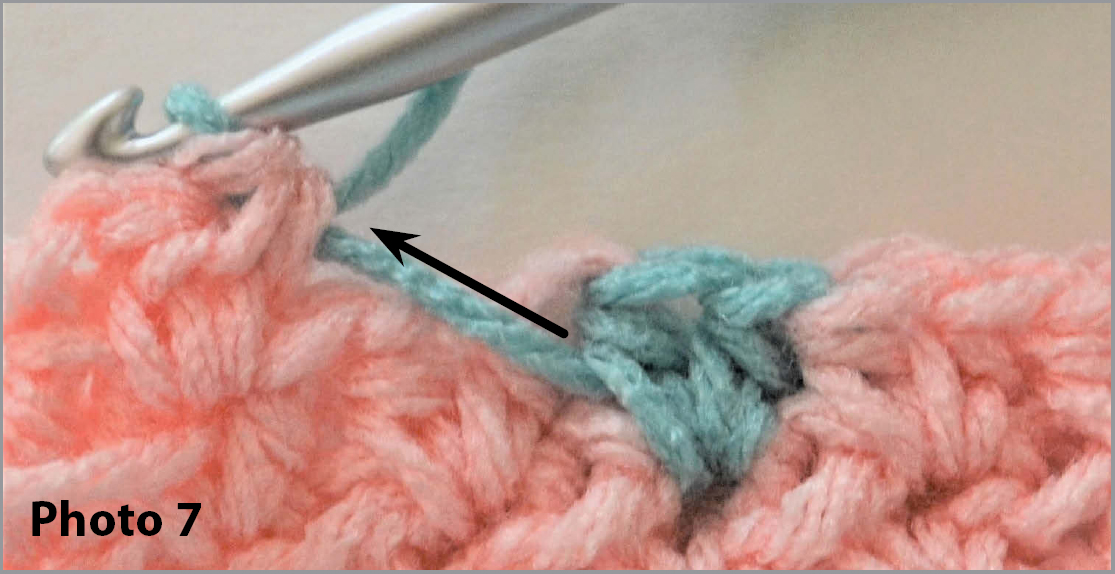
When CC is being used in the corresponding stitches of the next row in the pattern, use the dropped yarn from prior row to continue with the CC. If the stitches do not line up exactly (color changes in squares on chart are not directly on top of one another), you will be able to see the yarn being carried up. You will want to bury this yarn in the next mini V-stitches. (See Photo 6 and 7)
Front of work (showing yarn to hide)
Back of work (showing yarn to hide)
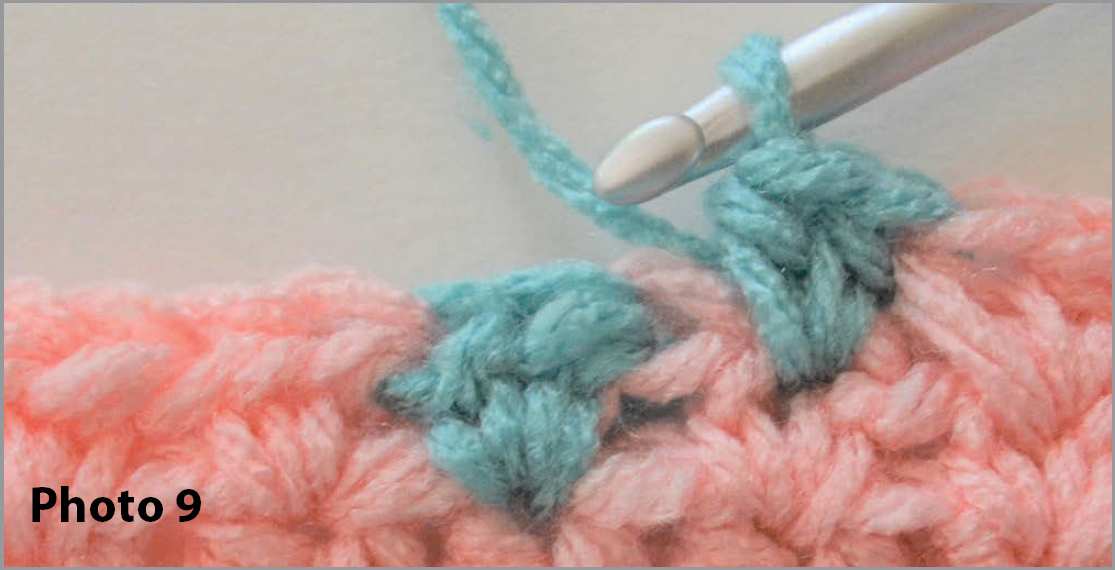
After changing yarn color in last step of prior mini V-stitch (shown in photos above), hide the piece of yarn by crocheting over it with the next mini V-stitch. (See Photo 8, 9 and 10)

Front of work (hiding yarn in next mini V-stitch)
Front of work (mini V-stitch completed)
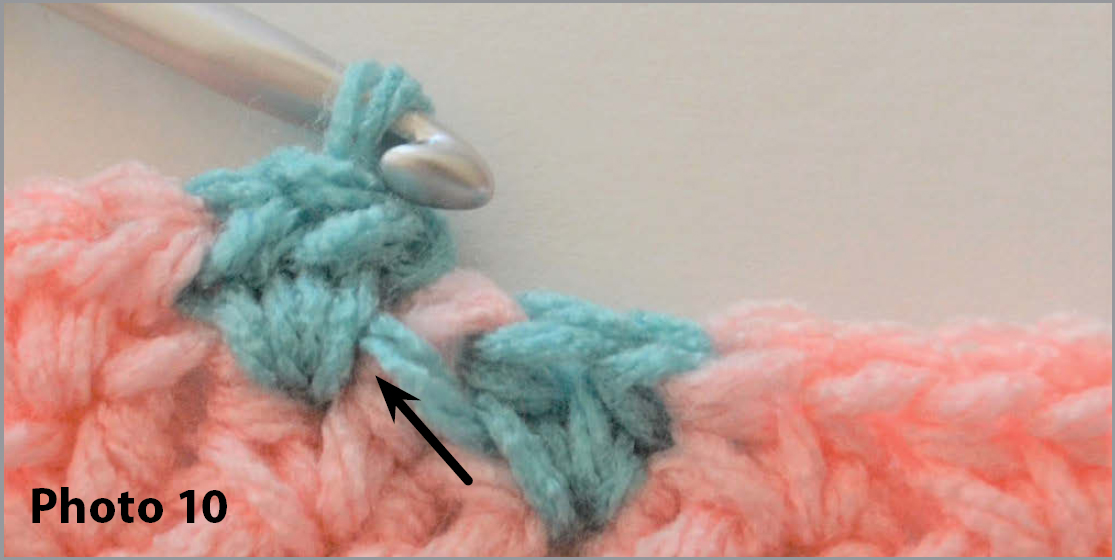
Back of work (still showing some yarn)
To hide the small section of yarn still showing after first mini V-stitch has been completed, begin next mini V-stitch by yarning over and inserting hook in completed stitch. At this point, rotate your hook in the direction of the yarn you want to hide. Grab this piece of yarn (see where hook placement is in photo 11),
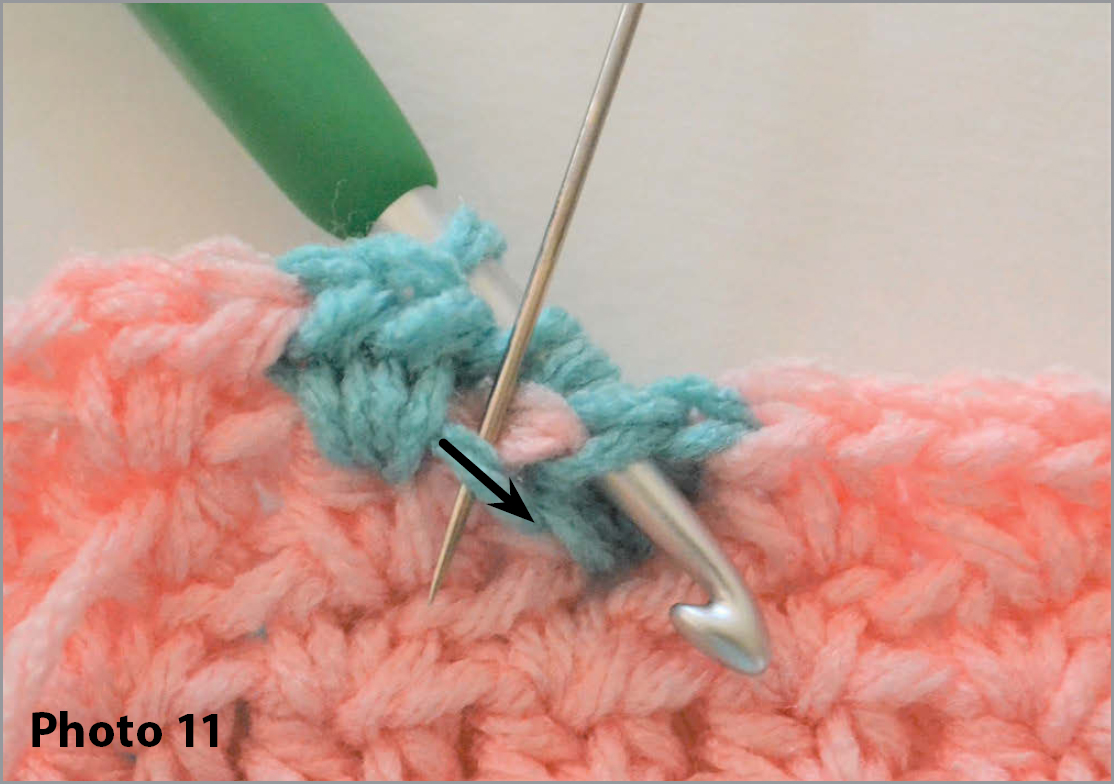
Back of work (yarn to hide)
then complete the half double crochet and next half double crochet to complete the mini V-stitch. (See Photo 12 and 13)
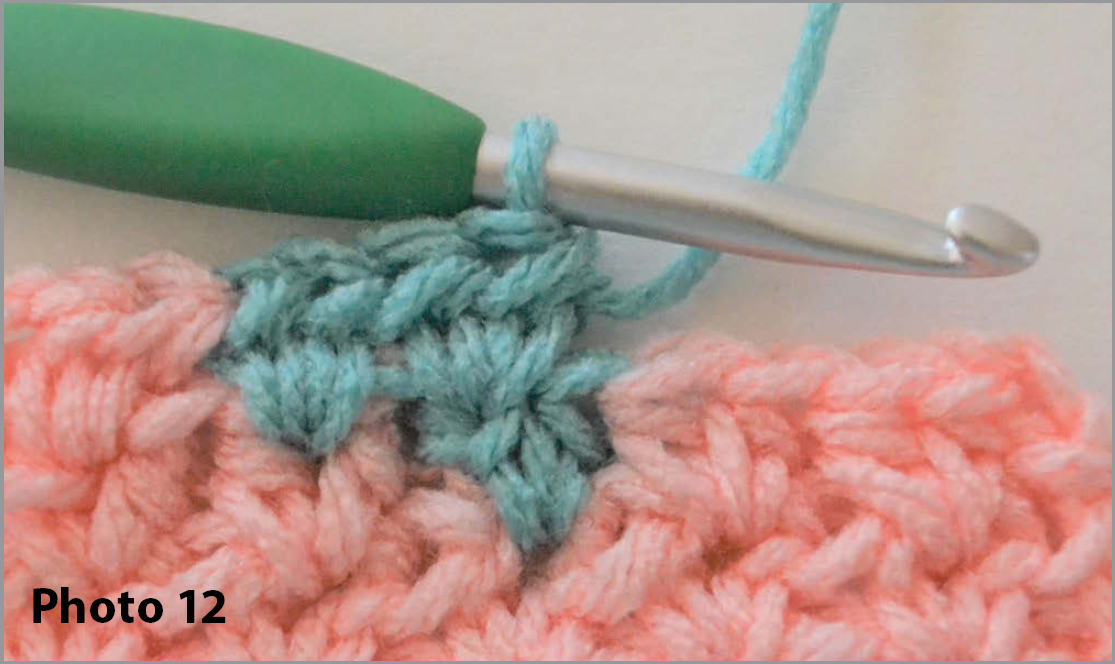
Back of work (complete mini V-stitch)
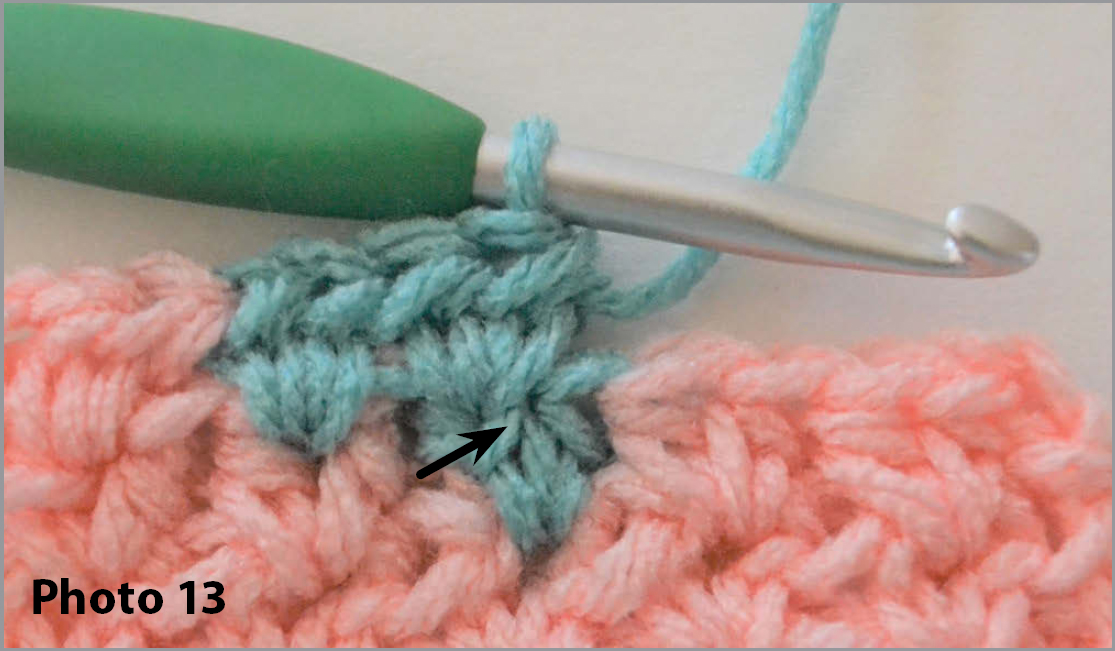
Back of work (where yarn is hidden)
The yarn being carried up is now hidden, giving your crochet piece a clean appearance.
Twisting Border
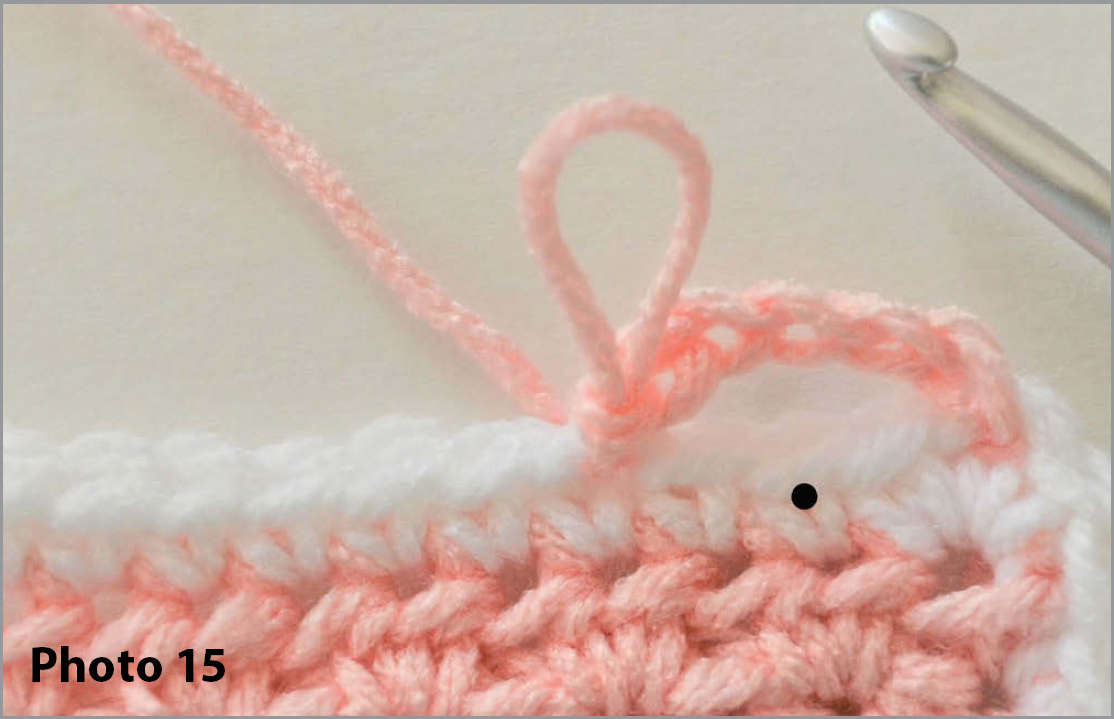
Note: Black dot in each photo indicates next st placement.
Rnd 1: Join MC with sl st in top of first sc of row 1, ch 4, sk next 3 sts, sl st in next st (See Photo 14),

extend lp on hook and remove hook from yarn (See Photo 15),
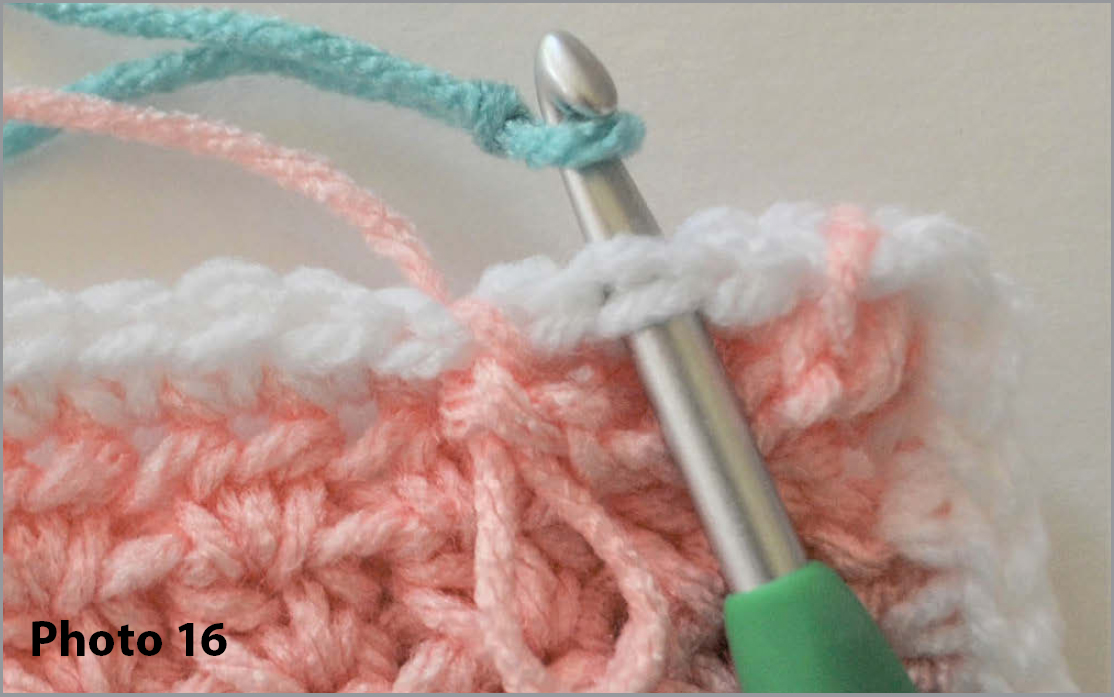
push ch lp just made to front of blanket, *working behind ch lp made, join CC with sl st in 2nd sk st between ch lp (See Photo 16),
