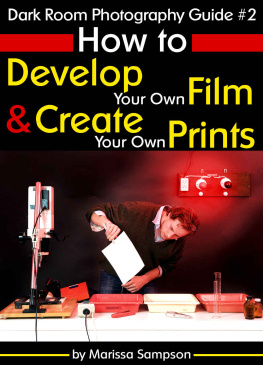
Sampson - Dark Room Photography Guide #2: How to Develop Your Own Film and Create Your Own Prints in a Dark Room
Here you can read online Sampson - Dark Room Photography Guide #2: How to Develop Your Own Film and Create Your Own Prints in a Dark Room full text of the book (entire story) in english for free. Download pdf and epub, get meaning, cover and reviews about this ebook. year: 2015, genre: Home and family. Description of the work, (preface) as well as reviews are available. Best literature library LitArk.com created for fans of good reading and offers a wide selection of genres:
Romance novel
Science fiction
Adventure
Detective
Science
History
Home and family
Prose
Art
Politics
Computer
Non-fiction
Religion
Business
Children
Humor
Choose a favorite category and find really read worthwhile books. Enjoy immersion in the world of imagination, feel the emotions of the characters or learn something new for yourself, make an fascinating discovery.
- Book:Dark Room Photography Guide #2: How to Develop Your Own Film and Create Your Own Prints in a Dark Room
- Author:
- Genre:
- Year:2015
- Rating:4 / 5
- Favourites:Add to favourites
- Your mark:
- 80
- 1
- 2
- 3
- 4
- 5
Dark Room Photography Guide #2: How to Develop Your Own Film and Create Your Own Prints in a Dark Room: summary, description and annotation
We offer to read an annotation, description, summary or preface (depends on what the author of the book "Dark Room Photography Guide #2: How to Develop Your Own Film and Create Your Own Prints in a Dark Room" wrote himself). If you haven't found the necessary information about the book — write in the comments, we will try to find it.
Sampson: author's other books
Who wrote Dark Room Photography Guide #2: How to Develop Your Own Film and Create Your Own Prints in a Dark Room? Find out the surname, the name of the author of the book and a list of all author's works by series.
Dark Room Photography Guide #2: How to Develop Your Own Film and Create Your Own Prints in a Dark Room — read online for free the complete book (whole text) full work
Below is the text of the book, divided by pages. System saving the place of the last page read, allows you to conveniently read the book "Dark Room Photography Guide #2: How to Develop Your Own Film and Create Your Own Prints in a Dark Room" online for free, without having to search again every time where you left off. Put a bookmark, and you can go to the page where you finished reading at any time.
Font size:
Interval:
Bookmark:
Dark Room Photography Guide #2
How to Develop Your Own Film and Create Your Own Prints in a Dark Room
Wait! Before You Continue
Were Giving Away Something BIG..
And It only Takes 30 Seconds of Your Time..
.. CLICK HERE TO FIND OUT MORE ..

www.bluebirdbookclub.com
Available for Limited Time Only. Dont Miss Out!
.. CLICK HERE FOR MORE INFO ..
Table of Contents
Introduction
If youve spent a little bit of time in a darkroom, youll know that there are lots of steps to go through before you get to your finished print. But before you can even begin to think about printing, you need to shoot your film.
A (Very) Quick Refresher in Shooting Film
Just some quick tips for a refresher: dont rely on your phone camera or on a digital camera to give you the correct metering for your image. Use a film camera that has a built in light meter. If this isnt possible, and you need to use your phone, download the app Pinhole Assist, which, though it costs about two dollars, is the most accurate overall and is very handy for on-the-go metering.
Another option is to look up the manufacturers exposure suggestions, based on the brand and ISO/ASA (speed) of your film. Take these numbers with a grain of salt; the ISOs of film are legally allowed to vary. An example would be an ISO 160 film which may, in reality, only be about ISO 80. For the best exposures, try stopping down two stops from the meter reading. Remember that this means you will actually be letting less light into the camera. So, for example, if your camera tells you to make a photo at f/ 8 and 125 th of a second, keep the shutter speed the same and shoot at f/ 16. Use only whole stops when employing this technique.
Unsure about getting a proper exposure? A technique called bracketing can help. Keep either your aperture or shutter speed constant, and move one stop up and one stop down from the original exposure to ensure that youll get a usable frame.
Finally, when selecting your film, choose a speed that is in the middle. This will be the simplest to work with, particularly if you are a beginner, because your film will neither be too sensitive to light, nor not sensitive enough.
Please remember that the instructions in this book apply only to black and white film, and that C-41 (color) film development is an entirely different process. Please note also that I am mainly referring to 35 mm film here, although medium format film works in much the same way.
Copyright 2015 by Miafn LLC - All rights reserved.
This document is geared towards providing reliable information in regards to the topic and issue covered. The publication is sold with the idea that the publisher is not required to render accounting, officially permitted, or otherwise, qualified services. If advice is necessary, legal or professional, a practiced individual in the profession should be ordered.
- From a Declaration of Principles which was accepted and approved equally by a Committee of the American Bar Association and a Committee of Publishers and Associations.
In no way is it legal to reproduce, duplicate, or transmit any part of this document in either electronic means or in printed format. Recording of this publication is strictly prohibited and any storage of this document is not allowed unless with written permission from the publisher. All rights reserved.
The information provided herein is stated to be truthful and consistent, in that any liability, in terms of inattention or otherwise, by any usage or abuse of any policies, processes, or directions contained within is solely and completely the responsibility of the recipient reader. Under no circumstances will any legal responsibility or blame be held against the publisher for any reparation, damages, or monetary loss due to the information herein, either directly or indirectly.
Respective authors own all copyrights not held by the publisher.
The information herein is offered for informational purposes solely, and is universal as so. The presentation of the information is without contract or any type of guarantee assurance.
The trademarks that are used are without any consent, and the publication of the trademark is without permission or backing by the trademark owner. All trademarks and brands within this book are for clarifying purposes only and are the owned by the owners themselves, not affiliated with this document.
Chapter 1: Getting Your Film Ready for Processing
Rewinding
Rewinding film may seem like a bit of a no-brainer, but in my experience, Ive run into a few jams. Once youve shot your first roll, youll need to know whether your camera has an automatic or manual rewind mechanism.
If the camera has an automatic rewind, then the film should begin to rewind after youve exposed your last frame. This may either be at 24 or 36 frames, depending on your film. If the roll is technically finished and doesnt rewind, dont worry. In some instances, 37 or even 38 exposures are possible. If you dont want the extra frames for storage reasons, your camera should have a small, possibly recessed button somewhere that you can press with a pencil tip to rewind. Check the cameras manual to locate it. You should be able to hear the rewind happening with an automatic feature, and once it stops, you can safely open the back of your camera.
Its important to note, however, that these mechanisms can be faulty, especially on older cameras. If this is a concern, my suggestion is to watch the numbers on your display go down as the camera rewinds, to ensure that it goes all the way back to zero. If the mechanism jams before it gets to zero, do not open the back of your camera outside of a light tight space.
In the case of manual rewinds, you seldom, if ever, need to worry about the mechanism jamming unless your camera is in bad shape. Once you reach your last frame, follow the manufacturers instructions to rewind. Generally, there will be a hand crank on top of the camera that youll turn, but you may also need to release the film via a button or lever beforehand. If you need to do this and you arent already familiar with the cameras design, be very careful not to release the back of the camera. As the crank is turned, there will be a series of small clicks as the sprocket holes move, and you will be able to feel the tension of the film as it turns. Once the tension releases, turn the crank one or two more times and open the back. If there is a bit of a tail sticking out, dont worry. This part will be trimmed off later anyway.
Preparing Film for Processing
After youre finished with all your rolls, its time to load them. As you know, you will need a film loading area. If youre using a local public darkroom, theyll have it. If youre using a darkroom that you created, and you dont have a space just for film loading, your best bet is to use your bathroom. Just be sure to make it completely light tight (meaning, no safe lights can be on, outside lights that may penetrate need to be off, and doors need to be shut).
Before you begin loading, youll need a few things. You should have a loading tank, the appropriate number of reels for the tank (typically 2, 3, or 5), a pair of good scissors, a can opener, and of course, your film. There are a number of types of tanks and reels that you can use, but Im going to introduce you to the simplest first. I use Paterson Universal Film Tanks with two reels. If you want to expedite the process, you can use a three or five-reeler, but bear in mind that once youve added your chemicals, the tanks can become rather heavy during the process.
Next pageFont size:
Interval:
Bookmark:
Similar books «Dark Room Photography Guide #2: How to Develop Your Own Film and Create Your Own Prints in a Dark Room»
Look at similar books to Dark Room Photography Guide #2: How to Develop Your Own Film and Create Your Own Prints in a Dark Room. We have selected literature similar in name and meaning in the hope of providing readers with more options to find new, interesting, not yet read works.
Discussion, reviews of the book Dark Room Photography Guide #2: How to Develop Your Own Film and Create Your Own Prints in a Dark Room and just readers' own opinions. Leave your comments, write what you think about the work, its meaning or the main characters. Specify what exactly you liked and what you didn't like, and why you think so.

