What's on the CD-ROM
The companion CD-ROM contains select graphics files to follow along in the book, Adobe Photoshop Elements 3 Trial Edition, and Picasa 2.
Windows Installation Instructions
| Insert the CD-ROM disc into your CD-ROM drive.
|
| From the Windows desktop, double-click on the My Computer icon.
|
| Double-click on the icon representing your CD-ROM drive.
|
| Double-click start.exe and follow the on-screen instructions.
|
NOTE
If your version of Windows is set to hide known extensions, you may only see start instead of start.exe .
If you have the AutoPlay feature enabled, start.exe will be launched automatically whenever you insert the disc into your CD-ROM drive.
License Agreement
By opening this package, you are also agreeing to be bound by the following agreement:
You may not copy or redistribute the entire CD-ROM as a whole. Copying and redistribution of individual software programs on the CD-ROM is governed by terms set by individual copyright holders.
The installer and code from the author(s) are copyrighted by the publisher and the author(s). Individual programs and other items on the CD-ROM are copyrighted or are under an Open Source license by their various authors or other copyright holders.
This software is sold as-is without warranty of any kind, either expressed or implied, including but not limited to the implied warranties of merchantability and fitness for a particular purpose. Neither the publisher nor its dealers or distributors assumes any liability for any alleged or actual damages arising from the use of this program. (Some states do not allow for the exclusion of implied warranties, so the exclusion may not apply to you.)
Chapter 1. Capture Your Life Visually
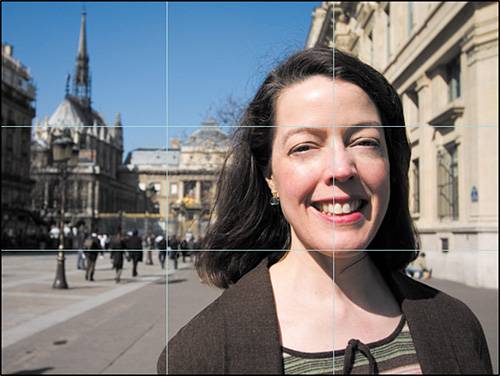
There are two keys to capturing great photos with a digital camera: using the correct settings and composition (that is, framing the subject in the viewfinder or LCD display before clicking the shutter). In this project, I'll show you how to use the various settings on typical digital cameras, share some tricks for handling difficult situations, and offer some tips on creative composition. Then it's time for a mini "photo safari," as you practice shooting while capturing images to use throughout the rest of this book. You'll also see how to avoid some of the most common photo problems, such as red eye (that undesirable red reflection in someone's eyes), underexposed subjects, and shadows behind group photos.
Getting to Know Your Camera
Using the correct camera settings for the situation ensures that you'll get a proper exposure that is, that the photo will realistically represent the scene as you saw it. The highlights in the image will be white, the shadows will be black, and the colors will look natural. This is often as simple as selecting Auto or Automatic and letting the camera use its own best judgment. But understanding and using the various options on your camera enables you to perfect the exposure in certain circumstances, such as difficult lighting and extreme close-ups.
Taking a Digital Picture: The Basics
You'll want to know how to turn the camera on and off, how to aim (through a viewfinder or by using an LCD display), how to zoom in and out (if your camera offers that option), and how to focus and shoot. Generally speaking, the basic procedure is this:
| Prepare the camera and turn it on Before using the camera for the first time, you need to fully charge the battery and insert the camera's recordable media. Figure 1.1. Different cameras have on/off buttons in different locationsand some you turn on by sliding a cover to expose the lens. 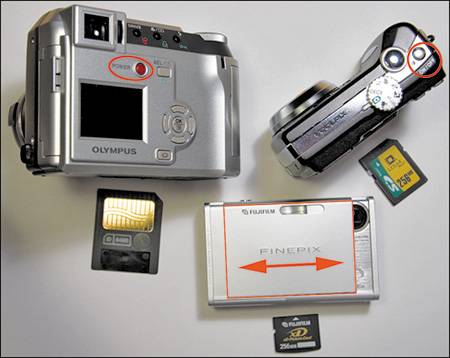
NOTE Throughout this book I use the term card to refer to a digital camera's removable storage media. Consider the generic term to include CompactFlash cards, SmartMedia memory cards, Secure Digital (SD) cards, xD-Picture cards, memory sticks, mini-drives, and all other removable storage for digital cameras. |
| Aim the camera and (optionally) zoom With some cameras, you hold the camera to your face and look through a viewfinder to see what will be included in the image. Other cameras have an LCD screen that you look at to aim the camera. Some have both. TIP If your camera has both a viewfinder and an LCD screen, learn to use both. The LCD screen is generally better in low-light situations and often shows the composition more accurately, but you'll need the viewfinder in bright environments. Remember, too, that you can turn off the LCD display to save your battery strength. |
| Press the shutter release button halfway down to focus It can take some practice to find the halfway point where the camera engages its auto focus but doesn't yet take the picture. Fortunately, it costs just about nothing to accidentally take a shot (or several) while learning how far is "halfway down."
|
| Take the shot When the camera is focused and you're happy with what you see in the viewfinder or on the LCD display, press the button the rest of the way down to capture the shot. Press gently so that you don't move the camera while taking the picture.
|
| Review the shot Press the button or select the menu item that looks like the Play button on a DVD player or VCRa triangle pointing to the right, usually within a box. That's the Playback button, and it displays the last shot on the camera's LCD screen. Your camera probably also offers the possibility of scrolling back and forth to view all the images on the camera's mediaand deleting shots you don't like to make more space on the card.
|
| (Later) Print or download the image covers the topics of downloading your images to your computer and printing.
|
NOTE
Throughout this book, you'll see pictures of cameras without wrist straps attached. That's strictly for aesthetic purposes. When you see something like the image on the left, imagine that you're actually seeing something like the image on the right.
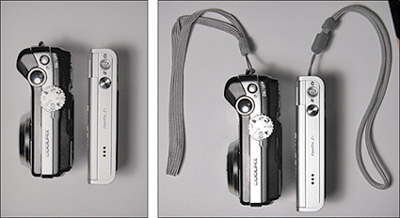
I strongly urge you to always use your camera's wrist strap or neck strap. Think of it as a seatbelt for your digital treasure-maker.
Exploring the Shooting Mode Options
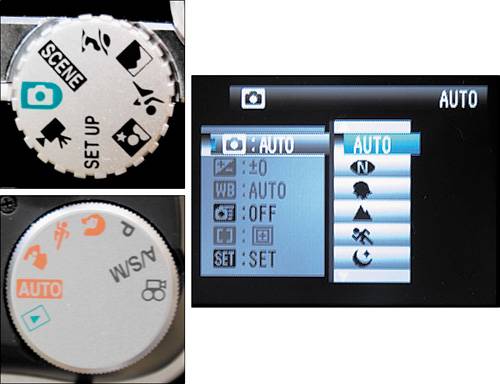
Your camera likely has a number of preset modes that help the camera capture photos properly under specific circumstances. Take a look at the rather similar icons shown in .
Figure 1.2. You may see variations, but the symbols for digital camera modes are pretty much standardized.
TIP
The best place to start learning about your camera's features is, of course, its user guide. But if you haven't read it yet, read this project first to give yourself some background information. If you have already read the user guide, and it didn't make much sense to you, read it again after finishing this project.

