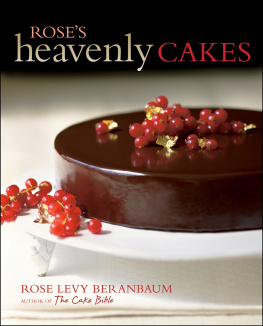
Beranbaum - Roses Heavenly Cakes
Here you can read online Beranbaum - Roses Heavenly Cakes full text of the book (entire story) in english for free. Download pdf and epub, get meaning, cover and reviews about this ebook. City: New York, year: 2010, publisher: Houghton Mifflin Harcourt;John Wiley & Sons, Inc, genre: Home and family. Description of the work, (preface) as well as reviews are available. Best literature library LitArk.com created for fans of good reading and offers a wide selection of genres:
Romance novel
Science fiction
Adventure
Detective
Science
History
Home and family
Prose
Art
Politics
Computer
Non-fiction
Religion
Business
Children
Humor
Choose a favorite category and find really read worthwhile books. Enjoy immersion in the world of imagination, feel the emotions of the characters or learn something new for yourself, make an fascinating discovery.

- Book:Roses Heavenly Cakes
- Author:
- Publisher:Houghton Mifflin Harcourt;John Wiley & Sons, Inc
- Genre:
- Year:2010
- City:New York
- Rating:4 / 5
- Favourites:Add to favourites
- Your mark:
Roses Heavenly Cakes: summary, description and annotation
We offer to read an annotation, description, summary or preface (depends on what the author of the book "Roses Heavenly Cakes" wrote himself). If you haven't found the necessary information about the book — write in the comments, we will try to find it.
Beranbaum: author's other books
Who wrote Roses Heavenly Cakes? Find out the surname, the name of the author of the book and a list of all author's works by series.


Roses Heavenly Cakes — read online for free the complete book (whole text) full work
Below is the text of the book, divided by pages. System saving the place of the last page read, allows you to conveniently read the book "Roses Heavenly Cakes" online for free, without having to search again every time where you left off. Put a bookmark, and you can go to the page where you finished reading at any time.
Font size:
Interval:
Bookmark:
Special Effects and Techniques
Storing and Frosting a Cake
Storing a Cake
Cool cakes until they are no longer warm to the touch before storing them in order to prevent sogginess. However, a cake that has been brushed with syrup can be stored while still warm. If a cake is still warm when buttercream is applied, the buttercream will melt.
To refrigerate or freeze cake layers, wrap them airtight so that they don't lose moisture or absorb odors from the refrigerator or freezer. Wrap the cake first in plastic wrap, preferably one that is designed for freezing, and then place it in a heavy-duty plastic freezer storage bag, pressing out as much air as possible before sealing the bag. A drinking straw works well for sucking out the air.
If you want to freeze a cake that has been decorated and frosted with buttercream, place it in the freezer until the buttercream is frozen to a very firm consistency before wrapping it with the plastic wrap. This helps to avoid crushing any decorations.
Defrosting a Cake
Remove unfrosted cakes from the freezer and thaw them without unwrapping, either overnight in the refrigerator or at room temperature. You can refresh them after thawing by placing them on a baking sheet in a 350F/175C oven for 5 minutes.
A frosted cake needs to be unwrapped, set in a cake carrier or under a dome, and refrigerated overnight in order to minimize condensation caused by extremes of temperature change. Butter cakes, which are softer at room temperature, should then be allowed to come to room temperature for another hour or two before serving.
Leveling a Cake
If the cake is a single layer, I find it most attractive with a slightly domed top. But for a two-layer cake, I like the top of each layer to be level. To level the top of a domed cake, use a serrated blade, preferably one the length of the diameter of the cake. Place the cake in the pan in which it was baked. If the cake is lower than the top of the pan, raise it slightly by placing the cake on a cardboard round or rounds before placing it in the pan. Rest the long serrated blade on the rim of the pan and run it back and forth in a sawing motion to remove the domed top and level the cake.
Splitting Layers
My favorite way to split a cake layer, also called torting, requires a serrated blade at least the length of the diameter of the cake. Since most of my layer cakes are 1 inches high, I usually use a set of metal bars called retainer bars that are inch high and resemble mini railroad tracks. I place the cake between the two bars and, with the knife blade resting on the surface of the bars, I slice through the cake, creating two equal -inch-high layers. Retainer bars can be purchased at cake decorating supply stores. Alternatively, metal supply shops carry brass bars of varying heights. Wood strips can also be used, but because they are lighter, they need to be taped to the work surface.
Another method that works well is to place the cake on a turntable and with one hand, hold a long serrated knife blade against the side of the cake where you estimate the middle to be. With the other hand, turn the turntable, cutting a shallow groove all around the middle of the cake. This provides a track for the knife to ride in when you are cutting through the cake. Use a firm forward and side-to-side motion when cutting, checking occasionally to ensure that the knife has remained in the groove. It is easiest to hold one hand palm downward on top of the cake while slicing in order to stabilize the cake and also to keep your fingers safe.
To separate the layers, slide a metal or cardboard round between them.
Supporting a Cake
To support the cake while filling or frosting it with buttercream, place it on a rigid surface such as a serving plate or cardboard round. Slip a few wide strips of wax paper or parchment under the edges of the cake to keep the rim of the serving plate clean. After the buttercream has been applied, carefully slip out the strips.
If using cardboard rounds, choose one the same size as the pan in which the cake was baked. Since cakes shrink inch all around the sides, this offers you a guide for just applying the right amount of buttercream. Begin by placing a small dab of buttercream on the middle of the cardboard round; this keeps the cake layer in place on the round. When applying the buttercream to the sides of the cake, be sure to hold the spatula at a right angle to the cake without allowing it to tilt inward.
Filling a Cake
A long flat metal spatula and a turntable are invaluable for creating a smooth and even layer of filling. I prefer a -inch-thick filling between two cake layers. Begin by heaping the buttercream on top of the cake layer. Use the spatula to press down firmly with a short, sweeping back-and-forth motion. Avoid lifting up the spatula because it will pull the crust away from the cake. After you have covered the entire cake, take the spatula and place it halfway across the cake layer; angle the blade so that it is almost flat against the surface of the buttercream. Starting in the middle of the layer, press lightly and rotate the turntable one full turn. Smooth or remove any excess from the sides.
Before placing the second layer on top of the frosted layer, put the frosted cake layer in the freezer or refrigerator for about 20 minutes to firm up the buttercream. When firm, the filling will remain an even thickness and also will enable the top layer to slide if it needs a slight adjustment. To support the upper layer while setting it on top of the filling, I use the removable bottom disk of a nonstick tart pan, the loose bottom of a cake pan, or a transfer disk.
Crumb Coating a Cake
A crumb coating seals in any crumbs on the sides of the cake and prevents them from getting into the frosting and detracting from the appearance of the frosted cake. If the sides of the cake are well sealed, it is not necessary to apply a crumb coating. To crumb coat a cake, brush a thin layer of warmed apple or apricot jelly, or piping gel, over the cake. Allow the jelly or gel to dry until it feels slightly sticky before you frost the cake. Alternatively, use a very thin coat of very soft frosting.
Frosting a Cake
If the cake has been set on a cardboard round, you can support it in the palm of one hand and turn it as instructed below. Alternatively, set it on a heavy-duty turntable.
Using a long metal spatula, place a large gob of frosting on a side of the cake. Press the frosting from side to side with the spatula without lifting so that it doesn't lift away any crust. Continue all around the cake layer, allowing the frosting to rise about a quarter inch above the top. Frost the top of the cake in the same way. When the entire surface is covered, hold the spatula halfway across the cake with the blade almost flat against the frosting and, pressing lightly, rotate the turntable smoothly in one full circle.
Remove any excess frosting from the sides by holding a small metal spatula parallel to the sides and rotating again. For a very smooth effect, dip a spatula in hot water, shake or wipe off the water, and run it around the sides of the cake. Instead of having a smooth surface, you can also use a small metal spatula to make swirls in the top and sides of the frosting. A frosted cake can be kept for 1 day at cool room temperature (no higher than 70F/21C).
Decorative Piping
The only time I pipe decorations on a cake these days is when I use a whipped cream topping. Although I often just spoon it onto the cake and make decorative swirls with a spatula, occasionally it's fun to pipe large stars or shells, for example. Stars are the first thing most people, including myself, learn to pipe because they are so easy. Shells are a variation on the star, and I think they are the most graceful of all festoons. Piped pearls are elegant and provide a lovely unobtrusive finish. You can make one row or two staggered rows. It's also very attractive to pipe little pearls or beads as a border.
Font size:
Interval:
Bookmark:
Similar books «Roses Heavenly Cakes»
Look at similar books to Roses Heavenly Cakes. We have selected literature similar in name and meaning in the hope of providing readers with more options to find new, interesting, not yet read works.
Discussion, reviews of the book Roses Heavenly Cakes and just readers' own opinions. Leave your comments, write what you think about the work, its meaning or the main characters. Specify what exactly you liked and what you didn't like, and why you think so.