
LIGHTING PROJECTS
Current with 2011-2013 Electrical Codes

Contents

Lighting Projects
 Ceiling Lights
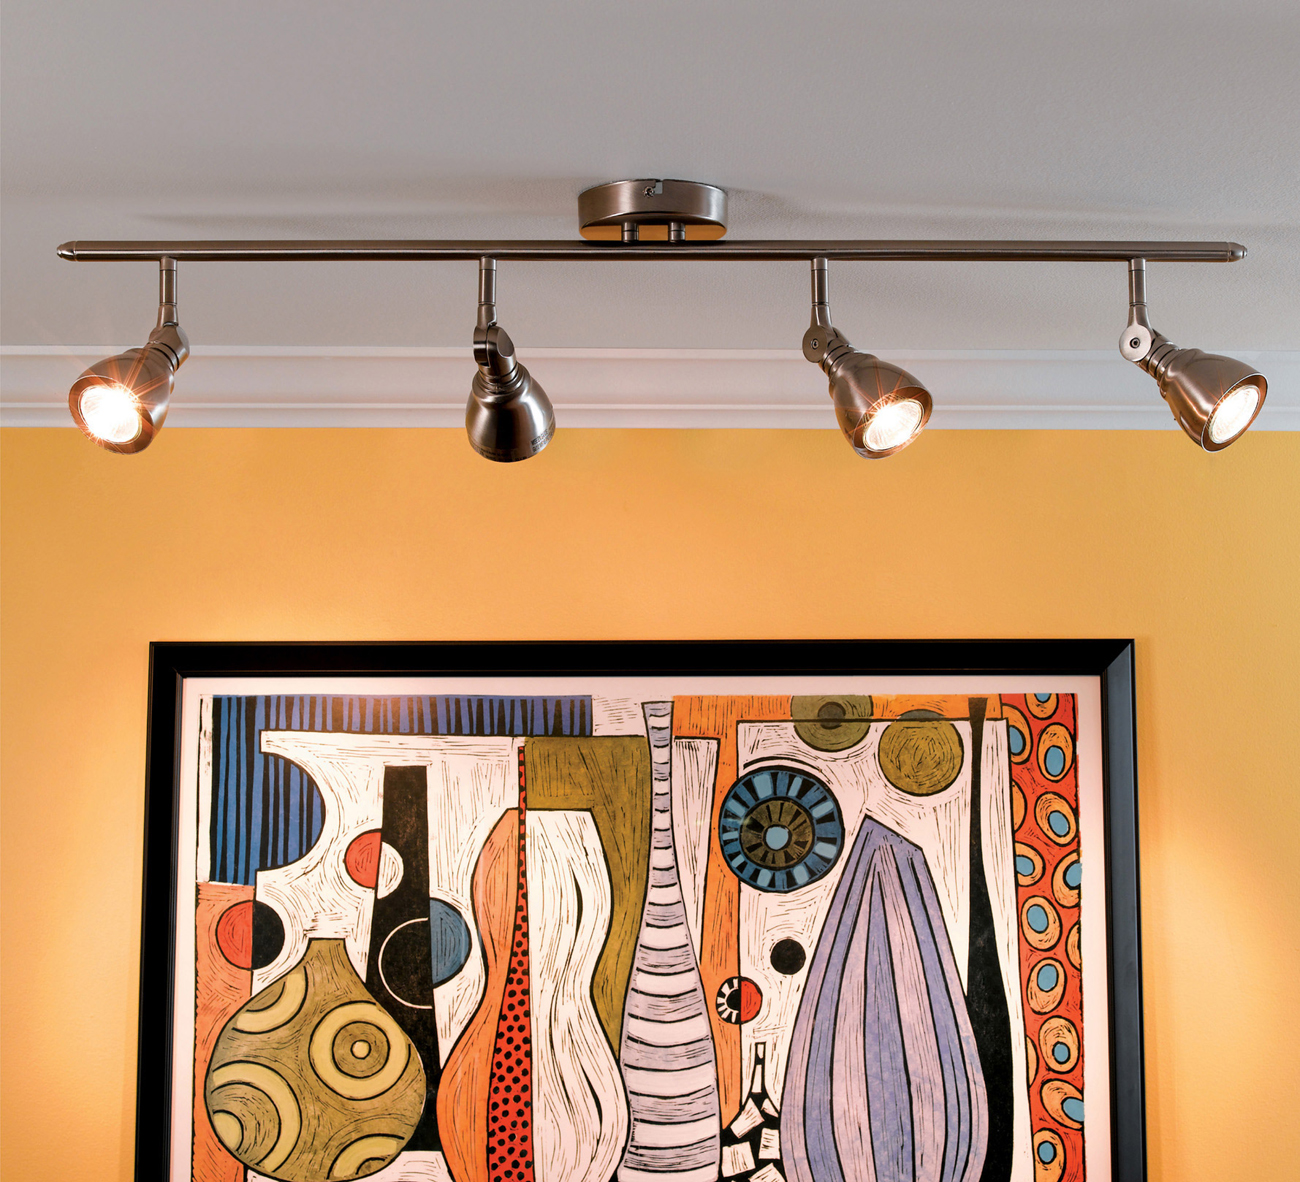
C eiling fixtures dont have any moving parts and their wiring is very simple, so, other than changing bulbs, youre likely to get decades of trouble-free service from a fixture. This sounds like a good thing, but it also means that the fixture probably wont fail and give you an excuse to update a rooms look with a new one. Fortunately, you dont need an excuse. Upgrading a fixture is easy and can make a dramatic impact on a room. You can substantially increase the light in a room by replacing a globe-style fixture by one with separate spot lights, or you can simply install a new fixture that matches the rooms dcor.
Tools & Materials
Replacement light fixture
Wire stripper
Voltage sensor
Insulated screwdrivers
Wire connectors
Eye protection
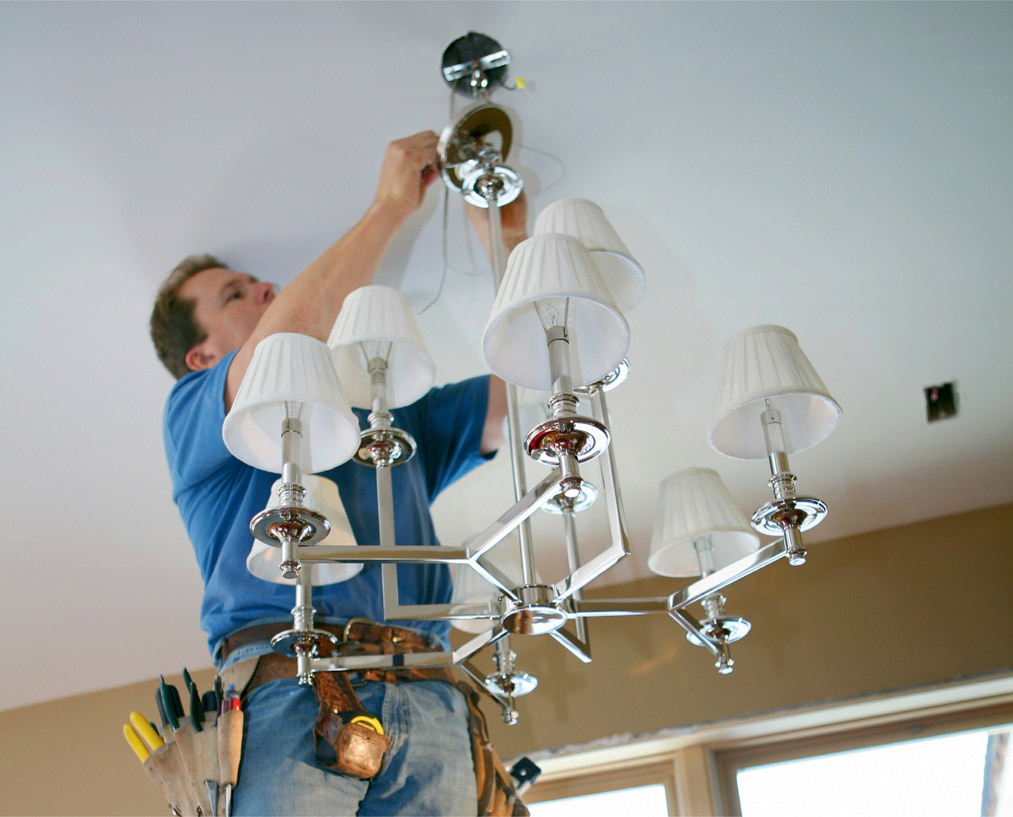
Installing a new ceiling fixture can provide more light to a space, not to mention an aesthetic lift. Its one of the easiest upgrades you can do.
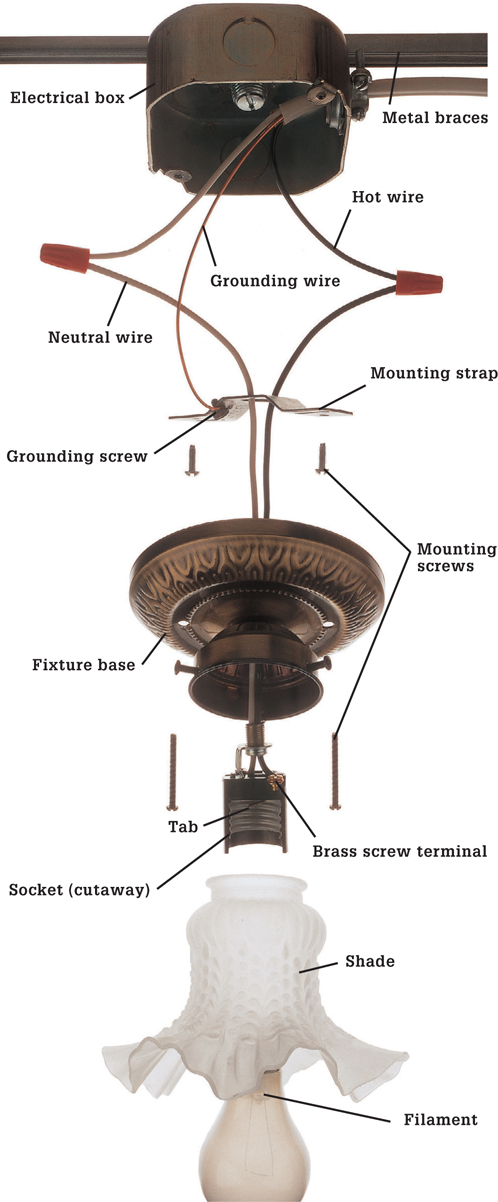
No matter what a ceiling light fixture looks like on the outside, they all attach in basically the same way. An electrical box in the ceiling is fitted with a mounting strap, which holds the fixture in place. The bare wire from the ceiling typically connects to the mounting strap. The two wires coming from the fixture connect to the black and the white wires from the ceiling.
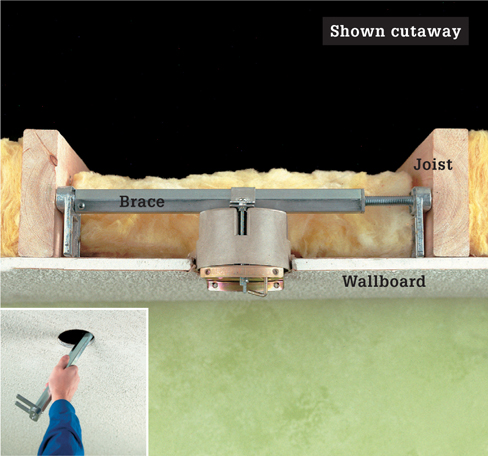
If the new fixture is much heavier than the original fixture, it will require additional bracing in the ceiling to support the electrical box and the fixture. The manufacturers instructions should specify the size and type of box. If the ceiling is finished and there is no access from above, you can remove the old box and use an adjustable remodeling brace appropriate for your fixture (shown). The brace fits into a small hole in the ceiling (inset). Once the bracing is in place, install a new electrical box specified for the new fixture.
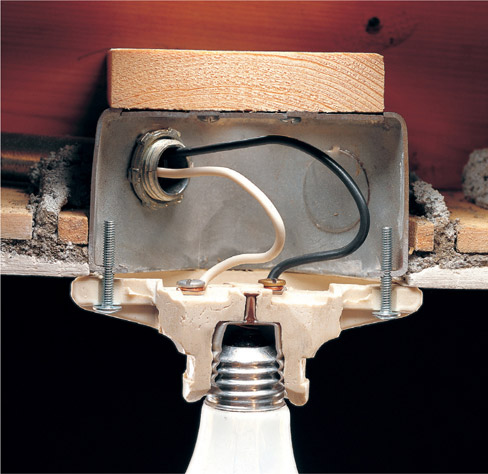
Inexpensive light fixtures have screw terminals mounted directly to the backside of the fixture plate. Often, as seen here, they have no grounding terminal. Some codes do not allow this type of fixture, but even if your hometown does approve them, it is a good idea to replace them with a better quality, safer fixture that is UL-approved.
 How to Replace a Ceiling Light
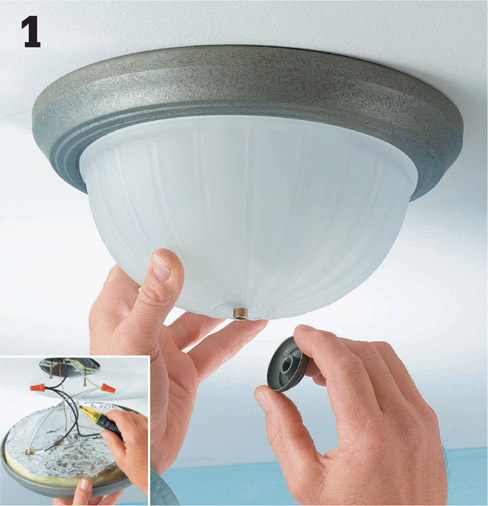
Shut off power to the ceiling light and remove the shade or diffuser. Loosen the mounting screws and carefully lower the fixture, supporting it as you work (do not let light fixtures hang by their electrical wires alone). Test with a voltage sensor to make sure no power is reaching the connections.
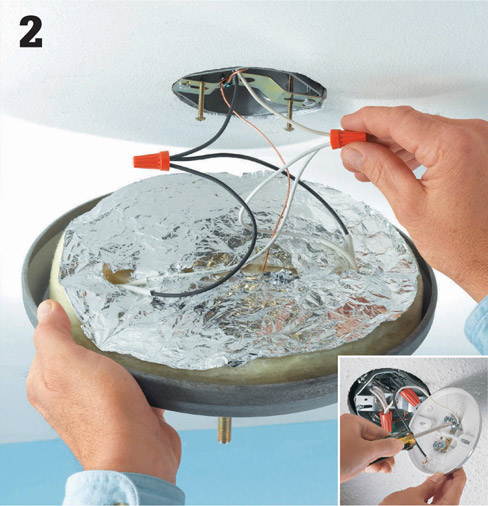
Remove the twist connectors from the fixture wires or unscrew the screw terminals and remove the white neutral wire and the black lead wire (inset).
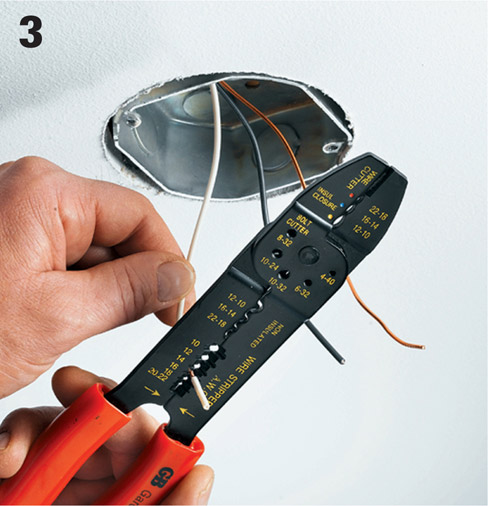
Before you install the new fixture, check the ends of the wires coming from the ceiling electrical box. They should be clean and free of nicks or scorch marks. If theyre dirty or worn, clip off the stripped portion with your combination tool. Then strip away about 3/4" of insulation from the end of each wire.
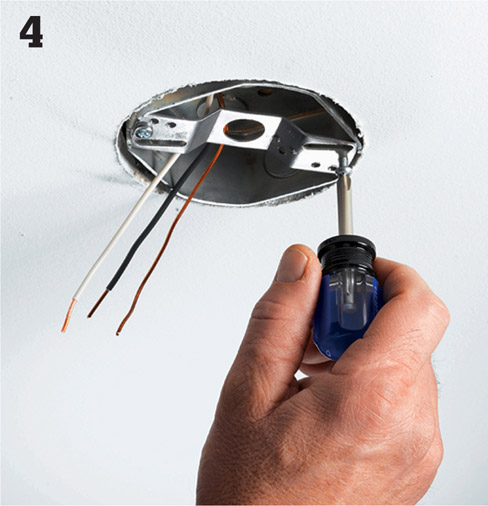
Attach a mounting strap to the ceiling fixture box if there is not one already present. Your new light may come equipped with a strap, otherwise you can find one for purchase at any hardware store.
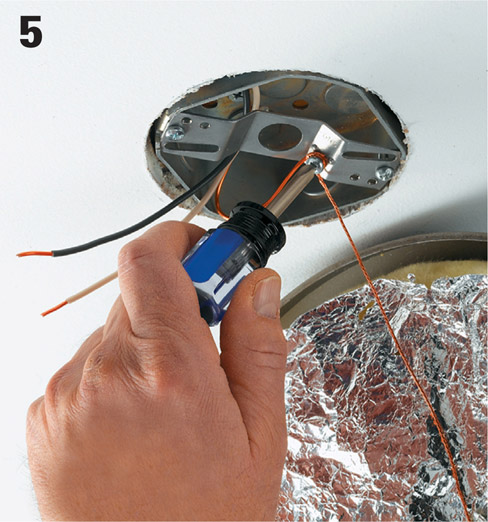
Lift the new fixture up to the ceiling (you may want a helper for this) and attach the bare copper ground wire from the power supply cable to the grounding screw or clip on the mounting strap. Also attach the ground wire from the fixture to the screw or clip.
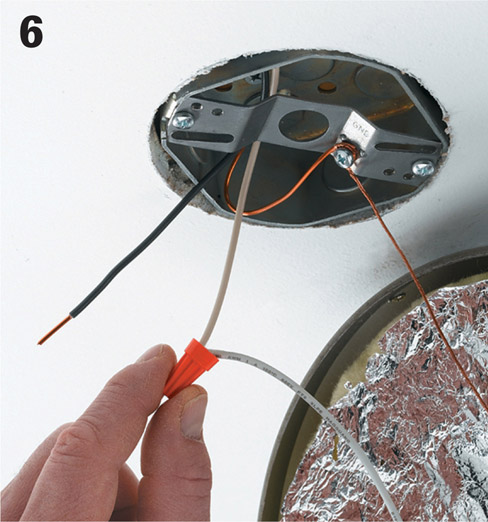
With the fixture supported by a ladder or a helper, join the white wire lead and the white fixture wire with a wire connector (often supplied with the fixture).
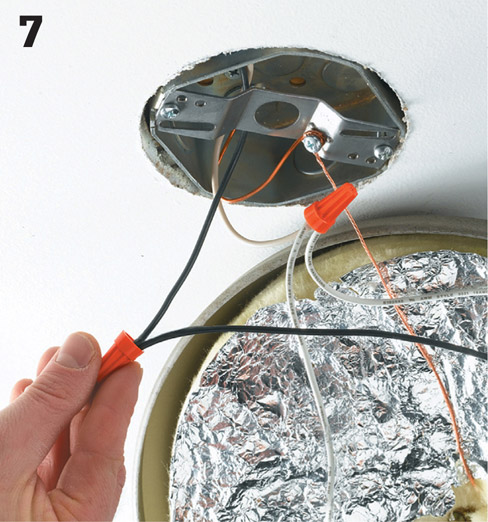
Connect the black power supply wire to the black fixture wire with a wire connector.
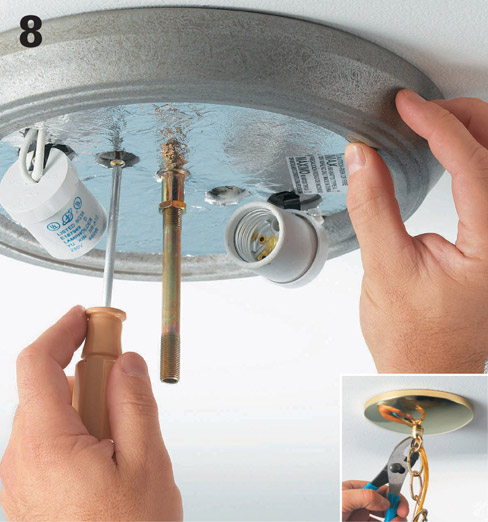
Position the new fixture mounting plate over the box so the mounting screw holes align. Drive the screws until the fixture is secure against the ceiling. Note: Some fixtures are supported by a threaded rod or nipple in the center that screws into a female threaded opening in the mounting strap (inset).
 Recessed Ceiling Lights
R ecessed lights are versatile fixtures suited for a variety of situations. Fixtures rated for outdoor use can also be installed in roof soffits and overhangs for accent and security lighting. Recessed fixtures can also be installed over showers or tubs. Be sure to use fixture cans and trims rated for bathroom use.





 Ceiling Lights


 How to Replace a Ceiling Light


