If you are an Annies customer and have a question about the instructions on a pattern you have purchased, please visit:
http://www.anniescatalog.com/pages/customer_care/pattern_services.html
Table of Contents
Unlike regular Tunisian crochet, with the double-ended hook, you arent limited to the size of the hook. Because you are working from both ends of the hook, the width of your project can be as long as you like. And, more importantly, you can also work in the round to make tubular and moebius projects.
All projects in this book can be made on a 6-inch or a 10-inch double-ended hook. A cable is unnecessary. However, if you prefer to use a cabled hook for convenience, use care to only work into stitches which have been closed with a closing chain, otherwise youll be knitting!
The Techniques section introduces you to using the double-ended hook in flat projects, then progresses to tubular in-the-round projects. Once you learn to work in the round, move to the next level with a moebius join.
Use these new techniques in the projects featured in this book, which include several different looks and skill levels.
If you are unfamiliar with Tunisian crochet or need to brush up on the stitches, use the Stitch Glossary at the end of the book to learn each individual stitch.
Techniques
Double-Ended Tunisian Worked Flat
Youll want to learn the basics and practice using a double-ended hook before you begin working in the round. When practicing, use two skeins of yarn in two different colors. The steps below will demonstrate working in Tunisian Simple Stitch, and youll want to be comfortable with it before moving on to the other techniques. The Ribbed Headband With Bow is a perfect starter project for this technique. Note that the following practice piece will be in Tunisian Simple Stitch, which is easier to use when learning. However, with the headband youll use Tunisian Knit Stitch.
Tunisian Simple Stitch
Chain the indicated number. To practice, chain 10 (see Photo 1).

Turn the chain so that the back horizontal bars are facing you (see Photo 2).
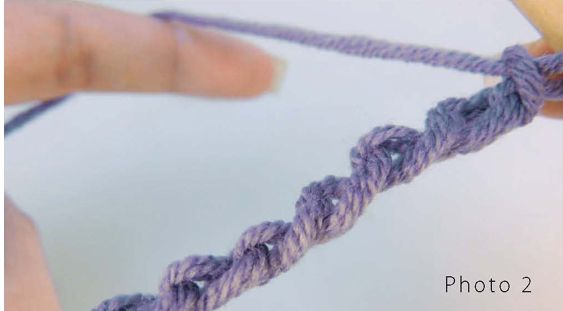
Skip the first chain and insert hook in the back horizontal bar of the next chain (see Photo 3).

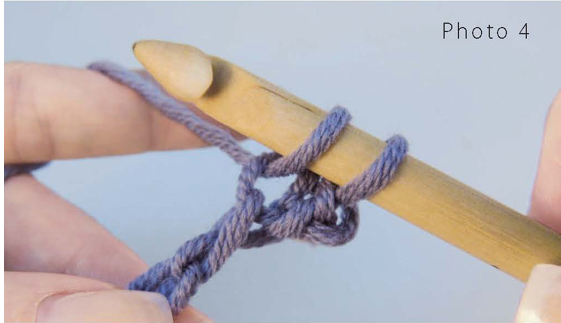
Yarn over and pull a loop through leaving it on the hook (see Photo 4).
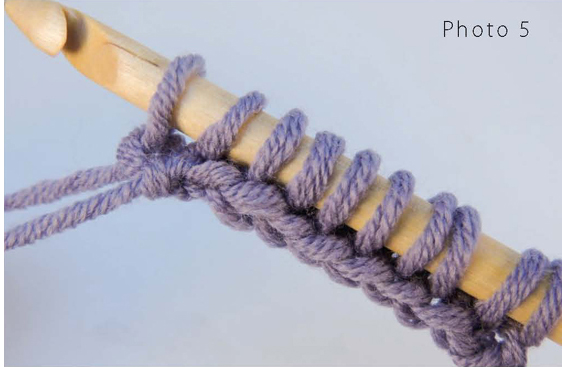
Continue pulling up loops in the same manner across (see Photo 5). When learning, count all the loops of every row until you are comfortable with the technique. You will have the same number of loops as the starting chain; in this case, you should have 10 loops on your hook.
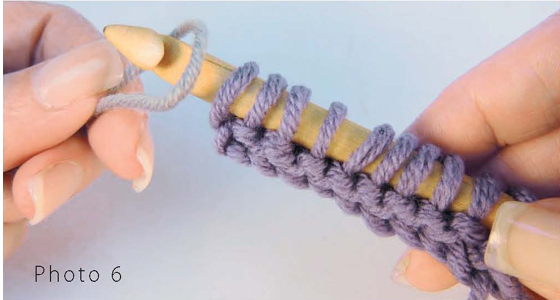
Turn the hook over so the back of the work is facing you. Push the loops close to the opposite hook. Leaving about a 6-inch length, pull the second color close to your work (see Photo 6).
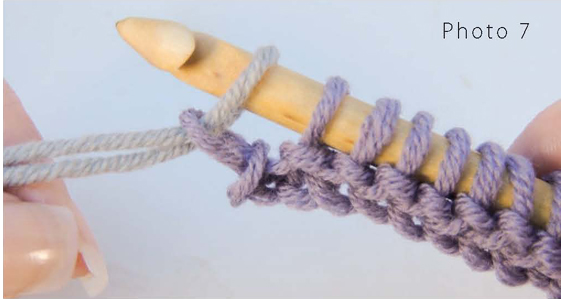
Pull the second color through one loop on your hook (see Photo 7).
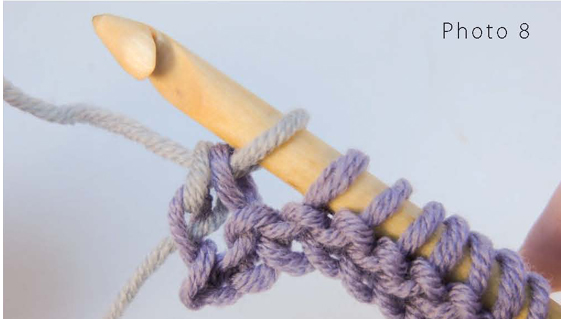
Yarn over and pull the second color through two loops on your hook (see Photo 8).
Continue to yarn over and pull through two loops until one loop remains on the hook. Do not turn. You will only turn when the hook is full of loops, never when there is only one loop on the hook (see Photo 9).

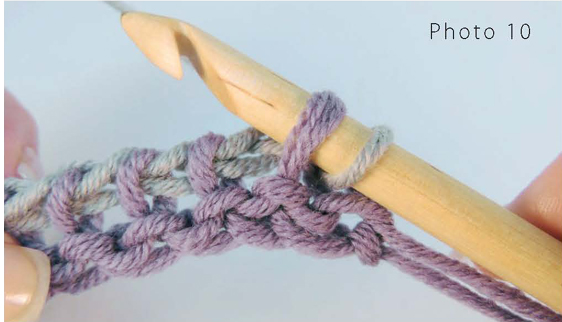
Skip the first stitch and insert the hook in the next stitch (see Photo 10) as you would for Tunisian Simple Stitch (see Stitch Glossary on page 31).
Yarn over and pull a loop through leaving it on the hook (see Photo 11).
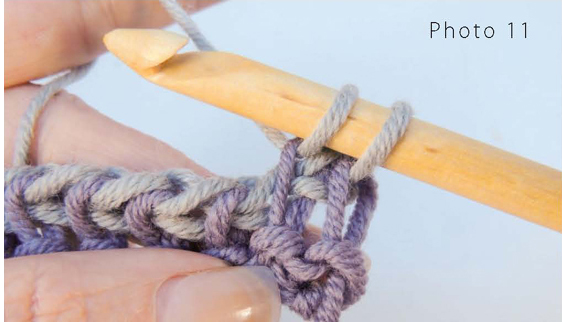
Continue pulling up loops in Tunisian Simple Stitch across (see Photo 12). Remember to count them!
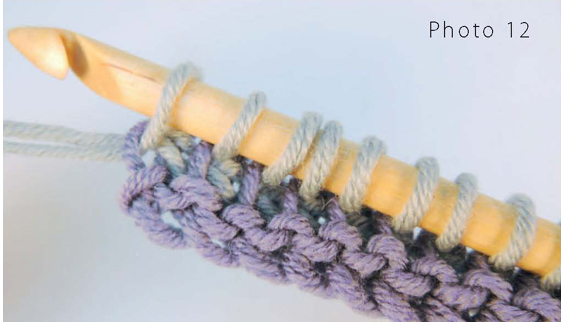
Remember to turn the work only when multiple loops are on the hook (see Photo 13).
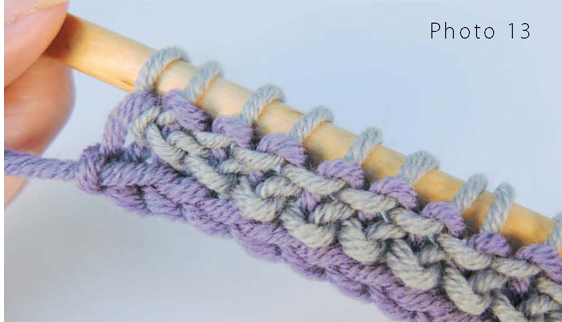
Yarn over and pull through one loop on the hook (see Photo 14).
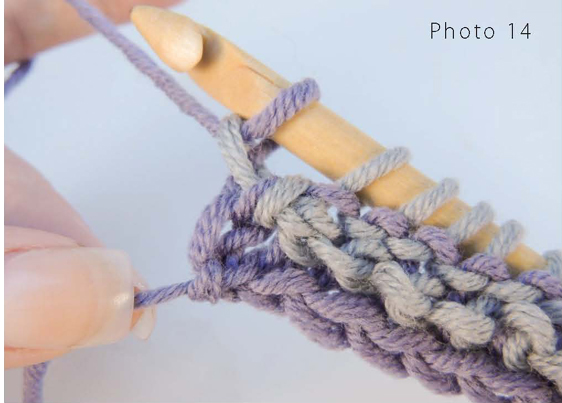
Yarn over and pull through two loops on the hook (see Photo 15). Continue to yarn over and pull through two loops until one loop remains on the hook. Do not turn. Repeat each row as established.

Double-Ended Tunisian
Worked in the Round
Now that you understand the basics, move on to working in the round and youll be ready to start the Rolled Brim Beanie. When practicing, use two skeins of yarn in two different colors.
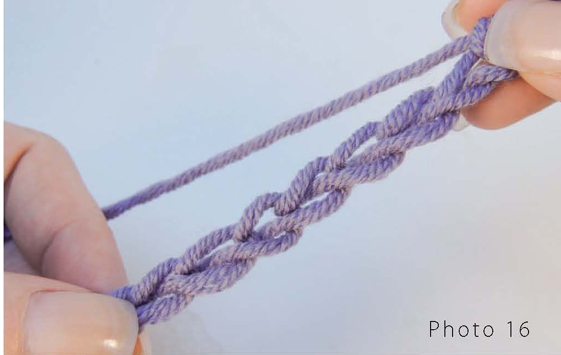
Chain the indicated number. To practice, chain 30 (see Photo 16).
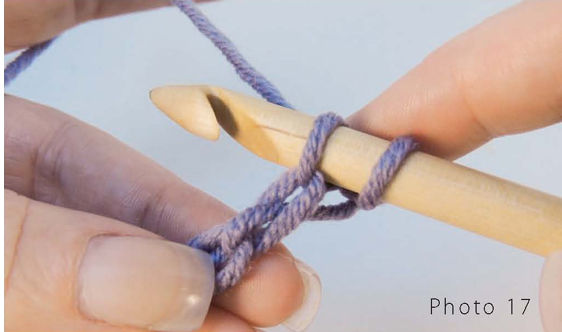
Skip the first chain and insert hook in back horizontal bar of next chain (see Photo 17).
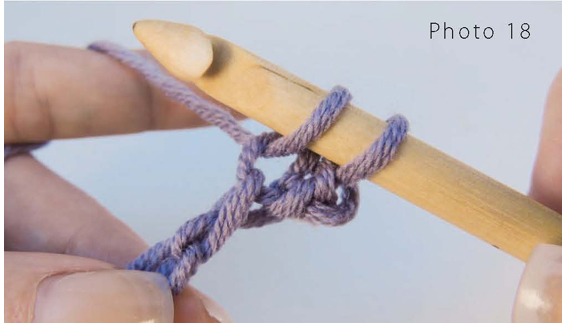
Yarn over and pull a loop through, leaving it on the hook (see Photo 18).
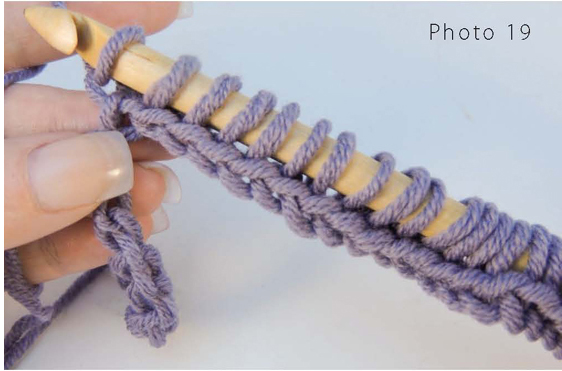
Continue pulling up loops in the same manner until the hook is full, but loops arent slipping off the end (see Photo 19). Dont worry about the remaining chains for the moment.
