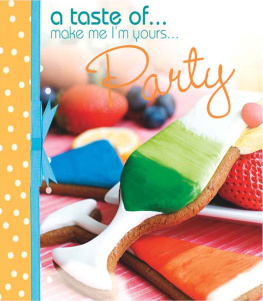
A TASTE OF:
Make Me Im Yours Party
Various Authors
Introduction
What better way to celebrate a special occasion with those you love friends, family and neighbours than with decorations, gifts and treats that you have made yourself. And, by making your own party garlands, dinner table settings, gift wrappings and celebration cakes, you can even save a tidy little sum. Even the cash-strapped can throw a fabulous party on a budget with the wealth of ideas on offer here.
This book has over 20 great reasons to discover how much fun crafts can be, from simple sewn celebration bunting to pretty paper-sculpted tiaras and gift bags. And for those with a sweet tooth, there are gift-shaped iced cookies and stunning sugarpaste cakes. Each project has been rated to give you an idea of just how easy it is to make.
These are the simplest of projects to get you started on discovering the great crafts featured.
Easing you in, these projects will help you to explore your newfound talents and creative inclinations.
As your passion for crafting grows, these designs will help you to round out developing skills.
The tips and tricks running throughout the book will give you ideas for adapting the projects whatever your celebration from baby showers to birthdays, christenings to Christmas, and so many more besides.
Paper Lanterns
These brightly coloured lanterns make wonderful party decorations and, as they are made from fairly thick handmade paper, they hold their shape even once cut. Inspired by the Far East, they can be hung from a pagoda for a summer garden party; alternatively, make them on a smaller scale and string together in garlands for indoor gatherings. However, theyre not intended for use as lampshades with light bulbs, and shouldnt be used as such!
You will need (for the Blue Lantern)
A2 (16 23in) sheet of decorative blue handmade paper
A4 (US letter) sheets of pink and green handmade paper
zigzag scissors
florists wire
flat-head pliers
coordinating ribbon for hanging
1. Cut a 45 28cm (17 11in) rectangle of the blue paper. Lightly score a line every 11cm (4in) to divide it into four panels. The last score line will leave a narrow border 1cm (in) wide. Gently fold the paper along the score lines. Fold under the border and glue it under the opposite side to create the cuboid shape. Flatten the lantern in half.
2. Very lightly draw a vertical line 2.5cm (1in) to the right of each fold. Starting 2cm (in) down from the top of the lantern, mark lines 1cm (in) apart, from the pencil line to the fold. Stop 2cm (in) above the lower edge of the lantern. Keeping the paper folded, cut along the pencil lines to make tabs. Repeat at each fold.
3. Flatten each corner then very lightly score the sides of every other tab on both sides of the fold, starting at the top.
4. Cut two 2cm (in) wide strips of pink paper with zigzag scissors. Glue a strip around the top and bottom edges of the lantern. Cut two thin strips of green paper and glue these along the centres of the pink borders.
5. Once the borders are dry, fold each corner again. Starting at the top of the lantern, push alternate tabs inwards, towards the centre of the lantern, to make a step pattern.
6. To make a hanger, cut an 18cm (7in) length of florists wire. Wrap the middle of the wire around a pencil and twist to make a loop. Pierce a hole at two opposite corners of the top of the lantern. Poke the ends of the wires through the holes and curl up the very ends with a pair of pliers. Tie a length of coordinating ribbon from the centre of the hanger to suspend the lantern.
Tips and Tricks
The pink lantern is made in the same way as the blue one, but the cylinders of paper are cut and scored differently, varying the width of the strips for different effects.
For Halloween, make your lanterns from coloured foil or acetate to reflect candlelight.
For a silver wedding anniversary, try making simple round lanterns from silver lacy doilies.
At Christmas string garlands of tiny lanterns on the tree.
Cocktail Cookies
Just what you need for a fun night with the girls! Instructions have been given for the zingy green cocktail here, but you can experiment with coloured sugarpaste to create your favourite tipple.
You will need
cocktail glass-shaped cookies
sugarpaste: white, red, deep green, pale yellow
cocktail glass cookie cutters
cutting wheel
Dresden tool
paste colours: green, yellow
1. First cover the cookies. Begin by rolling out white sugarpaste to a thickness of 3mm (in) and cut out a glass shape. With a cutting wheel, make a V cut at the base of the bowl of the glass and remove the top of the glass, leaving just the stem. Place the stem on the cookie.
2. Roll out green and white sugarpaste to a thickness of 3mm (in) and cut into 2.5cm (1in) wide strips. Place the strips adjacent to each other and, with a finger, stroke one colour over the other to give a partially mixed appearance; flatten with a rolling pin. Using the cookie cutter and cutting wheel, cut out the striped paste to form the bowl of the glass and position on the cookie.
3. For the pineapple, thickly roll out the yellow paste, cut out a triangle and add texture by pressing the Dresden tool deeply into it. Using the cookie cutter, cut the shape to fit the glass and attach to the cookie. Add a red paste cherry.
4. Mix the green and yellow paste colours separately with cooled boiled water. Paint green horizontal lines over the green section of the glass and yellow over the pineapple.
Handbag Gift Bag
What could be more appealing to a style-loving girl than a gift bag modelled on the chic designer handbags so often seen on the catwalk? This gift bag is made by layering different papers and stitching them together on the sewing machine. It has a generous gusset to accommodate bulky presents and a simple fastening to keep the gifts safely secured inside. The front pocket provides the perfect hiding place for a small surprise gift or a message written on a coordinating tag.

