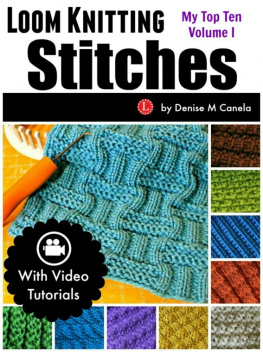
Loom Knitting Stitches:
My Top Ten Volume I
by Denise M Canela

All Rights Reserved. No part of this publication maybe reproduced in any form or by any means, including scanning,photocopying, or otherwise without prior written permission of thecopyright holder, LoomaHat.com . Copyright 2015
Table of Contents
1. Introduction
Please Read Before You Start Knitting. Patternsare not written in a conventional manner.
The Video Tutorial:
Every pattern includes a video tutorial.Please watch the video from beginning to end before you startknitting.
How to cast-on / start the stitchpatterns:
I'm often asked how Istart the stitch patterns . The answer is that it dependson the project pattern and not the stitch pattern.
How I wrote the patterns:
I tried to make these patterns as easy aspossible to read even if you're a beginner. For that reason youwill only find the multiples (the stitches that you repeat) and notthe edges. Most patterns that include the stitches needed tobalance the pattern out make it difficult for beginners tounderstand the basic information needed.
Read from left to right:
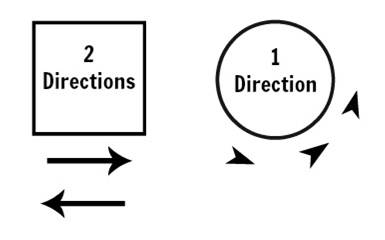
Read the patterns from left to right justlike you read a book regardless of whether you are knitting flat orin the round. Just remember that when you're knitting flat you arereturning on the even rows so your first peg is on the oppositeside from the peg that you started the odd numbered rows.
Why some stitches include 2 patterns:
That's because some need one for knittingflat like a scarf and another for knitting in the round like ahat.
Again, remember that when you're knitting inthe round you're always knitting in the same direction. However,when you're knitting flat you will go back and forth. I havewritten the pattern to match the actual knitting. You are alwaysreading from left to right regardless of the direction that you'reknitting.
Which knit stitch:
There are 4 versions of the knit stitch; Trueor Classic, Flat, U-wrap and e-Wrap. See the chapter on thissubject.
Pictures - large - close-up - reverse:
Each pattern includes 3 pictures. The largeone on the left is an overview, the top right is a close-up, thebottom right is the reverse side of the stitch.
Tighten loose edges and block:
If you knit with large gauge looms you mayneed to tighten those first loops. For detailed instructions ontightening loose loops: Click HERE .
Blocking the fabric removes curls, brings outthe details of the stitch and allows you to shape your project. Tosee my favorite Youtube video on how to steam block your knittedfabric: ClickHERE
To stay tuned for more tips and tricks visitthe webpage: LoomaHat.com
2. The4 Versions of the Knit Stitch

When a loom knitting pattern says KnitStitch it doesn't always mean what you think it does. That Iknow of there are 4 versions of this ever-present stitch. I believemost of us have a default Knit Stitch that we always use unlesssomeone says other wise. The problem is that although they allcarry the same name they are done differently and the wrong choicecan have a dramatic effect on the look and size of your knittedfabric.
So what does a loom knitter do when thepattern only says to Knit?
First lets learn the lingo. If you don't knowthe name then you'll really be in trouble.
There is the easy to do e-Wrap, theTrue sometimes called the Classic, the extremelytight Flat Stitch and the happy medium U-wrap. I wantto help you know how to do all four versions and how to know whento use it. Below are written instructions with pictures to makevisualizing the technique easier.
FOR A VIDEO TUTORIAL: ClickHERE
The e-Wrap:
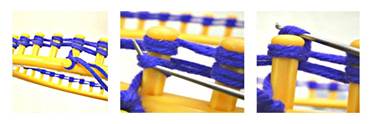
The "e" in e-Wrap is because of the shapeyour working yarn takes as you wrap each peg you plan to knit usingthis method of the Knit Stitch. It resembles a lower case"e". Some patterns will call this the Twisted Stockinette.
To knit your peg you will completely wrap itwith the working yarn forming that lower case e then with theknitting tool you will lift the bottom loop over the top loop andknit off.
This stitch is going to knit up quicker, withloose loops and your fabric will be larger than with the otherversions. In some cases as much as twice the size and with lessstitch definition. But it's the easiest one to learn which is why Ilike to start with it when teaching beginners
The Uwrap:
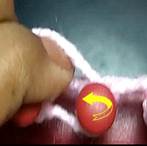
Like the eWrap, gets its name from the shapeyour working yarn takes when wrapping your pegs.
1. You are half wrapping the peg. Thatunfinished circle forms a "u".
2. With your hook knit the bottom loop overthe top.
The True:
This one is sometimes called the Classic. Icall it the default stitch because it is the one most knittersresort to when the pattern does not show a specific one.
This version is closest to the needle knittedKnit Stitch. It produces a well-defined stitch but will take longerto knit then the other 3 versions. For many people the extra workis worth the results

1. Place working yarn on the peg, over theexisting loop
2. Push your hook through the bottom loop
3. With your hook scoop the working yarn
4. Create a new loop
5. Take the old loop off
6. Put the new loop on
7. Pull your yarn
The Flat:
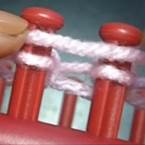
The name describes the way your working yarnlies on your peg.
In order to knit the peg you will place yourworking yarn flat above the existing loop and with your knittingtool you will lift the bottom loop over the working yarn and knitoff.
Very easy to do but can be very problematicfor beginners. The stitch can become so tight that knitting canbecome almost impossible.
3.Andalusian
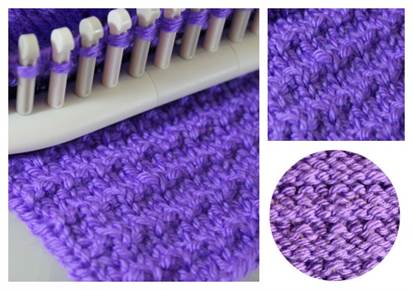
Skill Level: Beginner Easy
Stitches: Knit (True), Purl
Multiples of 2 + Edges
For a Video Tutorial: ClickHERE
Pattern
Be sure to read the introduction before starting thispattern.
Row 1: Knit
Row 2: Knit
Row 3:

