Design Originals For a color catalog featuring over 200 terrific How-To books,
visit www.d-originals.com COPY PERMISSION - You may copy or photocopy patterns in this book for personal use or to make items to sell for pin money. You do not have permission to sell the patterns. When you employ help making items or make more than 12 to sell, you have exceeded this permission. INFORMATION - All book rights are reserved. No portions of patterns, designs, projects or written instructions may be reproduced in any form. Design Originals, Suzanne McNeill, Designers, and/or Authors disclaim any and all liability for unsatisfactory results.
Mention of a product by a trade name is a record of the authors practice and does ot constitute a recommendation for its use. All information in this book has been tested and is presented in good faith, but no warranty is given, nor results guaranteed. It must be emphasized that the proper use of any product requires following the explicit instructions of its manufacturer. WARNING: Due to the components used in this craft, children under 8 years of age should not have access to materials or supplies. Under rare circumstances components of projects could cause serious or fatal injury. Neither Design Originals, Suzanne McNeill, the product manufacturer or the supplier is responsible.
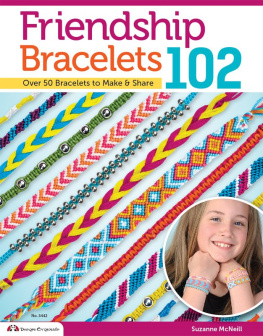
NOTE: The use of products and trademark names are for information purposes only, with no intention of infringement upon those trademarks. 2009 DESIGN ORIGINALS www.d-originals.com 800-457-9112 1970 Broad Street, East Petersburg, PA 17520 eISBN: 978-1-60765-125-3 ISBN: 978-1-57421-294-5 eBook Version 1.0 To wear and to share. Friendship Bracelets 102 Friendship knows no boundaries - it covers the world and comes in all languages.In this book, I show new ways to knot and twist clorful bracelets - techniques with easy knots and simple wheel weaving techniques.Knotting a bracelet to celebrate and share friendship began in Central America. Originally I found children of Guatemalan weavers using leftover threads to knot colorful bracelets to share with each other and with delighted visitors.The children loved showing me how to make the colorful knotted bracelets. I brought the legend and the basic knotting techniques of how to make these fun and meaningful bracelets home to share with my children and their friends.The legend of the friendship wish is that one person makes a knotted bracelet and ties it around the arm of a friend, who makes a wish. When the bracelet falls off by itself, the wish will come true!Happy knotting.
 French Twist
  Overhand Knot. Begin a Bracelet Cut 7 floss colors to 72 in length.
Fold in half and tie together with an Overhand Knot to form a 1/2 loop. Pin the loop to your jeans leg or tape it to a table.  Simple Twist Knot Begin on the right side. Loop the right outside thread over and under all the other threads. Pull the end up firmly to tie the first knot. Repeat to tie a total of 9 knots around all threads.
Switch colors by using another color on the right. Tie 9 knots with the second color. Switch colors. Tie and repeat until the desired length.  End a Bracelet Braid (see ) the ends together if desired.
  Basic Supplies Floss in assorted colors (You can use Prism or DMC embroidery floss, craft thread or pearl cotton size 5) Assorted beads and buttons Safety pin or masking tape Craft scissors Knotting surface (jeans leg or knotting board)
  Braiding with 3 Strands

 1.
1.  Basic Supplies Floss in assorted colors (You can use Prism or DMC embroidery floss, craft thread or pearl cotton size 5) Assorted beads and buttons Safety pin or masking tape Craft scissors Knotting surface (jeans leg or knotting board)
  Braiding with 3 Strands

 1.
1.
The left cord goes over the cen ter cord and under the right cord.  2. The new left cord goes over the new center cord and under the new right cord. Repeat this step to within 1 of the end of the strand. Tie the ends in an Overhand Knot to prevent raveling. Flat Braid with 4 Strands
  B A A B 1.
Fold one set of floss (A) in half and tie them into an Fold another set of floss (B) in half and thread them through the loop of the first set.  2. Cross the left B threads over the right B threads at the center of the bracelet.
  3. Cross the ends of the A threads at the center of the bracelet. Repeat Steps 2 and 3 to complete the bracelet.
Note: Keep the threads flat! 



 Friendship Bracelets 102 Friendship knows no boundaries - it covers the world and comes in all languages.In this book, I show new ways to knot and twist clorful bracelets - techniques with easy knots and simple wheel weaving techniques.Knotting a bracelet to celebrate and share friendship began in Central America. Originally I found children of Guatemalan weavers using leftover threads to knot colorful bracelets to share with each other and with delighted visitors.The children loved showing me how to make the colorful knotted bracelets. I brought the legend and the basic knotting techniques of how to make these fun and meaningful bracelets home to share with my children and their friends.The legend of the friendship wish is that one person makes a knotted bracelet and ties it around the arm of a friend, who makes a wish. When the bracelet falls off by itself, the wish will come true!Happy knotting.
 French Twist
  Overhand Knot. Begin a Bracelet Cut 7 floss colors to 72 in length.
 Simple Twist Knot Begin on the right side. Loop the right outside thread over and under all the other threads. Pull the end up firmly to tie the first knot. Repeat to tie a total of 9 knots around all threads.
 End a Bracelet Braid (see ) the ends together if desired.
  Basic Supplies Floss in assorted colors (You can use Prism or DMC embroidery floss, craft thread or pearl cotton size 5) Assorted beads and buttons Safety pin or masking tape Craft scissors Knotting surface (jeans leg or knotting board)
  Braiding with 3 Strands

 1.
1.  2. The new left cord goes over the new center cord and under the new right cord. Repeat this step to within 1 of the end of the strand. Tie the ends in an Overhand Knot to prevent raveling. Flat Braid with 4 Strands
  B A A B 1.
 2. Cross the left B threads over the right B threads at the center of the bracelet.
  3. Cross the ends of the A threads at the center of the bracelet. Repeat Steps 2 and 3 to complete the bracelet.