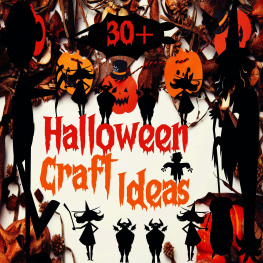
30+ Halloween Craft Ideas
Melinda Gregorie
Published by Moonlight Press, 2021.
While every precaution has been taken in the preparation of this book, the publisher assumes no responsibility for errors or omissions, or for damages resulting from the use of the information contained herein.
30+ HALLOWEEN CRAFT IDEAS
First edition. August 20, 2021.
Copyright 2021 Melinda Gregorie.
Written by Melinda Gregorie.
10 9 8 7 6 5 4 3 2 1
Table of Contents
This book will teach you how to make 33 unique Halloween crafts.
While some of them are simple, they will certainly help make your Halloween more festive and scarier. Additionally, you'll be able to learn about how these crafts are created and how you may get started right now.
Cutouts for a Spooky Paper Garland
L et's begin with something simple!
These scary paper cutouts are an excellent place to start, as they allow you to do a lot in a short amount of time and cover your whole home in hours.
To create these scary cutouts, you will need the following materials:
- Pencil/Pencil holder - Scissors
- Construction Paper in a variety of colors - Pins OR staples OR glue
- Tacks or other means of attaching cutouts to the wall
- Paint/crayons/markers (optional)
Begin by sketching a basic design on a scrap of paper. Draw whatever you want: a bat, a witch, pumpkins, etc. Then, carefully cut around the edges of your design. This will serve as your "stencil"/"guideline."
Now, put the stencil on a stack of five or ten sheets of paper and cut out all around it, creating hundreds of identical cutouts.
Continue this process as desired, and then pin/staple/glue the edges together to make a complete garland or banner to hang on one or more of your house's walls.
Decorative Paper Rings in Black and Orange
T hese are always enjoyable to create regardless of your age. I began creating them in preschool, continued to do so in eighth grade, and I think we made them for a high school dance back in the day.
What you will need is as follows:
- Construction paper in black and orange
- Glue (stick or bottle/gun)
- Scissors
The secret to producing them quickly and efficiently is to establish a rhythm. Begin by cutting hundreds of strips of paper, ensuring that they are all about the same size (size can vary though).
Then, join these strips together in ring shapes to create a garland of 50 - 100+ paper rings. Display them in your home, on your porch, or at a party; the options are limitless, and they are certain to amplify the Halloween mood.
Nota bene: This craft concept works best when two individuals participate. While one person cuts the strips, the other glues them together to form rings. You'd be amazed at how long your paper rings may last in only a few minutes.
Flowerpot Ghosts and Pumpkins
A s a gardener with a surplus of empty pots, this works well for the kids and is cost-effective for me.
What you will need is as follows:
- Flower pots (made of plastic, acrylic, or stone)
- Stalks of pumpkin
- Utilize paint (and paint brushes)
I've found that plastic pots perform better since they're so inexpensive.
Begin with an empty pot and clean it well if it has any dirt or debris. After that, invert the pot.
After that, paint your favorite scary Halloween design using orange, black, or any other color paint. The best effect is achieved by painting a pumpkin face/jack-o'-lantern.
Finally, (if your pot has a pumpkin face), insert the stem of one of your pumpkins into the hole at the bottom of the pot (which is now at the top) to transform your painted pot into a painted pot pumpkin.
T hese are a family favorite, and they're surprisingly simple to make. Once you've made one, your children, friends, and even yourself will be clamoring for more.
What you will need is as follows:
- Jugs de lait (preferably 1 gallon plastic)
- Off white (or any color) Christmas illuminations
- Paint
To begin, DRINK THE MILK. Do not pour it down the drain (but you already knew that, right?).
Once you've emptied the milk jug, rinse it well with water and allow it to dry.
Following that, using your preferred paint (or sharpies), paint or draw ghost and frightening faces directly onto the milk jug. Allow the paint to dry if you are painting.
Once the paint is dry, thread a short string (50 or 100) Christmas lights through the milk jug's top. If your light strand is insufficiently lengthy, connect your lights through an extension cable.
Finally, turn on the lights, wait for darkness, and marvel at your eerie spirit creations.
W arning: If you put these in your yard, be prepared for many double takes from passing motorists (I do it all the time).
What you will need is as follows:
- Periodical (or regular paper)
- Rope or strand of string
- Sheets or other inexpensive white material

