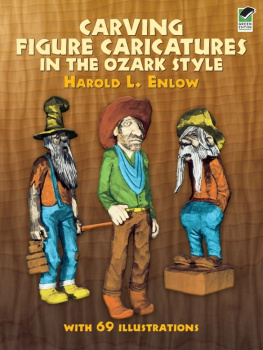
Harold R. Enlow - Carving Figure Caricatures in the Ozark Style
Here you can read online Harold R. Enlow - Carving Figure Caricatures in the Ozark Style full text of the book (entire story) in english for free. Download pdf and epub, get meaning, cover and reviews about this ebook. year: 2012, publisher: Dover Publications, genre: Home and family. Description of the work, (preface) as well as reviews are available. Best literature library LitArk.com created for fans of good reading and offers a wide selection of genres:
Romance novel
Science fiction
Adventure
Detective
Science
History
Home and family
Prose
Art
Politics
Computer
Non-fiction
Religion
Business
Children
Humor
Choose a favorite category and find really read worthwhile books. Enjoy immersion in the world of imagination, feel the emotions of the characters or learn something new for yourself, make an fascinating discovery.

- Book:Carving Figure Caricatures in the Ozark Style
- Author:
- Publisher:Dover Publications
- Genre:
- Year:2012
- Rating:4 / 5
- Favourites:Add to favourites
- Your mark:
Carving Figure Caricatures in the Ozark Style: summary, description and annotation
We offer to read an annotation, description, summary or preface (depends on what the author of the book "Carving Figure Caricatures in the Ozark Style" wrote himself). If you haven't found the necessary information about the book — write in the comments, we will try to find it.
Wood carving in the Ozark style is easy and fun when you follow professional carver Harold Enlows directions. Using figures he has carved for his own collection in Dogpatch, Arkansas, he gives instructions and illustrations that cover every angle of carving figure caricatures.
He tells you how to go about selecting and preparing the wood, selecting the proper tools, sharpening the tools, using a mallet and band saw, roughing out a figure from a block, carving a head and face, and finishing your carvings. Then he presents explicit instructions for ten projects: a Missouri mule, a mountaineer, a hobo, a cowboy, a hill woman, Rufus and Sadie, Bootsie the cow, a banjo player, Ozark Trails End, and Revenooers. Each project is illustrated in diagram form (front and usually profile) to make it easy to draw on the wood, and there are photographs of each completed project and some in intermediate stages. The general instructions are also illustrated copiously, and there are photographs of other completed carvings from the authors collection a total of 22 drawings and 47 photographs in all.
Whether you are an accomplished carver or just beginning, you will find these caricatures a delightful group and very easy to do. The projects are arranged in order of difficulty, and by the time you get to the last one, you will be ready to do your own designs and carve your own caricatures.
One of the better (books) around on wood-carving. Indianapolis News.
Harold R. Enlow: author's other books
Who wrote Carving Figure Caricatures in the Ozark Style? Find out the surname, the name of the author of the book and a list of all author's works by series.


Carving Figure Caricatures in the Ozark Style — read online for free the complete book (whole text) full work
Below is the text of the book, divided by pages. System saving the place of the last page read, allows you to conveniently read the book "Carving Figure Caricatures in the Ozark Style" online for free, without having to search again every time where you left off. Put a bookmark, and you can go to the page where you finished reading at any time.
Font size:
Interval:
Bookmark:

I would like to extend my appreciation to the following people for their help in the preparation of this book:
My friend, Wade Radford, for taking many of the photographs and giving general advice;
My wife, Elaine, for correcting and typing the manuscript;
All my wood-carving friends, from whom I have learned many things, some of which are included herein.
Special thanks to Ida Engler and Peter Engler for helping to make wood carving a part of the Ozarks, by the encouragement they have given so many carvers.
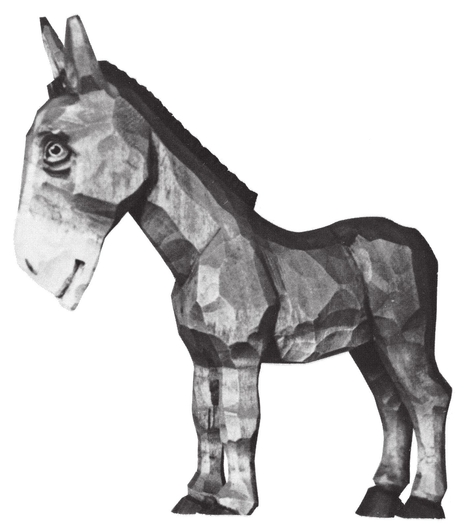
MISSOURI MULE, see page 10.
Most carvers use woods which are nearby and readily available; a carver is lucky if he has good carving wood in his back yard. Not all carvers are this lucky, however, and many must learn what kind of wood to be on the lookout for.
In the Ozark country, where I live, basswood or lindenwood (linn to old-timers) is the standby for carving. It is ideal for small carvings of people and animals, especially caricatures. Other woods used, especially for larger projects, are sassafras, black walnut, butternut and red cedar. But I would advise the beginning carver to get linden if he or she possibly can.
In my area linden is usually purchased from small mountain sawmills, the tree usually having been cut only a few days before being sawed into planks.
The primary step in preparing wood for carvingwhether linden or any other woodis getting it sufficiently dry. Since most carvers have no kiln in which to dry it, it must be stacked and stripped. Stripping means putting small, inch-thick pieces of wood between the planks so that air will circulate between them.
If the planks are allowed to dry through the ends instead of the sides and edges, long cracks will appear and ruin a good part of each piece. Ends should therefore be coated with melted paraffin to keep moisture from escaping. Use extreme caution when melting the paraffin; put the wax in a clean coffee can, then allow it to melt in a pan of hot water. Do not melt over a direct flame. Use an old paint brush to apply the melted paraffin to the ends of each plank.
After coating the ends, store stacked wood in a dry place for several weeks before carving. Drying time depends largely upon the thickness of the wood, but for the small projects in this book, which use 2- to 3-inch planks, drying time is about six weeks. Logs cut in winter months dry faster and work better; sap is down and there is less moisture in them at that time of year.
Many carving tools of good quality are available on todays market, and the purchaser could well be confused by the sheer variety of them. My own tool box contains several different brands, since I have experimented over the years with various tools, looking for different characteristics. Actually, there are two basic criteria for choosing tools: good design and ability to hold an edge.
Many beginners fail to realize that most carving tools are sold unsharpenedone hates to think how many carvers have given up after trying unsharpened tools. Sharpening will be discussed in the next chapterit is probably the most important fact for the beginning carver. Most of the time when a tool doesnt cut properly, it isnt because of the tool itself but because of improper sharpening.
A good tool always has a shoulder where it enters the handle to keep it from splitting the handle wood. Tool handles should be of very hard wood, and the larger tools should have a ferrule or metal banding where the handle attaches to the tool. Handles for extra-heavy work should be banded at both ends.
Most small and medium tools are sold with handles attached; large tools and their handles, however, usually are sold separately. You will have to know how to attach the handle if you purchase them separately. Many tools have been broken because the handle was forced on. Tool handles have a pre-drilled hole, ready to accept the tool. Twist the tang of the tool into the handle, using a back-and-forth motion, so that the tool drills its way in. Continue until the tool is about inch from being seated. Then place it on a block of wood and drive the final quarter-inch with a wooden mallet.
Since a bent tool is easily broken, do not drive the handle in on a block of wood. When it is twisted in, place the shank of the tool in a vise between two blocks of wood, then pound on the handle.
While, as we said, many tools are available today, it is doubtful that you, as a beginner, will need more than a few of them. As you progress you will find a need for other tools, depending upon the type of carving you are doing. If you are a professional carver, of course, you will discover many tools that will save you time and energy if applied to problem areas.
To recognize different tools easily, some carvers like to paint the handles different colors. This will eliminate searching for particular tools, as you will learn to know each by its color.
Each of the ten projects in this book will list the tools being used, to give the reader some idea of which tools made the different cuts. Dont be afraid to substitute if you think the same results may be obtained by using a different tool.
If you think you would like making your own tools, this is possible also, and adds to the fun of carving. Old files and broken cross-cut saw blades are excellent metals for making your own tools. Try to pick pieces of metal you know were originally from hard-edge tools. Use a power grinder to shape metal into the tool shape desired, being careful not to get the metal hot. Keep a can of water near you and dunk the tool occasionally, since an overheated tool will not hold an edge. If overheating does occur, or if you need to heat the tool for bending, it may be tempered again by heating the tool cherry-red and quenching in cold water.
Practically every book written on wood carving has a chapter on sharpening, and rightly so, for this is the most important thing the beginner needs to know. Sharpening is a science in itself, not difficult to learn, although it does take time and patience. We will go over the process briefly, so as not to confuse the reader with too much detail. If you know an experienced tool sharpener, watching him at work is a good way to learn the method.
To begin, you will need a Carborundum stone with coarse and fine sides, a hard Arkansas stone (a hard Arkansas slipstone will be needed for the inside of the v-tool) and a piece of smooth cowhide for stropping your tools (see Fig. 1). Any size cowhide will do, but I use a piece two inches wide by twelve inches long. For ease in using, the cowhide may be glued onto a piece of wood, or you may want to use a razor strop if one is available. It is up to the individual whether he or she wants to use honing compound on the leather. Personally, I prefer the use of a fine abrasive; jewelers rouge will work as well if a compound isnt available.
Font size:
Interval:
Bookmark:
Similar books «Carving Figure Caricatures in the Ozark Style»
Look at similar books to Carving Figure Caricatures in the Ozark Style. We have selected literature similar in name and meaning in the hope of providing readers with more options to find new, interesting, not yet read works.
Discussion, reviews of the book Carving Figure Caricatures in the Ozark Style and just readers' own opinions. Leave your comments, write what you think about the work, its meaning or the main characters. Specify what exactly you liked and what you didn't like, and why you think so.