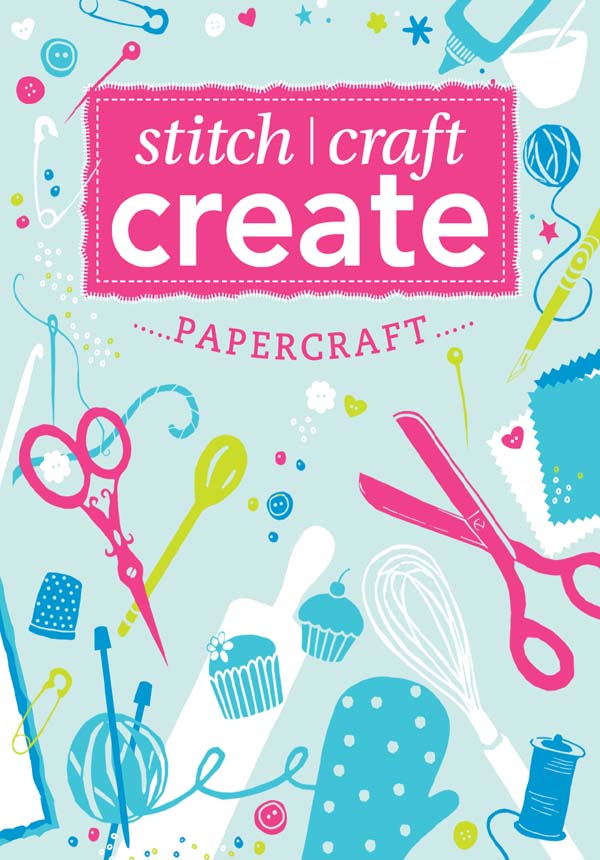
Various - Stitch, Craft, Create: Papercraft: 13 Quick & Easy Papercraft Projects
Here you can read online Various - Stitch, Craft, Create: Papercraft: 13 Quick & Easy Papercraft Projects full text of the book (entire story) in english for free. Download pdf and epub, get meaning, cover and reviews about this ebook. year: 2012, publisher: F+W Media, genre: Home and family. Description of the work, (preface) as well as reviews are available. Best literature library LitArk.com created for fans of good reading and offers a wide selection of genres:
Romance novel
Science fiction
Adventure
Detective
Science
History
Home and family
Prose
Art
Politics
Computer
Non-fiction
Religion
Business
Children
Humor
Choose a favorite category and find really read worthwhile books. Enjoy immersion in the world of imagination, feel the emotions of the characters or learn something new for yourself, make an fascinating discovery.
- Book:Stitch, Craft, Create: Papercraft: 13 Quick & Easy Papercraft Projects
- Author:
- Publisher:F+W Media
- Genre:
- Year:2012
- Rating:4 / 5
- Favourites:Add to favourites
- Your mark:
Stitch, Craft, Create: Papercraft: 13 Quick & Easy Papercraft Projects: summary, description and annotation
We offer to read an annotation, description, summary or preface (depends on what the author of the book "Stitch, Craft, Create: Papercraft: 13 Quick & Easy Papercraft Projects" wrote himself). If you haven't found the necessary information about the book — write in the comments, we will try to find it.
Want to try your hand at making gorgeous homemade goodies? Then unleash the crafter within you with this collection of all-new papercraft projects! With simple step-by-steps, these quick makes ensure fast results.
Various: author's other books
Who wrote Stitch, Craft, Create: Papercraft: 13 Quick & Easy Papercraft Projects? Find out the surname, the name of the author of the book and a list of all author's works by series.


Stitch, Craft, Create: Papercraft: 13 Quick & Easy Papercraft Projects — read online for free the complete book (whole text) full work
Below is the text of the book, divided by pages. System saving the place of the last page read, allows you to conveniently read the book "Stitch, Craft, Create: Papercraft: 13 Quick & Easy Papercraft Projects" online for free, without having to search again every time where you left off. Put a bookmark, and you can go to the page where you finished reading at any time.
Font size:
Interval:
Bookmark:

Various Authors
![]()
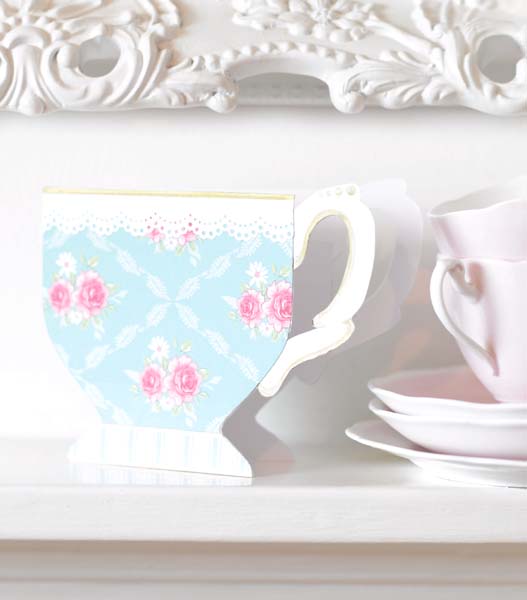
You Will Need:
Stiff white card
Patterned paper, Tilda Summer Blues
Decorative edge punch, Martha Stewart doily lace
White paper
Glue stick
Gold pen
1. Using the template, cut out the teacup design from thick white card with a craft knife. Fold the card in half down the centre.
2. Cut out a piece of floral patterned paper following the bowl section of the teacup template and glue onto the white folded card.
3. Cut out a piece of striped paper following the lower portion of the template and glue in place.
4. Use the edge punch to cut a scalloped strip 2cm (in) deep along the edge of the white paper. Ensure that your strip is long enough to cover the width of the cup.
5. Glue the white paper to the top of the card and trim the edges to fit. Draw decorative details on the top rim, base and handle with a gold pen.
6. If desired, repeat steps 25 to decorate the back of the card in the same way.
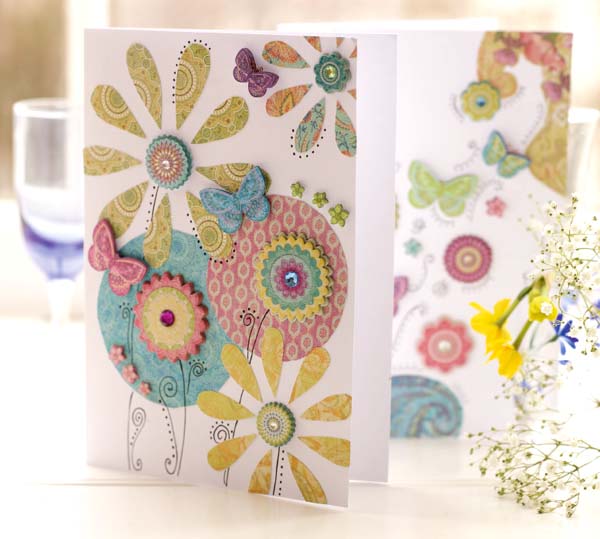
You Will Need:
A4 (US letter) white cards and envelopes
Patterned paper, K & Company
Flower card toppers, K & Company
Glue stick
1. Fold the pre-folded card from the card pack, choosing either white or cream.
2. Select pieces of patterned paper and carefully cut shapes to fit neatly against the edge of the card; stick down. Next select your circular toppers and stick onto the card and over the top of the patterned paper.
3. Select your butterfly toppers and stick these onto the card and patterned paper.
4. Using a fine line black pen, or alternatively a gold or silver pen, draw onto the card to help to bring the pattern to life. (You can draw very lightly onto the card first in pencil if you like.)
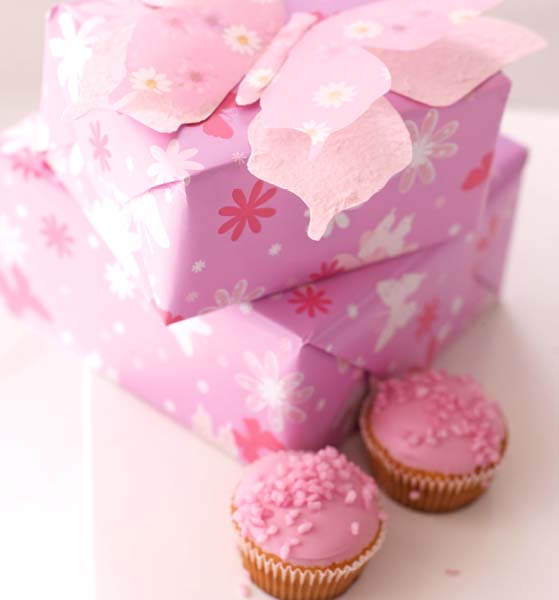
You Will Need:
Pastel paper
Pastel vellum
Sticky foam pads
Champagne ultra fine glitter (optional)
1. Print out or trace the two butterfly templates. Draw around the butterfly templates onto the pastel paper and the pastel vellum and cut out.
2. Adhere a foam pad under the smaller butterflys body.
3. Stick the smaller butterfly on top of the larger butterfly, making sure that the wings are left unstuck.
4. Adhere the double butterfly to the present with sticky foam pads for dimensional effect. Add glitter for extra sparkle!
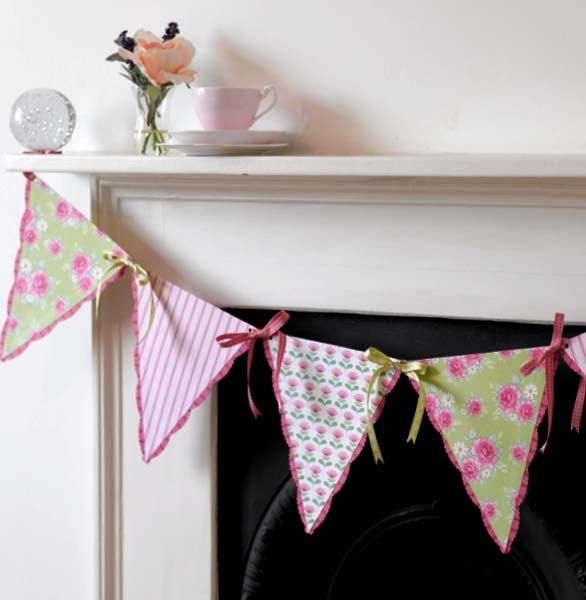
You Will Need:
Patterned paper, Tilda Fruit Garden
Decorative ribbons, Tilda Fruit Garden
Decorative edge punch, Martha Stewart double scallop
Glue stick
Hole punch
1. Using the template, cut two triangles for each bunting flag from co-ordinating patterned papers. The more triangles you choose to make, the longer your bunting will be.
2. Cut strips of striped dark pink paper 2.5cm (1in) wide. You will need four strips for each of your triangles. Punch the strips with a scallop border punch to create a decorative edge. Glue two strips wrong sides together to make them double-sided.
3. Glue one strip to each side of a triangle on the wrong side of the paper. The scalloped edge should overhang the edge of the triangle by about 1cm (in). Glue the matching triangle of patterned paper over the glued edges of the strips to cover them up and create a double-sided bunting flag. Repeat for the remaining paper triangles and strips.
4. Use a hole punch to cut out one hole on either side of the top edge of your bunting flags.
5. Cut lengths of ribbon 60cm (23in) long. Thread a length of ribbon through the right-hand hole of one bunting flag, from the back to the front. Put the other end through the left-hand hole of the next bunting flag and tie the two ends together in a bow.
6. Trim the ends of the ribbon so that they are even, creating an inverted V-shape. Continue in this way to add more flags until your bunting is the desired length.
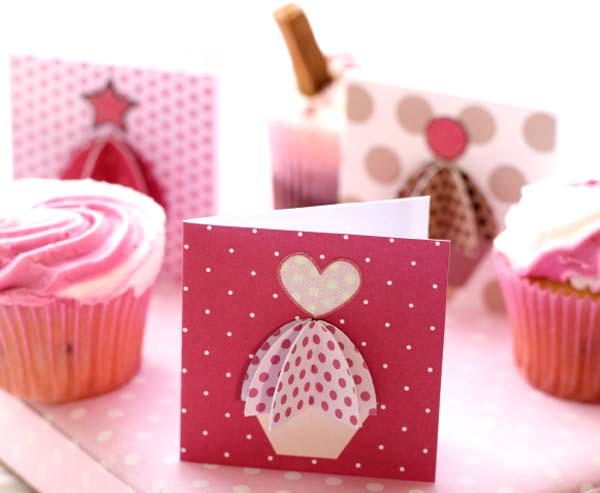
You Will Need:
Pearlescent card
Patterned card and cupcake card toppers
Glue stick
1. Cut a rectangle measuring 7.5cm 15cm (3in 6in) from your chosen background card and fold in half.
2. Choose your papers for the cupcake and for the cupcakecase. Cut out one case piece and four cake pieces from your selected papers using the templates. Fold each of the four cake pieces in half horizontally.
3. Take one folded cake piece and glue another folded piece to it, aligning the back of each half. Continue to attach the remaining cake pieces in the same way until you have a concertina semicircle shape, but do not glue the last two pieces together.
4. Flatten the concertina so that you have one semicircle shape with a front and back.
5. Glue the case piece to the background card. Stick the back of the flattened concertina cake piece to the card, overlapping the case slightly.
6. Choose a topper and glue on top of the cake design. Gently pull the layers of the concertina cake piece out to create a dimensional shape. This can be flattened again for posting.
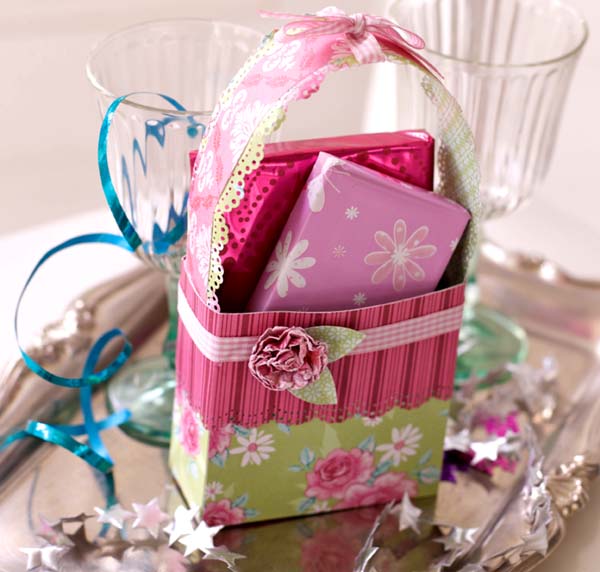
You Will Need:
Patterned paper, Tilda Fruit Garden
Checked satin ribbon,Tilda Pink/White
Decorative edge punch, Martha Stewart doily lace
Scalloped circle punch ,Martha Stewart Punch All Over The Page
Brads
Double-sided tape and glue stick
1. From green patterned paper, cut a strip measuring 30cm 8cm (11in 3in) and two squares measuring 10cm 10cm (3in 3in). Score the strip 2cm (in) in from each edge and fold. Score every 10cm (3in) and fold. Cut notches and fold up to attach to the squares by gluing tabs to the box sides.
2. To make the handle cut a strip of green paper measuring 5.5cm 30cm (2in 11in).
3. Punch the edges of the handle strip using the decorative edge punch and add a strip of pink patterned paper along the centre measuring 2.5cm 30cm (1in 11in). Attach to the inside of the bag.
Font size:
Interval:
Bookmark:
Similar books «Stitch, Craft, Create: Papercraft: 13 Quick & Easy Papercraft Projects»
Look at similar books to Stitch, Craft, Create: Papercraft: 13 Quick & Easy Papercraft Projects. We have selected literature similar in name and meaning in the hope of providing readers with more options to find new, interesting, not yet read works.
Discussion, reviews of the book Stitch, Craft, Create: Papercraft: 13 Quick & Easy Papercraft Projects and just readers' own opinions. Leave your comments, write what you think about the work, its meaning or the main characters. Specify what exactly you liked and what you didn't like, and why you think so.