Mollie Makes - Mollie Makes: Papercraft
Here you can read online Mollie Makes - Mollie Makes: Papercraft full text of the book (entire story) in english for free. Download pdf and epub, get meaning, cover and reviews about this ebook. year: 2015, publisher: HarperCollins Publishers, genre: Home and family. Description of the work, (preface) as well as reviews are available. Best literature library LitArk.com created for fans of good reading and offers a wide selection of genres:
Romance novel
Science fiction
Adventure
Detective
Science
History
Home and family
Prose
Art
Politics
Computer
Non-fiction
Religion
Business
Children
Humor
Choose a favorite category and find really read worthwhile books. Enjoy immersion in the world of imagination, feel the emotions of the characters or learn something new for yourself, make an fascinating discovery.

- Book:Mollie Makes: Papercraft
- Author:
- Publisher:HarperCollins Publishers
- Genre:
- Year:2015
- Rating:3 / 5
- Favourites:Add to favourites
- Your mark:
Mollie Makes: Papercraft: summary, description and annotation
We offer to read an annotation, description, summary or preface (depends on what the author of the book "Mollie Makes: Papercraft" wrote himself). If you haven't found the necessary information about the book — write in the comments, we will try to find it.
Mollie Makes: author's other books
Who wrote Mollie Makes: Papercraft? Find out the surname, the name of the author of the book and a list of all author's works by series.


![Marcia Joy Miller - Origami for Busy People: 27 Original On-The-Go Projects [Origami Book, 48 Papers, 27 Projects]](/uploads/posts/book/151502/thumbs/marcia-joy-miller-origami-for-busy-people-27.jpg)

Mollie Makes: Papercraft — read online for free the complete book (whole text) full work
Below is the text of the book, divided by pages. System saving the place of the last page read, allows you to conveniently read the book "Mollie Makes: Papercraft" online for free, without having to search again every time where you left off. Put a bookmark, and you can go to the page where you finished reading at any time.
Font size:
Interval:
Bookmark:

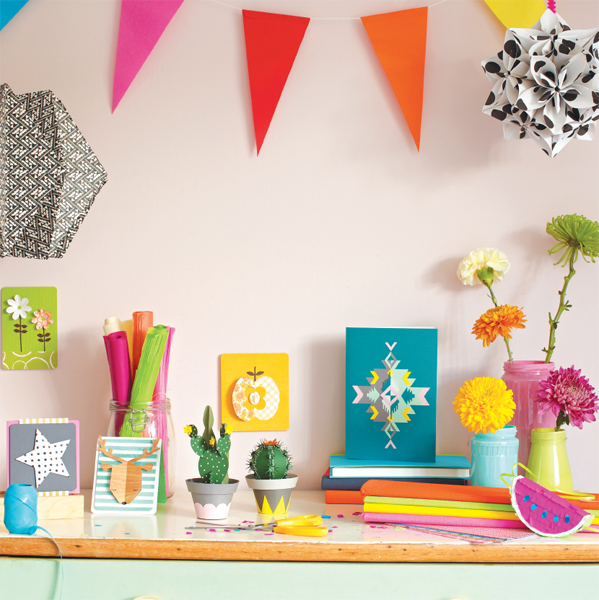


Paper. Its often our first crafty love. We graduate from scribbling all over it, gluing glitter across it and folding it into aeroplanes to developing a life-long appreciation for stunning stationery, stickers and beautifully-finished prints. Its tactile, malleable and versatile well show you on these pretty pages how you can use this civilisation-building material to make everything from jewellery to lampshades.
The techniques open to you when youre working with paper are vast and weve covered a huge selection here, from origami to scrapbooking, cardmaking to stamping. Youll also find papier mch, quilling, paper-cutting and stitching being used to create beautiful, modern pieces you can give as gifts or keep for yourself. Far from flimsy and solely decorative, let our designers demonstrate how paper can be durable, strong and practical too.
Turn the page to get started and be surprised at what you can create with sheets, leaves and strips!

Lara Watson
Editor, Mollie Makes
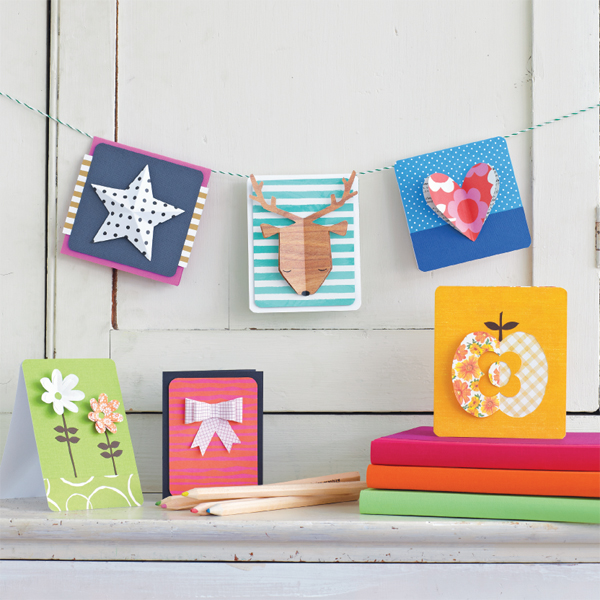
| Get to grips with basic cutting, scoring and folding techniques to make this simple set of dimensional greetings cards. The designs are adaptable to suit just about any occasion, and you can also customise colours and patterns, or add a message, so each finished card is perfectly tailored to the recipient. |
Sheets of thin card
Plain and patterned papers
Adhesives: foam mounting pads, glue stick and PVA glue
Craft knife, cutting mat and metal ruler
Scissors, ruler and pencil
Bone folder (optional)
Corner-rounder punch (optional)
Heart card: 10 x 10cm (4 x 4in)
Apple card: 12.5 x 11cm (4 x 4in)
Star card: 11 x 11cm (4 x 4in)
Bow card: 8.5 x 11cm (3 x 4in)
Flower card: 9 x 13cm (3 x 5in)
Stag card: 10 x 12cm (4 x 4in)
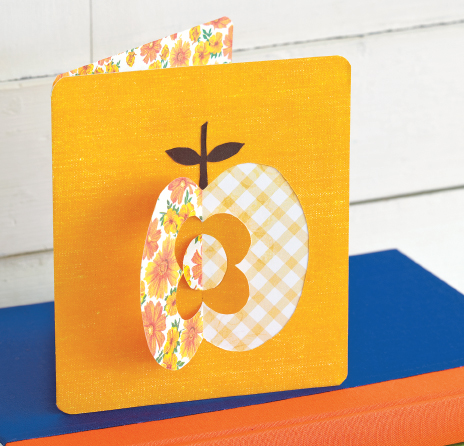
To make the apple card, a double-sided sheet of patterned card is required. If you dont have anything suitable in your paper stash, you can simply stick two contrasting sheets of paper together, back to back.
If you dont have a corner-rounder punch, use a small coin to round off the corners of the base cards: place the coin in each corner in turn, draw around it with a pencil, then cut around the marked curves.
KIRSTY NEALE

Kirsty is a designer-maker and author based in London. She enjoys working with fabric, paper, pattern and illustration, and she is very detail-focussed (which is just a nice way of saying obsessive). She has written several craft books and blogs at www.kirstyneale.co.uk
{01} Prepare and decorate base card
Cut a 21 x 10.5cm (8 x 4in) piece of card and fold it in half. Cover the card front with patterned paper. With the folded edge at the top, add a strip of plain paper along the bottom edge of the card front. Round the corners.
{02} Prepare the heart motif
Copy the heart onto two contrasting pieces of paper and cut out. Score and fold along the centre of each heart as marked by the dotted line. Using a toothpick, spread a thin line of PVA glue along the creased fold at the back of one of the hearts. Press the heart glue-side down on top of the second heart, taking care to line up the folds. Allow the glue to dry for a few minutes before proceeding with step 3.
{03} Finish the card
Working on the back of your joined hearts, apply a thin line of glue to the creased fold and then press the joined heart motif glue-side down onto the centre front of the base card. When the glue is completely dry, gently fold the sides of each heart upwards, away from the background, to create a simple but effective 3D look.

{01} Prepare base card
Cut a 22 x 12.5cm (8 x 4in) piece of double-sided card and fold it in half. Round the corners.
{02} Prepare the apple motif
With the folded edge at the left-hand side, measure the halfway point along the top edge of the base card and lightly mark the vertical with a pencil. Copy the apple onto the card front in pencil, aligning the straight edge of the template with the marked vertical line and positioning it approximately 2cm (in) from the bottom edge of the base card.
Open out the base card and, following the template markings, use a craft knife to carefully cut along each of the solid lines on the marked apple design. Score along the dotted centre line, then fold over the two shaded sections (see template). Refold the base card.
{03} Finish the card
Working on the card front, stick a contrasting piece of paper behind the apple cut-out. Copy the stalk template onto brown paper and cut out. Glue the stalk to the top of the apple.
note
For a fun Christmas card, cut a nose from red paper and mount Rudolph onto a festive print background paper. You could also use alphabet stickers or a printed sentiment to add a greeting to the front (or inside) of your finished cards.
{01} Prepare and decorate base card
Cut a 22 x 11cm (8 x 4in) piece of card and fold it in half to give you your base card.
Cut a contrasting piece of card 10cm (4in) square, and round the corners. Cut two narrow strips of card 7.5cm (3in) tall; glue one strip behind each side edge of the contrasting card square. Fix this panel to the front of the base card using foam mounting pads.
{02} Prepare the star motif
Copy the star onto thin, patterned card, and cut out. Score along the dotted lines as marked on the template. Fold the score lines: the folds going out to each point should be mountain folds (pointing upwards), and those in-between should be valley folds (pointing downwards).
Font size:
Interval:
Bookmark:
Similar books «Mollie Makes: Papercraft»
Look at similar books to Mollie Makes: Papercraft. We have selected literature similar in name and meaning in the hope of providing readers with more options to find new, interesting, not yet read works.
Discussion, reviews of the book Mollie Makes: Papercraft and just readers' own opinions. Leave your comments, write what you think about the work, its meaning or the main characters. Specify what exactly you liked and what you didn't like, and why you think so.