Im always excited by the endless possibilities presented by an uncut length of beautiful fabric. Its that sense of it just waiting to be transformed into something unique with some clever cutting and stitching. Whether youre making a wardrobe update, a project for the home, or a handcrafted gift for family and friends, nothing beats that feeling of creating something from just a few pieces of material.
This crafty collection features 20 easy projects to help you start sewing, whatever your level of experience. From a summer dress and a pattern-free kimono to a snuggly quilt and his and hers hot water bottle covers, theres plenty to inspire you for every season.
Sewings one of the crafts Im still a beginner at, so Ill be learning along with you. With over 80 techniques explained and demonstrated in these makes, well soon be working those sewing machines like a pro!
MATERIALS
Felt: dark grey, light grey, baby pink, candy pink, white and pistachio green
Embroidery or sewing threads in shades to match felt colours
Small amount of polyester stuffing
1cm (in) wide satin ribbon in shades to match your felt colours
Pins and small, sharp scissors
Sharp embroidery needle
SIZE
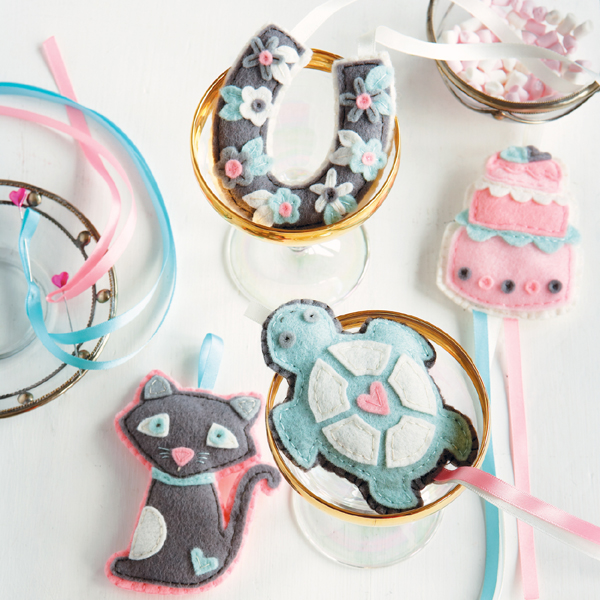
Cake: 6 x 8cm (2 x 3in)
Turtle: 7.5 x 9cm (3 x 3in)
Cat: 8 x 9.5cm (3 x 3in)
Horseshoe: 8 x 8cm (3 x 3in)
FEATURED TECHNIQUES
Stitching by hand: backstitch []
BEFORE YOU BEGIN
Felt is a great place to start your sewing adventures as the edges of the fabric do not fray when cut. Use a medium-density felt for this project you could change the colours of the charms to match your wedding colour scheme.
If you dont have any polyester stuffing, cotton wool will work just as well.

| Sewing Story It is a tradition to give the bride a token to hold on her wedding day, to wish her well and to bestow her with good luck. Different cultures have different good luck symbols for example, in China, a turtle represents wealth, longevity and good health and Ive included three more designs for you to choose from. Charlie Moorby |
METHOD
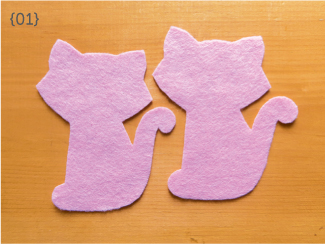
{01} Cut your backing pieces
Start by cutting out two identical backing shapes for the base of each of the charms using the templates provided on . The backing shape is the outer outline on each of the templates and these should be cut from a contrasting felt colour so that the appliqu really stands out: candy pink has been used for the cat, dark grey for the turtle, and white for the cake and horseshoe.
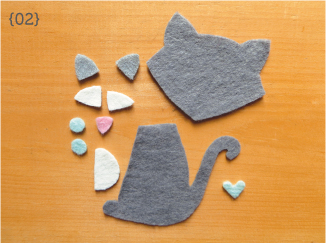
{02} Cut the appliqu pieces
Using the templates provided (see to guide you, cut out all the other pieces of felt that you will need to complete each charm appliqu. Use small sharp scissors to cut the intricate pieces as neatly as possible.
{03} Layer and stitch the details onto the appliqu pieces
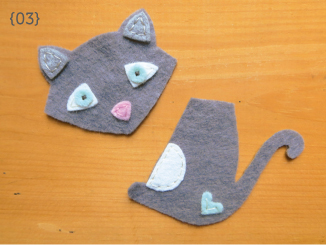
Now begin layering and stitching the small details onto the appliqu pieces, such as the ears, eyes and nose onto the cats head, and the belly and heart onto the cats body. Use thread to match the felt piece being sewn on, working small backstitches with a sharp embroidery needle. Sew on very small pieces, like the cats pupils, with tiny cross stitches.
{04} Join the appliqu pieces to a backing shape
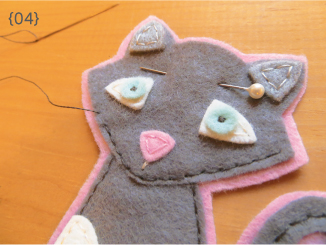
Pin and stitch the appliqu pieces onto one of the backing shapes for your chosen charm. Start stitching around the edge of the appliqu pieces to secure them in place, working your backstitches close to the edge to mirror the outline of the design. Add any additional stitched details such as the small stitch beneath the cats nose for the mouth, for example, and the progressively longer stitches at either side of the nose for the whiskers.
Note
Small appliqu details, such as the cats and turtles eyes and the flower centres, are held in place with tiny cross stitches, but you could use French knots if you prefer.
{05} Join the front and back
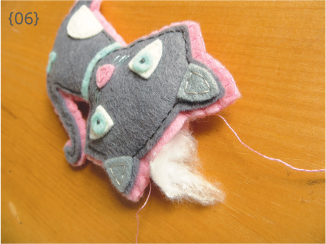
Once all the stitching on the front piece is complete, pin it to the remaining backing piece, taking care to line up the pieces as neatly as possible. Blanket stitch around the edge of the charm, leaving a gap for stuffing at the top of the design.
{06} Fill with stuffing
Gently fill the charm with a little polyester stuffing (or cotton wool) but do not overstuff it, as the stuffing may become visible through the blanket stitch edge.
{07} Make the hanging loop
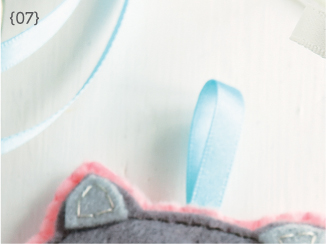
Make a small hanging loop from a short length of ribbon, slip it into the stuffing gap and stitch the opening closed. For the horseshoe charm, both of the top edges are left open for stuffing, and a longer length of ribbon is inserted into each opening to make a handle for carrying.

