
PAINTING
Garden
Birds
WITH
Sherry C. Nelson
MDA

NORTH LIGHT BOOKS
Cincinnati, Ohio
DEDICATION
To my bird-painting, bird-watching students:
Your enthusiasm for my work and your excitement
about painting birds make it all worthwhile.
You inspire me to keep learning too.
Contents
Basic Mixing
Foliage Mixes
Flowers, Fruit, Leaves and Branches
Head and Body Feathers

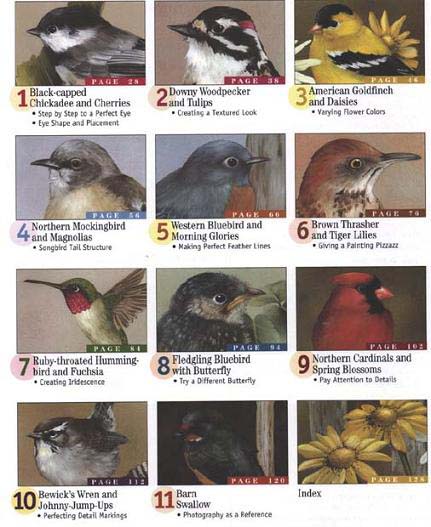
Projects: Paint 11 Beautiful Birds with Sherry
Materials
O il paints are easy to use, and they last forever since you'll use very small amounts of paint for any one painting. You can purchase inexpensive paints, but they contain less pigment and more oil, so you'll end up getting less for your money. Quality paints are a good investment.
Always buy the best brushes you can afford. If you are a beginning painter and you attempt these projects with poor quality brushes, you may blame yourself if your paintings don't turn out right. Using good brushes from the start, anyone can succeed with my method.
If you have painted in oils before, you no doubt have many of the supplies you need. If you have not, begin with just a few of your favorite projects from this book to minimize the expense, but always start with the best materials you can afford.
Basic Supplies
Palette Pad. A 9 x 12 (22.9cm 30.5cm) disposable strip palette for oils is best.
Palette Knife. A flat painting knife is best for mixing in drier and applying thinned oil paint on backgrounds for antiquing.
Oil Paints. I used a total of twenty colors for all the projects in this book: Titanium White, Ivory Black, Raw Umber, Raw Sienna, Burnt Sienna, Burnt Umber, Prima Gray, Cerulean Blue, Indigo, Prussian Blue, Cadmium Scarlet, Winsor Red, Alizarin Crimson, Permanent Magenta, Purple Madder Alizarin, Yellow Ochre, Cadmium Lemon, Cadmium Yellow Pale, Cadmium Yellow and Sap Green. You may certainly substitute colors from your own stock. Just check them against what I used and make the mixes as close as possible.
Cobalt Siccative (or Cobalt Drier). This product is optional, but I would certainly encourage you to try it. When used as I do, your painting will be dry overnightyet it leaves the palette workable until you are finished with the painting.
Brushes. Red sable brights (short-bristled flat brushes) in sizes 2, 4, 6 and 8. Red sable round (a skinny, pointed brush), in size 0 or 1, for detailing.
Artist's Odorless Thinner and a tiny capped jar to pour a little into when you paint. I use an empty Carmex lip balm jar yes, that small! and I keep it capped until I need it.
Masonite Panels in the sizes suggested for each project. You can purchase large sheets and cut it yourself, as I do, or you can have it cut at the lumberyard. Use the medium-priced  (.3cm) thick Masonite. Try not to buy the really dark, nearly black hardboard. It's made more waterproof, and the slicker surface sometimes makes painting difficult.
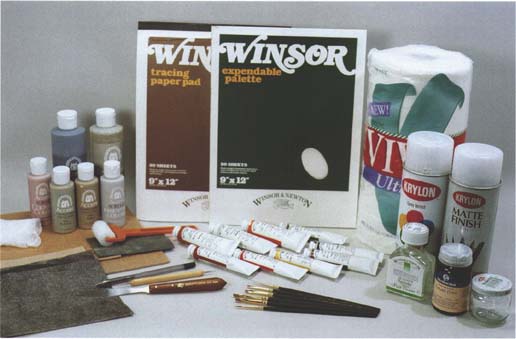
Check the materials for each project before you begin. Purchase supplies you'll need and add to your collection gradually. Always buy the best you can afford. In the long run, quality supplies pay for themselves.
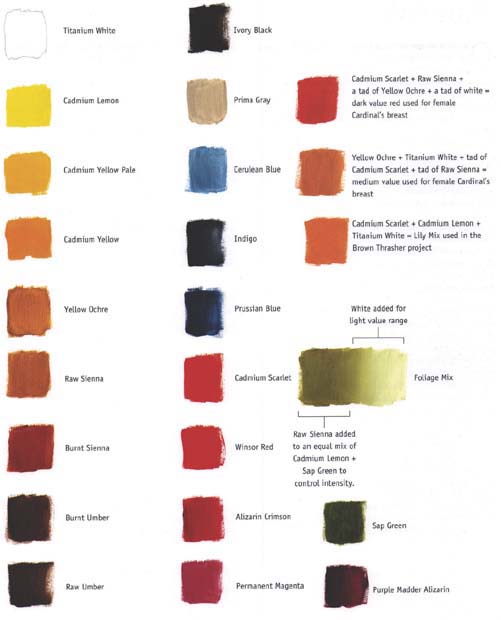
Oil Colors Used for the Projects
These color samples will help you determine the oil colors you'll need for each project. Included are swatches of some of the more difficult mixes so you can get just the right color.
Artist's Graphite Paper for transferring the design. You'll need a sheet of dark gray and a sheet of white. Buy it at an art supply store in large sheetsnot in rolls from a craft store. The craft papers will not work as well and sometimes are not thinner soluble.
Tracing Paper. A 9 x 12 (22.9cm x 30.5cm) pad will work fine.
Stylus. You can use a worn-out ballpoint pen or the end of a brush handle for etching feather lines back into the wet paint.
Ballpoint Pen, not a pencil, for transferring designs.
Paper Towels. Soft and very smooth. Buy the cheap ones for the kitchen; get the really good ones to wipe your brushes. It'll save a lot of wear on those wonderful little brushes.
Spray Varnish. Final finish for the completed paintings.
Materials for Background Preparation
If you've not painted before, you may wish to simplify your background preparation and concentrate on learning the basic painting skills. As you complete more projects, you may find you want to get a bit more colorful and elaborate. When you do, just purchase a few more colors of acrylic.
These are the basics:
Masonite Panels.
Sponge Roller. I apply all my acrylic background paint with 2 (5.1cm) foam rollers. They give a slightly textured, beautifully even surface for painting.
Acrylic Paints. You may purchase one or two neutral colors and add others for specific projects as you like. I used Accent colors, but you could substitute other brands. For the projects in this book, I used Light Mushroom, Off White, April Showers, Wicker, Wild Honey, Soft Blue, Light Stoneware Blue, Stoneware Blue, True Purple, Pine Needle Green, Sage, Green Olive, Roseberry, New Leaf, Peaches n Cream, English Marmalade and Pueblo Red.
220-Grit Wet/Dry Sandpaper. It's black, and it's available in packs at the hardware store.
Krylon Matte Finish, #1311. A must. This acrylic matte spray will seal the surface of the background lightly, allowing the oil paints to move easily for blending.
Newspaper to protect your work surface.
Paper Towels. These can be less expensive than your painting towels, since you'll need them just for cleanup.
What Sherry Uses
Compare your supplies to those I use and make any substitutions as close as possible for best results.
Oil Paint. Winsor & Newton Artists' Oils. One color, Prima Gray, is from the Martin F. Weber Co. Prima Oil line.
Brushes. Winsor & Newton Series 710 red sable brights, sizes no. 2, 4, 6 and 8. Winsor & Newton Series 740 red sable rounds, sizes 0 and 1.





 (.3cm) thick Masonite. Try not to buy the really dark, nearly black hardboard. It's made more waterproof, and the slicker surface sometimes makes painting difficult.
