About the Author
The origami designs of Peter Engel are known to paperfolding enthusiasts worldwide. The author of Folding the Universe: Origami from Angelfish to Zen, Engel has been creating original origami designs for over three decades. He has exhibited his origami artwork and sculpture at the Gettysburg College Art Gallery in Pennsylvania, the Asian Art Museum and the de Young Museum in San Francisco, the Carpenter Center for Visual Arts at Harvard University, the American Museum of Natural History in New York City, and Seian University of Art and Design in Otsu, Japan. The recipient of a Fulbright Fellowship and grants from the National Endowment for the Humanities, the Asian Cultural Council, and the Graham Foundation, Engel is a licensed architect in Berkeley, California with a practice specializing in schools, childrens museums, ecological design, and international development. He and his wife Cheryl Perko have two children, Hannah and Gabriel.
Acknowledgments
Thanks to my editor, Wendy Gardner, art director, Wendy Simard, assistant art director Seth Dolinsky, and their colleagues at Hollan Publishing for their hard work, keen judgment, and patience, and to Barbara Llewellyn for skillful drafting of the diagrams and abundant good humor. My parents and brother have encouraged my passion for origami since I was a child, and perhaps only they can appreciate what this art form has meant to me. Finally, I thank my wife, Cheryl, and our children, Hannah and Gabriel, for their unquestioning love and support.
BASIC ORIGAMI SYMBOLS AND FOLDS
Origami diagrams are like a composers score or an architects plans: They are the key to interpreting the design and the means by which the performer or builder realizes the creators intentions. Learning to read folding instructions takes practice, just like learning to follow a musical score. The basic folding procedures and symbols used in these diagrams follow an internationally accepted standard. When you have mastered the ones here, you should be able to follow the instructions in virtually any origami book.
S Y M B O L S
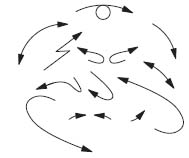
Symbols consist of two types: arrows and lines. There are many types of arrows, whose expressive shapes suggest the motion of the paper.
A couple of arrows have specific meanings. The top arrow means turn the paper over. The bottom arrow, with two heads, means fold and unfold.
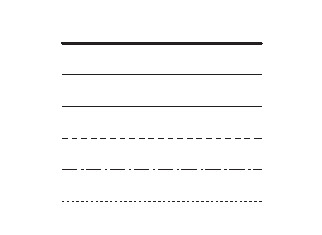
There are six types of lines used in this book:
A thick line shows the outline of the diagram against the page.
A medium line represents an edge of the paper, either the original edge or one produced by folding.
A thin line represents a crease in the paper that was formed in an earlier step.
A dashed line represents a valley-fold.
A dotted and dashed line represents a mountain-fold.
A dotted line represents a fold hidden from view or, occasionally, a fold about to be formed.
B A S I C F O L D S
A piece of paper has two sides. Thus, it can be folded in either of two directions. Each of these folds has a name: valley-fold and mountain-fold. Every origami folding procedure is a valley-fold, a mountain-fold, or a combination of valley- and mountain-folds.
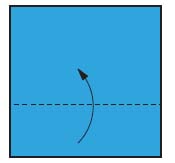
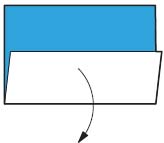
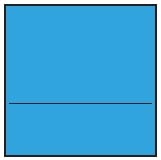
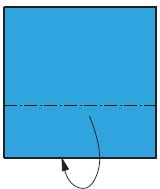
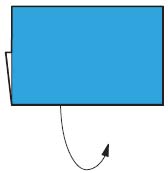
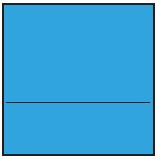
Forming a valley-fold
Swing the lower edge upward to produce a valley-fold. If you swing the lower edge back down, a thin line indicates where the paper has been creased.
Forming a mountain-fold:
Swing the lower edge underneath to produce a mountain-fold. If you swing the lower edge back, a thin line indicates where the paper has been creased.
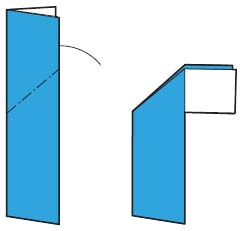
A reverse-fold combines valley-folds and mountain-folds. In a reverse-fold, two or more layers of paper are folded together symmetrically along a single crease. The reverse-fold comes in two types: inside reverse-fold (the more common) and outside reverse-fold.
Forming an inside reverse-fold:
Crease firmly with either a mountain- or a valley-fold to form the line of the reverse-fold. Spread the open edges of the paper and turn the top portion inside-out by pushing inward on the crease of the mountain- or valley-fold. Flatten to form an inside reverse-fold.
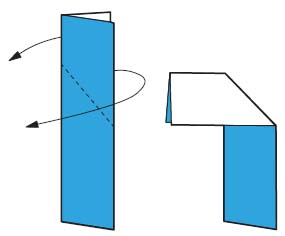
Forming an outside reverse-fold:
Crease firmly with either a mountain- or a valley-fold to form the line of the reverse-fold. Spread the open edges of the paper and turn the top portion outside-in. Flatten to form an outside reverse-fold.
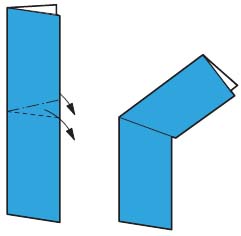
In a crimp-fold, a pair of valley-folds and mountain-folds converges at one point. The creases on the front and rear layers are mirror images of each other.
Forming a crimp-fold:
Valley-fold and mountain-fold the front and back. Flatten to form a crimp-fold.
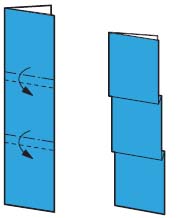
In a pleat-fold, a mountain- and a valley-fold are parallel. A pleat can be performed on any number of layers. They are folded together as one.
Forming a pleat-fold:
Valley-fold and mountain-fold the front and back. Flatten to form a pleat-fold.
One other procedure merits special attention. A sink-fold is a kind of 3-D reverse-fold. In a sink-fold, a portion of the middle of the paper is reversed back into the paper (and may be reversed back out again, as desired).


