BurdaStyle Patterns 101
If youve never used a BurdaStyle pattern before or you need a refresher course, this guide will help make your garments a sure success. BurdaStyle patterns are slightly different than those from other publishers, so read through these instructions thoroughly before you begin your project.
Using BurdaStyle PatternsStep by Step
Follow the steps below to ensure the best results when working with BurdaStyle patterns.
Step 1: Measure yourself and determine your BurdaStyle pattern size
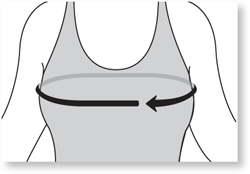
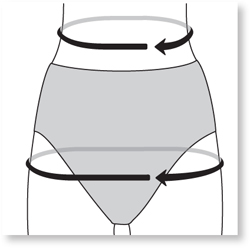
For the best fit, its important to take precise measurements. Remember that your BurdaStyle size will most likely be different from your regular store-bought clothing size. Measure your body while wearing underwear or close-fitting garments, and have someone assist you if needed. Use a flexible measuring tape to measure around your body, ensuring the tape is taut, but not tight, and parallel to the floor. Stand upright with a relaxed posture and breathe normally while you take the standard body measurements for garment sewing. Start by measuring your bust, waist, and hips.
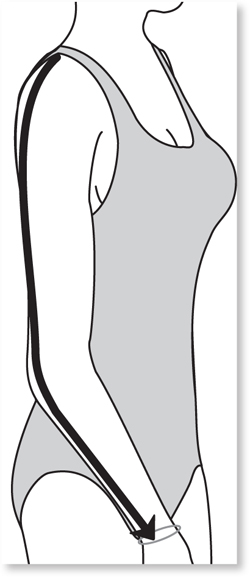
Arm length: With your arm slightly bent, measure from the tip of your shoulder over the elbow to the natural wrist line.
Bust: Measure around the fullest part of your bust.
Waist: Measure around your natural waist, the narrowest part.
Hips: Measure horizontally around the fullest part of your bottom and upper thighs.
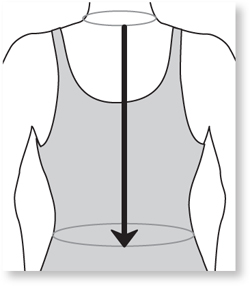
Back waist length: Measure from the base of your neck to the natural waistline.
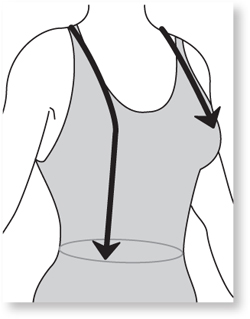
Front waist length: Measure from the side base of your neck over the apex of your bust to the natural waistline.
Bust depth: Measure from the side base of your neck to the apex of the bust.
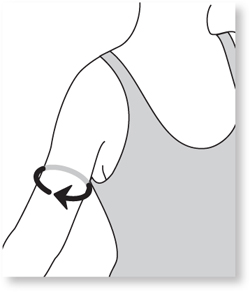
Upper arm circumference: Measure around the fullest part of your upper arm.
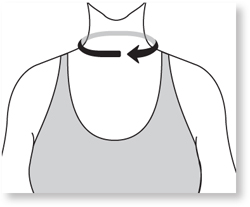
Neck circumference: Measure the circumference at the base of your neck and above the collarbone.
Step 2: Purchase your fabric and notions
The pattern instructions will tell you how much fabric and what notions to buy. The amount of fabric needed is based on the width of the fabric, the size youre making, and whether or not the fabric has nap. The notions list will include details about finishing items for the garment, such as the number and size of buttons, the zipper length and type, the elastic width and length, closures, and so on.
Compare your body measurements to the BurdaStyle size charts below.
TIP: Circle each of your body measurements on the BurdaStyle size charts. You may want to adjust your pattern to fit a range of sizes across different measured areas of your body.


| Metric Conversion Chart |
|---|
| To Convert | To | Multiply By |
| Inches | Centimeters | 2.54 |
| Centimeters | Inches | 0.4 |
| Feet | Centimeters | 30.5 |
| Centimeters | Feet | 0.03 |
| Yards | Meters | 0.9 |
| Meters | Yards | 1.1 |
Step 3: Cut out the appropriate pattern pieces
The next step is to locate the proper pattern pieces on the pattern insert pages and then cut them out.
Note: The BurdaStyle patterns available on the insert sheets include seam and hem allowances. Standard seam allowances are 58" (1.5 cm) and hems are 158" (4 cm). If these differ, there will be a note on the pattern instructions indicating the new numbers.
Here are some tips for working with the pattern pieces:
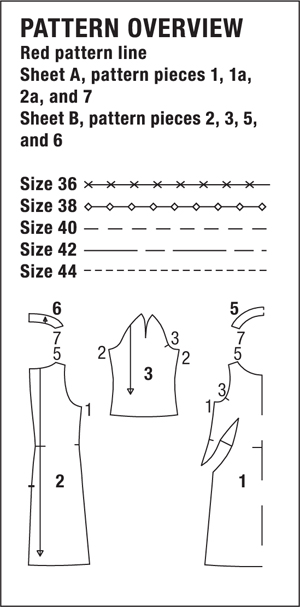
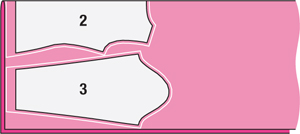
- In each garments pattern overview box (), youll find the color of the pattern line (red, blue, green, or black), the pattern sheet location (AH), the pattern piece numbers, the size outlines, and the schematics of the pattern piece flats.
Figure 1
- To locate the pattern pieces, look for each pattern piece number in the stated color along the edge of the appropriate pattern sheet. For example, if your garment has its pattern in green on sheet C and includes pieces 1 to 7, look along the edges of pattern sheet C to find the number 1 written in green. Once youve found that, use it as your starting point to follow an imaginary line perpendicular to the pattern sheet edge until you point to the green 1 along a pattern piece cutting line. Thats the pattern piece you need. Do the same for the remaining pattern piece numbers.
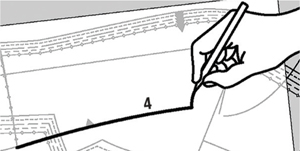
- Trace the pattern pieces onto pattern paper and copy all markings and seam numbers onto your new paper pattern pieces (). Check them against the drawings in the instructions to ensure they were copied correctly and that you have all the pieces needed.
Figure 2
- Once you have the proper pattern pieces, cut them out individually. Then lay them on your garment fabric and cut the fabric accordingly (). Transfer all markings from the pattern pieces to your fabric.
Figure 3
- In some instances, you will draft shapes to make your own small pattern pieces, like bindings, ties, etc. Simply follow the instructions for the dimensions needed and draw them right on the fabric using tailors chalk.
Cutting Made Easy
Youll have greater success, and more fun sewing your own clothes, if you understand these few simple rules about cutting your fabric.
Grainline
The grainline is the direction of the warp threads, which run lengthwise through the fabric. The way your garment drapes depends on cutting your fabric along the correct grainline. When you lay your pattern pieces out on your fabric, make sure the grainline drawn on the pattern is parallel to the selvedges.


