

CONTENTS

ABOUT ME
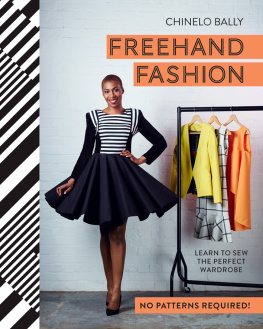
I am a Nigerian-born Brit with an overly healthy appetite for fashion and sewing. I have always loved fashion, but I began my dressmaking journey just four years ago. After buying my first sewing machine and failing woefully at a couple of attempts at off-piste sewing, I decided to go to my aunty, who is a dressmaker, and watch her in the hope of picking up her magic tricks. Her freehand approach appealed to me because I had many ideas in my head and was itching to bring them to fruition! It took me three months to learn the freehand technique, but I was determined and fell passionately in love with the process of dressing myself this way. The seeds of daring to venture into the fashion industry were ahem sown.
I was eager to understand how to make beautiful clothes that fit women of all shapes and sizes and, after only three months of sewing for myself, I began designing and making clothes for family members and friends. I have since made clothes for private clients from all walks of life. In 2014 I took part in the BBCs The Great British Sewing Bee, where I learned so much from the judges and my fellow sewists. It was lovely to be surrounded by like-minded people, and to spend so much time sewing!
This is not your conventional sewing book; if you watched the Sewing Bee, then you will know that I am not a conventional sewist. This book is all about producing beautiful, elegant and stylish garments using the freehand cutting method. Its aimed at anyone with an interest in dressmaking, and especially the growing numbers of young people who are venturing into sewing for the first time. I want to offer beginners a fresh take on home sewing, one that is fashionable and trendy, and I also want to entice seasoned sewists to step away from traditional rules and try the exciting freehand method. I learned this method without any prior knowledge of sewing; before I appeared on the Sewing Bee, I had never used a pattern. This is a technique that everyone can learn, and I look forward to walking you through it, step by step.

ABOUT FREEHAND CUTTING
F reehand cutting is all about marking your measurements directly onto fabric, using simple tools, and developing an understanding of how clothes come together and sit on the contours of the body. It allows you to tailor clothes precisely to your own shape and size no more fiddling around, adjusting commercial patterns to fit!
Although the idea of freehand garment construction intrigues many in the West, this method has been used traditionally and is still used in many of the less developed parts of the world. Fashion varies greatly around the globe and there is a vast array of traditional dress codes. In Africa and Asia many garments are created, if not entirely freehand, with at least some reference to this approach. I am most familiar with the Nigerian freehand method, and although this has coloured my own sewing technique and style aesthetically, I have further developed what I learned to achieve a high-quality and very precise individual fit, with an exceptional standard of finishing both on the inside and outside of the garments.
My book covers key techniques and the drafting, cutting and construction of five basic blocks and then shows you how to adapt them for different designs. It contains a plethora of exciting projects that range from easy to more challenging. For me, sewing isnt just about craftsmanship, its also about design; the silhouettes of the garments we will make are timeless, beautiful shapes that have lasted throughout the history of fashion. We will make beautifully fitted gowns for ultra-glamorous events like a posh party or a prom, flattering tops that ooze femininity, and many more garments that will give your wardrobe a facelift.
MY SEWING ESSENTIALS
N owadays sewing is becoming very hi-tech and gimmicky, but I believe that these new-fangled tools are just candy-coated basics. Before I discovered fancy machine feet, I always did my invisible zips with a standard foot. At one of my workshops recently there was a bit of a panic amongst the students because we only had one concealed zipper foot. I soon calmed them down by inserting the invisible zip with the standard foot. They were dead impressed and Ive added a new party trick to my list!
I digress; the point is that although modern equipment makes life easier, it isnt essential. You dont have to be put off doing a buttonhole because you dont have a buttonhole foot; you can carefully use the zigzag stitch on your machine or do it by hand. You dont even need a seam ripper for unpicking your mistakes; just slide a razor blade carefully between the layers and the job is done far quicker.

MY BASIC TOOL KIT
Sewing machine Iron and ironing board Tape measure Small pair of sharp scissors Large pair of fabric scissors Razor blade or seam ripper Hand sewing needles Pins Fabric marker (I use pencil or chalk) Threads in different colours to match your fabrics
ALSO USEFUL
Ruler Overlocker Pinking shears Inexpensive poly-cotton fabric for making templates Bias binding Fusible interfacing
TECHNIQUES
I truly believe that, once youve mastered threading your machine and sewing in a reasonably straight line, you can tackle pretty much any sewing project you want! There are a few basic things like neatening seams and understitching that will help to give your work a professional-looking edge, as well as a couple of other techniques that I would urge you to get to grips with. Here are my top techniques for successful stitching!
SEAMS
T he majority of seams in this book are very simple just place the pieces to be joined right sides together and sew, taking the seam allowance specified in the project instructions. There is one slightly more specialised seam thats well worth mastering, and thats a French seam. Its commonly found in shirts, and is particularly useful for sheer or lightweight white fabrics, where you dont want the seam allowance to show through when youre wearing the garment, and for lightweight fabrics that fray easily, as all the raw edges of the seam allowances are enclosed. Ive used it in the .
FRENCH SEAM
Place the pieces wrong sides together and sew, taking a 6-mm (-in.) seam allowance. Press the seam open and trim the seam allowance to 3 mm ( in.) from the stitching.

Fold the fabric right sides together along the line of stitching that youve just worked. Pin and stitch a second line of stitching, taking a 1-cm (-in.) seam allowance.
Next page
