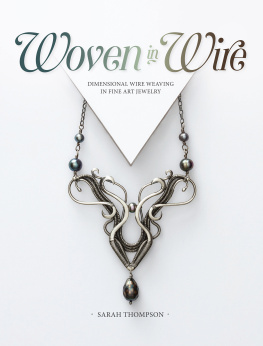
Weaving Techniques for Stunning Jewelry Designs
Sarah Thompson

CONTENTS
Beginner
Intermediate
Advanced
Introduction
My journey in jewelry making began when I received my first stash of beads at age fourteen. I quickly became fixated with learning all I could with this medium and spent many hours haunting the library and local bead store for new books and magazines. As my skills grew, I began to gravitate toward off-loom beadwork. While I loved the diversity and dimensions I could achieve by building layers of beadwork, I wanted to continue to grow and learn other forms of jewelry making as well.
My desire to make more elegant, flowing designs that were both delicate and wearable led to my experiments with wire. I found most traditional wirework too simple. The more complex wirework jewelry that I could find looked freeform, organic, rustic, and bulky, not the precise and refined look I wanted. I also struggled with the wire; it felt awkward and unnatural, which led to frustration.
My breakthrough came in 2005, when I was introduced to Marilyn Moores work for the first time. I instantly fell in love with her beautiful vases made from recycled copper wire. I admired the movement, textures, and sculptural qualities in the woven wire. This was what I was looking for; I saw how I could use these techniques to make the jewelry I had always envisioned.
Over the next five years, I experimented, trying to turn my vision into a reality. My success came when I began melding the same concepts I learned from years of beadwork into wirework. The weave became the peyote stitch. Once I realized this, I found I could manipulate the wire the same way I would if I were beading. I experimented with different wire types and sizes. I pulled ideas from crochet to better handle the wire. I layered the wire together one step at a time to add depth and details.
Many wireworkers use 26-gauge wire as their smallest size; I found that 28- to 30-gauge wire makes weaving more delicate and finely textured. By combining the weaves with shaping, layering, symmetry, and three-dimensional forming, wirework bursts with a whole new level of possibilities.
In 2010, I started teaching. I enjoy giving students a strong foundation for creating their own original designs. The beginning projects in this book focus on the weave to help you practice and become proficient and consistent in your workmanship. As you progress through the book, youll learn more advanced design elements and create more complex projects. By the time you finish, I hope youll feel confident about combining different elements. Have fun experimenting and finding your own unique style.
Materials
Choosing the Right Wire for the Job
Wire comes in a wide range of sizes, shapes, hardnesses, and metals. You can create beautiful work with all types of wire, but working with the right wire will cut down on frustration and result in a more beautifully finished piece.
When it comes to wire, I like to keep it simple. Instead of having round, half-round, and square wire on hand, I choose to work only with round wire. Round wire is very versatile. If I want a flat surface, I hammer it. If I need a section to be a half-round, I file it. I sort my wire gauges into three categories: heavy, medium, and small. Use heavy (14- to 20-gauge) wire to provide structure for bases; it can be shaped, woven, and layered together to create a complex design. Use medium (22- to 26-gauge) wire to add beads into the finished forms, create head pins and links, and wrap briolettesessentially, everything pertaining to embellishments. Use small (28-gauge and smaller) wire to weave and sew the base wires together, adding stability, strength, cohesiveness, and texture to the design.
Because many designs require extreme shaping, the wire must have certain qualities. First, how soft is it? I want the softest, most malleable wire possible. Just because a wire is labeled dead-soft doesnt mean its as soft as I would like. Theres a difference in wire malleability among manufacturers. Second, how quickly does it harden and get brittle? This is particularly important with the smaller gauges because the more you work with wire, the harder it gets. This is called work-hardened. You want to weave without having the wire break every time it gets a kink and to shape heavy-gauge wires with ease. Other qualities include whether the wire can be annealed (heated with a flame so it becomes soft and malleable), hammered, or oxidized, and how nicely the end balls up when torched.
Fine Silver
Also known as pure silver or .999 silver, this is my wire of choice. Its the most malleable, easily shaped into intricate designs. It can be reshaped if needed and anneals wonderfully. Fine silver does not get as brittle as sterling silver does, so the 28-gauge wire wont break as frequently when used. The finished weave also compacts better with less spring to it. Fine silver melts easily, creating smooth balls on the tips of the wire. The best part is that the wire doesnt need to be pickled after torching. Having young children at home, I prefer to avoid caustic chemicals. This wire is also slow to oxidize, so it wont require frequent polishing.
Sterling Silver
I rarely use sterling silver. Once you start working with this wire, it quickly starts to harden, making it difficult to finish intricate, three-dimensional shaping. It also means more breakage while weaving. Its difficult to reshape after a mistake. It doesnt torch as easily as fine silver does; the balls on the end of the wire tend to be slightly pitted. After torching, youll have to pickle the wire to remove the firescale. Sterling silver can be annealed, but this will darken the wire and can be cumbersome to do when the wires are woven together. You can weave with 28-gauge wire, but the weave tends to spring up and doesnt compact nicely. I use it for base wires when I want a structurally sound base such as a bracelet. I also try to keep my design simpler when using sterling silver. Also, the copper content in sterling silver means it oxidizes much more quickly than fine silver does.


