7777 W. Bluemound Rd. P.O. Box 13819 Milwaukee, WI 53213
In Australia Contact:
Hal Leonard Australia Pty. Ltd.
4 Lentara Court
Cheltenham, Victoria, 3192 Australia
For all works contained herein:
Unauthorized copying, arranging, adapting, recording, Internet posting,
public performance, or other distribution of the printed or recorded music
in this publication is an infringement of copyright.
Infringers are liable under the law.
Visit Hal Leonard Online at
www.halleonard.com
Table of Contents
Chapter 1
Getting Started
Parts of the Bass
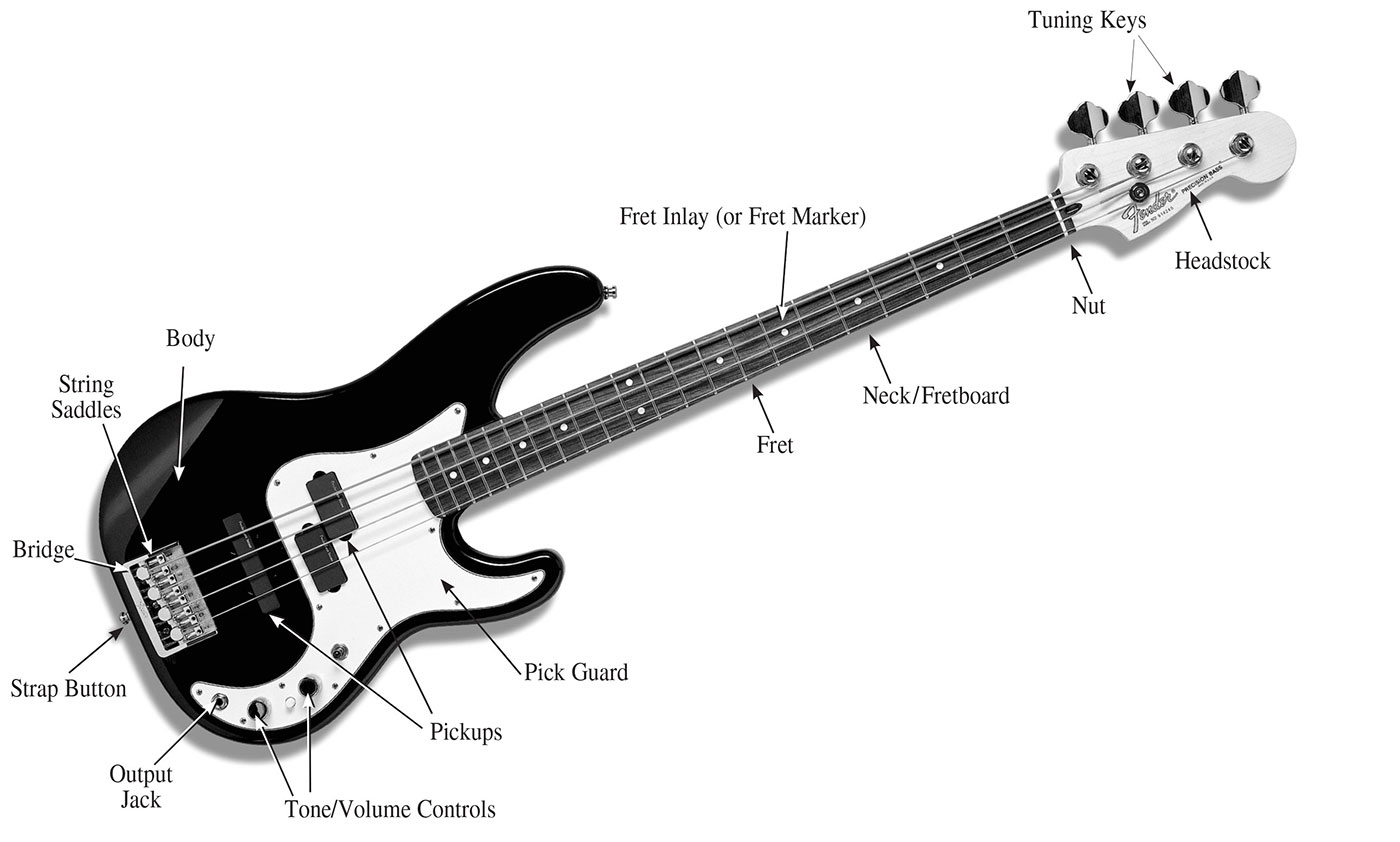
Before you put your hands all over it, you should probably get acquainted with a bass guitar first (at least take it out to dinner!). The image below details the most common features found on electric bass guitars. Each model will likely be slightly different, but theyll usually have most, if not all, of these features in common.
Your bass may have more than one pickup, it may not have a pick guard, or it may have more or fewer volume/tone controls. If thats that case, dont sweat itjust be sure to familiarize yourself with the features of your bass.
Fretboard Diagrams
Lets look closer at the neck of your bass. Those metal strips that run across itperpendicular to the stringsare called frets. Frets help us produce different, distinct pitches on each string and are numbered, low to high, from fret 1 to fret 20 (or 21 or 22, depending on your bass), with fret 1 being closest to the nut.
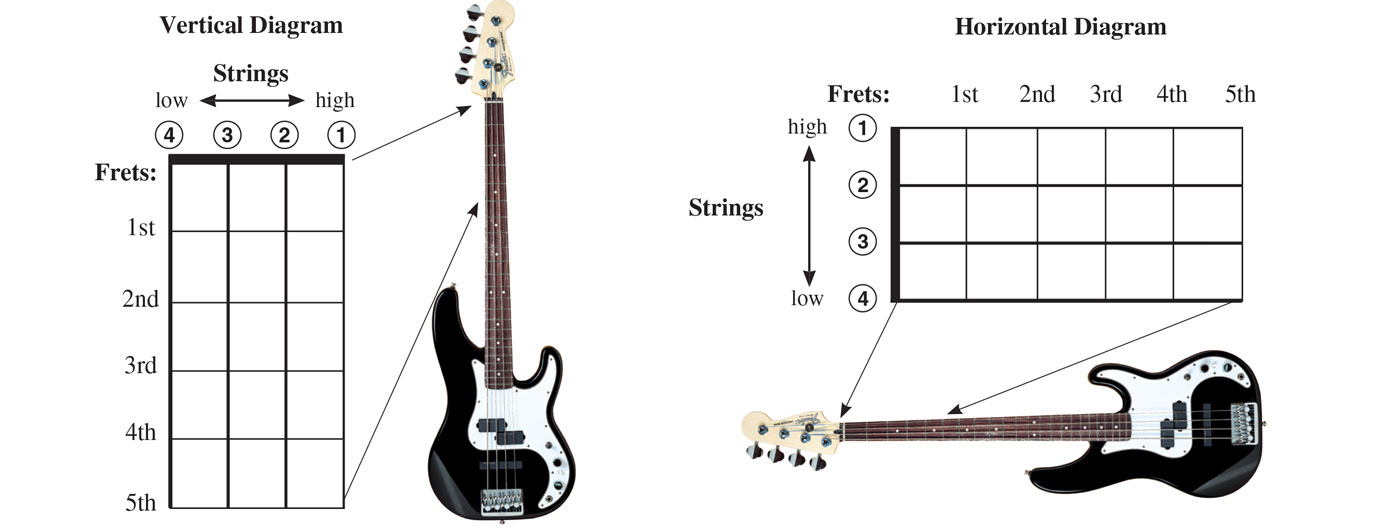
We sometimes use fretboard diagrams to depict portions of the neck for the purpose of showing certain notes, scales, etc. You may see these oriented vertically or horizontally, although horizontally is more common for the bass (vertical diagrams are used more often for guitar chords). See below for a description of how they work.
Vertical Diagram
The vertical diagram is like looking at the instrument hanging on a wall. The vertical lines represent the strings, with string 4 (the thickest, lowest pitched) located far left. The horizontal lines represent the frets, with the lowest fret number (often the nut) at the top. Again, though these are more common for guitar, you may see them for bass occasionally.
Horizontal Diagram
The horizontal diagram is the more commonly used fretboard diagram for bass and the one well use in this book. This diagram is closer to a players perspective. Its oriented as if youd laid the instrument across your lap. The horizontal lines represent the strings, with string 4 (the thickest, lowest pitched) located at the bottom (or nearest your midsection). The vertical lines represent the frets, with the lowest fret number (often the nut) at the left.
Fret-hand Fingers
For simplicity, the fretting hand may be referred to as the left hand in this book, and the plucking hand may be referred to as the right hand. If youre a leftie, just reverse these labels whenever you see them. The fingers of the fret hand are numbered as follows:
String Pitches
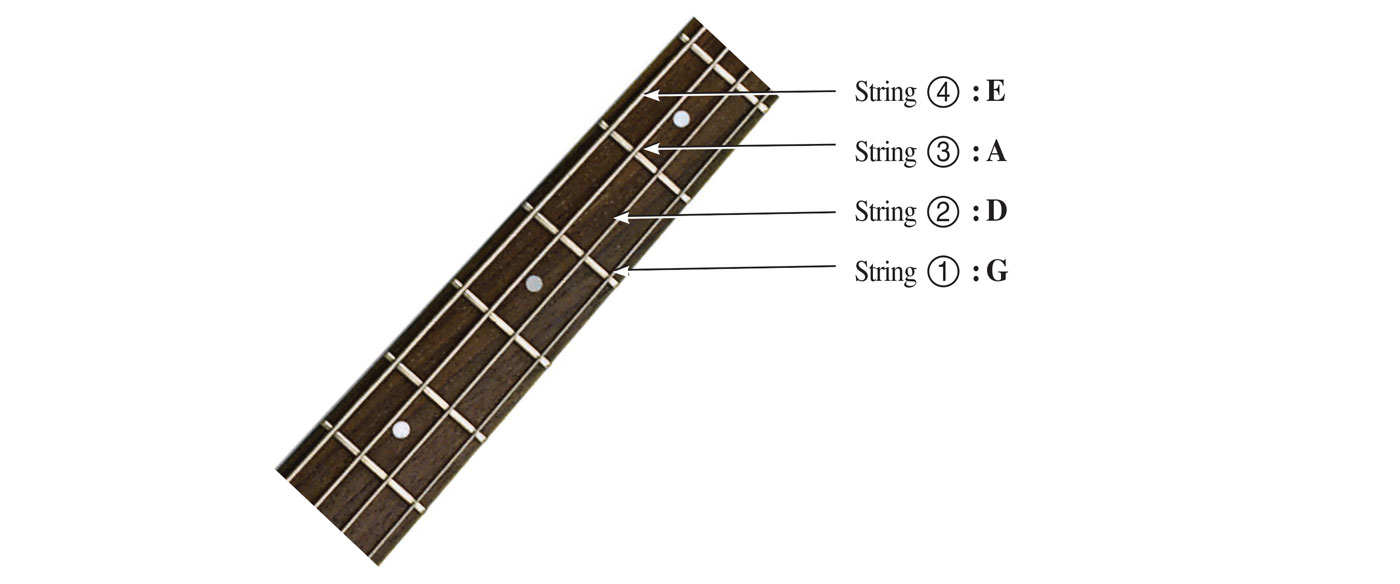
As mentioned earlier, the strings of the bass are referred to, with regard to high and low, by their music pitchesnot their geography. This is a bit confusing at first, and you will certainly hear some people calling string 4 the high string because its the highest from the floor. However, string 4 is actually called the low string because it produces the lowest pitch. When tuned correctly, each string of the bass sounds a specific pitch. From lowest to highest, they are as follows:
Of course, if youve ever seen a bass player play, you know that they dont just play open strings. We use the frets to play different notes, as well. The lower the fret number (toward the nut), the lower the pitch; the higher the fret number (toward the bridge), the higher the pitch. Well discuss this in more detail soon enough.
Left-Hand Technique
In order to produce clean, accurate playing, you need to be mindful of the proper playing techniques for the instrument. Bad technique can not only lead to sloppy playing; in the worst cases, it can even lead to injury.
Take this section seriously!
See the photos below for proper left-hand technique.
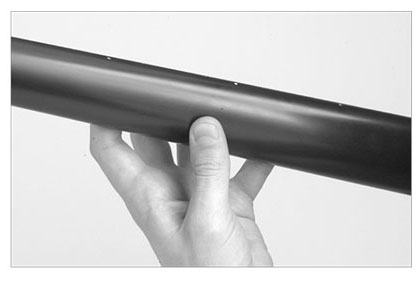 | 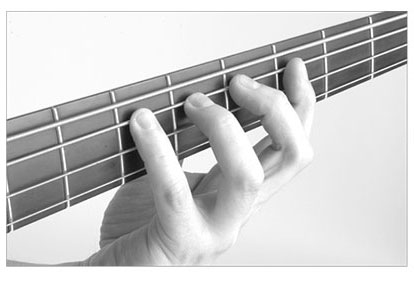 | 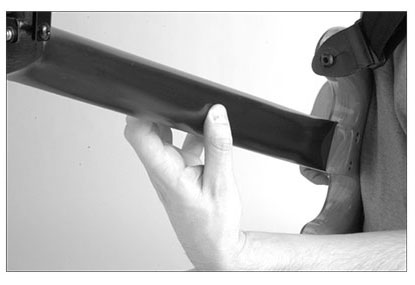 |
Place your thumb on the middle or underside of the bass neck. | Place your finger just behind the fretwire in order to produce the cleanest-sounding note. | Dont let your palm touch the neck of the bass. |
Also remember these important fretting tips:
- Only use as much pressure as necessary. Pushing down too hard can cause the note to go sharp (too high) and lead to finger fatigue.
- If you place your finger too close to the fret or too far back (in the middle of two frets), you could get a buzzing sound. The cleanest tone is produced with your finger directly behind the fret.
Right-Hand Technique
There are two common methods used for plucking strings on a bass: with the fingers or with the pick, or plectrum.
Playing with the Fingers
This is the most common method of playing bass and is used in virtually all stylesfrom jazz and country to the heaviest of metal. To begin, rest your thumb on the pickup and place your index finger on string 4. Using the pad of the finger (not the tip), and keeping the knuckle closest to the tip straight, push slightly in toward the body of the bass as you pluck the string so that youre plucking both across and slightly downward.
When plucking a string other than string 4, rest your thumb on string 4. Try plucking string 2 with your index finger. After plucking downward and through the string, let it come to rest against string 3.

