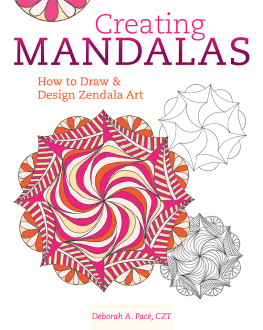
Deborah A. Pac, CZT
Thank you for purchasing this Artist Network eBook.
Sign up for our newsletter and receive special offers, access to free content, and information on the latest new releases and must-have art resources! Plus, receive a coupon code to use on your first purchase from NorthLightShop.com for signing up.
or visit us online to sign up at
http://artistsnetwork.com/ebook-promo
Contents
Chapter 1
Chapter 2
Chapter 3
Chapter 4
Chapter 5
Chapter 6
Chapter 7
What You Need
- General supplies:
- Colored card: gray, navy blue, tan, white, black
- Compass
- Erasers
- Gold leaf
- Gold metallic gel pen
- Mounting adhesive, double sided
- Paper, bristol, 612" (17cm) square
- Paper tape
- Pencils, no. 2
- Pens, Pigma Micron 01 (.25mm) and 08 (.5mm) black
- Ruler
- Sakura Gelly Roll pen, white
- Scissors
- Spirograph
- Stencil template blanks
- Tracing paper
- White chalk pencil
- Optional supplies:
- Bone folder
- Craft knife
- Glue stick
- Permanent marker
- Protractor
- Stencil cutter
- Watercolor paintbrush
- Watercolor pencils
Introduction
The art of making mandalas is less about drawing and more about slowing down and opening up to your inner creative flow. You do not have to be an artist. There is no need to know how to draw. All you need to make a mandala drawing are some simple everyday tools and a little effort. Can you create a circle using a compass and pencil? Can you draw a line? Can you repeat patterns? Then you can create your own mandalas.
It is important to have fun and not to stress when creating your mandalas. Beautiful mandalas are formed when we just go with the flow and let the patterns happen. If you make a mistake, so what? Learn to incorporate it into your design, giving your design character. Happy accidents are in some of the mandalas that I have created, but you do not see them because instead of stressing over it, I just incorporated them into my designs, sometimes intentionally repeating that little happy accident. What did I get? An unexpected design that worked. If you worry that your lines are not exactly straight, or your circles are not perfectly round or all the same size, you will not enjoy making your mandala. Let go and see what happens. You might be surprised.
In this book you will learn the basic steps to create a mandala and how to make your mandalas uniquely you. Through projects based on my own designs, I will show you step-by-step how to create different mandalas, and you can give it a try on practice pages that are right in the book. There are also many templates you can try and a gallery of mandalas I have drawn to inspire you. You will learn how to add color to them, how to find shapes and designs that are all around you, and most importantly, I hope, you will learn how to relax and just let yourself play.
As you create your mandalas, you will build confidence and develop your own unique creative voice. I hope you fall in love with mandalas as I have, but most of all, I just want you to have fun and enjoy the process of making these personal little works of art.
Deborah
Chapter 1
Getting Started
Mandalas are created from the center out, whether it is with a dot or circle. The substrate you draw your mandala on is usually white paper, drawn upon with black ink or pen. However, that being said, as you become more familiar with creating mandalas, you can start to explore and go beyond the usual. Mandalas are easy to draw. With a little bit of imagination and practice, you can take your mandalas to any level that is comfortable for you. They can be as simple as a couple of lines, circles and patterns, or complex, with fine lines, a series of concentric circles and detailed patterns. Your mandalas are an expression of you, so remember, whatever you choose to do, enjoy the process.
Supplies
No. 2 pencilsA no. 2 pencil is best to work with when drawing lines with a pencil. It is easily erasable; you can make faint pencil lines and still see your lines. It does not leave a mark on your paper like some of the harder leads do. I have a favorite woodless graphite pencil that I like to use. It has a jewel tip that makes me happy every time I use it.
ErasersI have several erasers I like to use, made by Faber-Castell, Staedtler and Pentel. In my opinion they all work equally well, but I do tend to favor the Faber-Castell. The Faber-Castell is dust-free and erases cleanly. Its a matter of preference.
Pigma Micron pens 01 (.25mm) and 08 (.5mm) in blackWhy Pigma Micron pens? Because they are permanent and they do not bleed. Even when you use the large-tip (.5mm) pen to darken a section, it does not bleed through. I like this because I do not have to worry about putting another piece of paper underneath my project. If I use pencil lines, I can erase them without worry of smearing the ink.
Pigma Micron pens 01 (.25mm) and 08 (.5mm) in blue and brownAs with the black Pigma Micron pens, the colored pens are permanent, do not bleed and have the same good coverage.
Sakura Gelly Roll pen in whiteThis pen is excellent when drawing on black or dark papers. The white ink shows up well. You can get a fine or heavy line with this pen, depending on the pressure you apply when drawing.
Paper
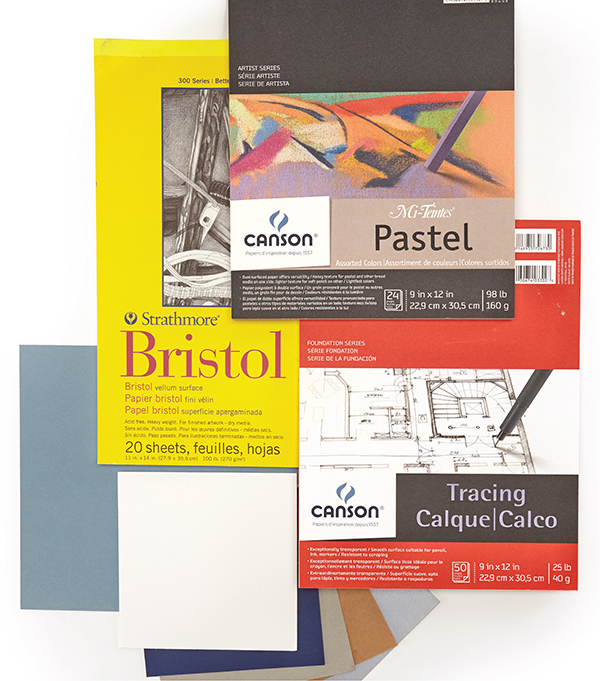
The sky is the limit! In this book I use bristol paper, cardstock, scrapbooking paper and tracing paper. But you can use any paper you want to use or that you have on hand.
Strathmore bristol paper pad (vellum surface)I use this because of the smoothness of the paper. I have, however, used Strathmore smooth bristol paper. It has a little more texture, but both work equally well. I prefer the smoothness of the vellum; its just my personal preference.
Colored papersI like to use a variety of papers to create my mandalas. No one says you have to use just white. I also use colored cardstock or scrapbook paper. Some of my favorite colored papers are the Canson Mi-Teintes drawing papers. They come in three different variety packs: pastel, earth tone and gray tone. I not only like the colors in these pads, but I also like the texture of the paper.

