Thank you for purchasing this Artist Network eBook.
Sign up for our newsletter and receive special offers, access to free content, and information on the latest new releases and must-have art resources! Plus, receive a coupon code to use on your first purchase from NorthLightShop.com for signing up.
or visit us online to sign up at
http://artistsnetwork.com/ebook-promo
Contents
Chapter 1:
The Sampler Bracelet
Chapter 2:
Right-Angle Weave
Chapter 3:
Peyote Stitch
Chapter 4:
Square Stitch
Chapter 5:
Triangle Weave
Chapter 6:
Brick Stitch
Chapter 7:
Netting Stitch
Chapter 8:
Herringbone (Ndebele) Weave
Chapter 9:
Other Weaves

Introduction
My husband and I do a number of retail bead and rock and gem shows every year as we travel around the country in our recreational vehicle. Over the years I developed a line of kits that we sell at the shows (along with the three books I have written for F+W Medias Krause Publications).
Some of our customers wanted to buy just the patterns from the kits because they already had the beads, so I also started self-publishing the patterns in book form. The first book sold well, so I expanded and did a number of them on different beading subjects. Acquisitions editor Tonia Davenport saw one of my self-published bracelet books and asked me to submit a proposal for a book on bead-woven bracelets for beginner to intermediate beaders. Im pleased to say this book is the result of that request.
The idea behind this book is to teach you a specific stitch via a simple project. Bracelets make excellent projects for teaching and learning stitchesearrings are too small to really sink your teeth into, and a necklace is a much larger commitment and can be quite intimidating at times. Most of these bracelets can be completed fairly quickly, and you should be comfortable with the stitch by the time you complete the bracelet.
Each pattern (except the Sampler Bracelet) includes variations to the pattern using different beads, different sizes of beads, alternate ways to embellish or slight alterations in the pattern. The idea is to get you thinking about ways you can change a pattern to make it your own. Thats how I ended up being a designer and authorI was forever changing patterns to make them mine.
I hope you can use this book as a starting-off place for making it your own.
Getting Started
The materials used in this book are pretty basicseed beads, thread and needles. Depending on the kind of beading youve been doing, you probably already have a stash that includes some of the various beads and threads called for in the projects. Of course you can practice with what you have on hand, or you may want to go out and buy some special beads. I could have done this entire book (with the exception of one project) with what I had on hand, but wheres the fun in that? Trips to buy beads are as much fun as the actual beading. I also find that it is much easier to choose colors at the bead store. (I confessI am a bead hoarder and have way more beads than I can ever use. )The store at which I was buying when I was planning projects for this book has limited stock, and thats OK. At times, having too many choices can become overwhelming, especially for a less experienced beader.
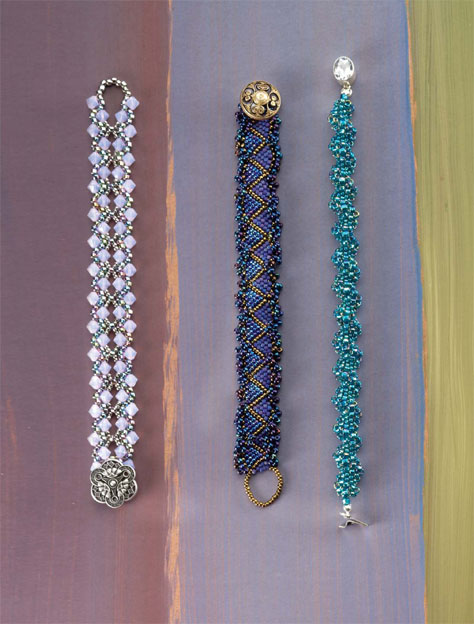
This book is intended to be a beginner to intermediate guide to a variety of weaves and stitches, and it uses a bracelet format to teach you those weaves and stitches. The projects all end with a button and loop closure or purchased finding. There are lots of different ways to make closures, but since the focus here is the stitch, I wanted to concentrate on that and not on making fancy closures.
The tips and techniques in this chapter only represent how I make and finish jewelry; they are by no means the only ways to do so. If you prefer a different method, by all means, go ahead and use it. There are no hard and fast rules in beadingeach person is free to (and should!) put her individual stamp on her work.
Enjoy!
Beads
Most of the beads used in the following projects would be classified as seed beads. I also use drop beads, cube beads, peanut beads, Tila beads, hex beads, Delica beads, bicone crystals, fire polish beads, Chinese crystal rondelles, pressed glass beads and a few lampworked beads.
One thing to keep in mind at all times is that you should buy at least a few more beads than you think you will need, as you may need to adjust length; most of the time the instructions in this book will be for a 7" (18cm) bracelet. Another good reason to buy extra is that glass seed beads are manufactured in lots and often there is a slight color variation from one lot to another. Be sure all your beads are from the same lot.
Beads are usually described and sold by measurements in millimeters. The crystals, cubes and fire polish beads will be measured in millimeters. If there are two measurements, the hole length is usually given first. For example, a bead measuring 7mm 5mm will have a hole that is 7mm long and a width of 5mm.
The exception to the millimeter rule is seed beads. A seed bead will be numbered with a /0 or a behind a number (6/0, 8/0, 11/0, 15/0 or larger; 6, 8, 11, 15 or larger). The stands for ought and comes from an old way of numbering seed beads. Remember that the larger the number, the smaller the bead.
The two major types of seed beads for weaving are Japanese and Czech. The seed beads used in this book are all Japanese. I prefer them because they have larger holes. That becomes very important as you weave back and forth through them many times. I suggest you avoid seed beads other than Japanese and Czech, as sizing is unlikely to be uniform.
Mention will be made throughout the book about starting your project with a waste or stop bead. This is a seed beadusually not a color you are using in your designthat is tied on your thread with a single overhand knot to stop the beads you are stringing from falling off the end of your thread. At some point the bead will be removed (hence, the simple knot) so that you can use the tail to add a clasp or work it into your beading.
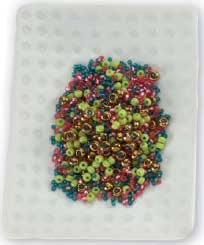
Seed Beads
The four sizes of seed beads used in the book are 6/0 (gold), 8/0 (chartreuse), 11/0 (pink), and 15/0 (teal). The smallest beads may also be referred to as 14/0. One or more of these beads are used in most of the projects in this book. They are usually purchased in tubes (Japanese) or on hanks (Czech).
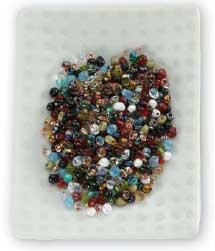
Drop Beads
A drop bead has a hole which is offset to one side. It is often used on the end of a fringe strand to make a smooth end. Three kinds of drop beads were used in the book3.4mm or 4mm drops and raindrops. The 3.4mm and 4mm drops are Japanese and the raindrops are an 8/0 size Czech bead with an off-center hole.


