GET THE
PICTURE
DAN RICHARDS


INTRODUCTION
My life changed in high school.
Relax. This is not some sappy coming-of-age story. Just a tale of an overgrown sixteen-year-old kid who got appointed to the yearbook staff and had access to, you know, real cameras things with knobs and dials and click-stops and scales in millimeters (!). What a tantalizing pile of contraptions was strewn about the squalid little clubroom referred to as the Yearbook Office: A massive, wrist-busting press camera, a junky little 35mm viewfinder model, a light meter, flash units, and it.
It was a pretty thing, chrome and black leatherette, of East German make, but at first puzzlingthere was no viewfinder window. How would you compose the picture? I picked it up and looked into a small eyepiece on the back and realized I was looking through the taking lens.
It was a single-lens reflex camera. I realized at that moment there was no going back for me.
With that camera, and lots of others, I learned through trial and (ahem) some error that, despite apparent complexity, real cameras had only three essential controls: focus, shutter, and aperture. I took pictures like crazy, all kinds, some of them professionally.
But the lifelong passion that was genuinely inspired in me was something else. I wanted to teach. I wanted to let other people in on the wonder.
And so Ive now spent more than thirty years writing about the craft of photography, mainly for Popular Photography and its book series. In all that time, Ive taken an approach that runs counter to that of many other writers and teachers. I dont give a hoot if you never use manual exposure. I want you to get out and shoot, shoot, shoot with your DSLR or ILC, and stoke the passion for seeing and making pictures and most important, to learn how light works. And then we can get to all those nuts and bolts.
Thats why this book is organized the way it is, with as little technical blather as possible at the beginning, and more toward the end for those who stick with it. If somewhere along the way I convey the giddy marvel of a kid composing a photo through a pentaprism for the first time, Ive done my job. Please let me know.
And oh, the warning: There will be no going back for you, either. Youll end up using your phone as a phone. Sorry.

DAN RICHARDS
Contributing Editor, Popular Photography

PHOTO PRIMER

PREP YOUR CAMERA FOR QUICK SHOOTING
So youve unpacked your shiny new camera. Now what? You probably want to immediately start taking pictures not spend hours reading the instruction manual. And who can blame you, since its 300 pages long with tiny type? (Please note that, while I bad-mouth the manual often, its a critical guide to your specific cameras functions. So keep it handy, and use the contents list or index to quickly locate your answer dont attempt to read it in its entirety unless youve landed yourself on that proverbial desert island.)
Right now, my goal is to get you shooting as soon as possible, so lets set up the camera so its ready for your first photo excursion. Heres the general gist to prepping your camera for action.
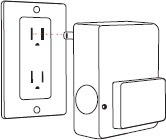
STEP 1 Juice up the battery. The rechargeable battery packaged with your camera may come with a partial charge on it or none at all. In any event, charge it fully before you start shooting, following the directions in the manual. It may take several hours to reach full power, so practice patience.
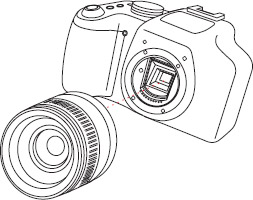
STEP 2 Attach the lens to the camera. The lens and camera body almost always come as separate pieces. To mate them up, first remove the protective caps from the camera body and the rear of the lens. Twist them off counterclockwise, like removing a jar lid. Match the mark on the rear of the lens with the one on the lensmount, insert the lens into the camera body, and twist clockwise until they lock together with a distinct click. (One exception: On Nikon cameras, both caps twist off clockwise, and the lens mates with the camera counterclockwise.)

STEP 3 Insert the battery. Its compartment is usually accessed via a hinged or sliding hatch on the cameras bottom. Open it and insert the battery so that its metal contacts go in first. If the battery doesnt go in all the way or the hatch wont close, youve inserted it the wrong way. Reorient the battery and try again.
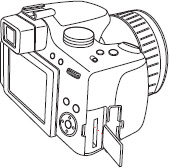
STEP 4 Insert the memory card. Almost all current digital cameras use Secure Digital (SD) cards, although some take the larger Compact Flash (CF) cards. The memory card goes into a covered slot on the side or bottom of the camera, and like the battery it goes in terminal end first. If your card wont slide in fully, flip it and try again.
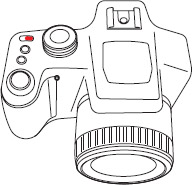
STEP 5 Turn on the camera. Usually its obvious where the On/Off switch is, although sometimes its not for instance, if its a small button tucked in a corner. Check the manual if its hard to find.
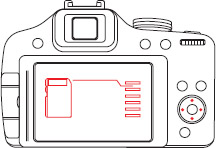
STEP 6 Format the memory card. This procedure readies a new cards file structure to properly record images. Check that manual again for the directions its done via the cameras menu system, and its usually not very obvious.
KNOW YOUR CAMERA
There are two main styles of interchangeable-lens camera on the market today. The most popular is the digital single-lens reflex (DSLR), which views through the lens via a complicated optical system: The scene is reflected by a mirror up to a prism, which flips the image right side up and unreversed to display in the viewfinder or on the LCD screen (see ). The mirror then hinges up out of the way at the moment of exposure. However, an interchangeable-lens compact (ILC) dispenses with the prism and mirror, delivering a direct electronic feed from the imaging sensor to the viewfinder hence they are called mirrorless.


