Benjamin John Coleman - Origami Bonsai: Create Beautiful Botanical Sculptures
Here you can read online Benjamin John Coleman - Origami Bonsai: Create Beautiful Botanical Sculptures full text of the book (entire story) in english for free. Download pdf and epub, get meaning, cover and reviews about this ebook. year: 2013, publisher: Tuttle Publishing, genre: Children. Description of the work, (preface) as well as reviews are available. Best literature library LitArk.com created for fans of good reading and offers a wide selection of genres:
Romance novel
Science fiction
Adventure
Detective
Science
History
Home and family
Prose
Art
Politics
Computer
Non-fiction
Religion
Business
Children
Humor
Choose a favorite category and find really read worthwhile books. Enjoy immersion in the world of imagination, feel the emotions of the characters or learn something new for yourself, make an fascinating discovery.

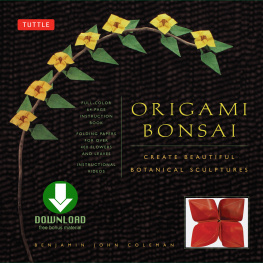
- Book:Origami Bonsai: Create Beautiful Botanical Sculptures
- Author:
- Publisher:Tuttle Publishing
- Genre:
- Year:2013
- Rating:4 / 5
- Favourites:Add to favourites
- Your mark:
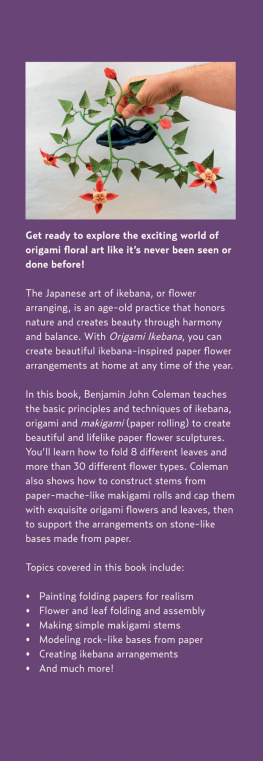
Origami Bonsai: Create Beautiful Botanical Sculptures: summary, description and annotation
We offer to read an annotation, description, summary or preface (depends on what the author of the book "Origami Bonsai: Create Beautiful Botanical Sculptures" wrote himself). If you haven't found the necessary information about the book — write in the comments, we will try to find it.
Benjamin John Coleman: author's other books
Who wrote Origami Bonsai: Create Beautiful Botanical Sculptures? Find out the surname, the name of the author of the book and a list of all author's works by series.


Origami Bonsai: Create Beautiful Botanical Sculptures — read online for free the complete book (whole text) full work
Below is the text of the book, divided by pages. System saving the place of the last page read, allows you to conveniently read the book "Origami Bonsai: Create Beautiful Botanical Sculptures" online for free, without having to search again every time where you left off. Put a bookmark, and you can go to the page where you finished reading at any time.
Font size:
Interval:
Bookmark:
What most folders dont realize is that an incorrect fold at the beginning compounds exponentially as we progress through a folding pattern. By the time the folder nears the end, the incorrect fold has contaminated almost every plane of their model. Something inside us tells us not to waste paper, however, discarding a tainted paper when exploring a new folding pattern will end up saving both paper and time in the long run. Review the instructions before folding the model. Before you begin, look at each diagram and read each instruction. This allows your brain a little time to digest the pattern before you attempt it.
Even if you dont fully understand the diagrams and instructions, reviewing them in advance will give you an edge and save you time and paper. Watch the video. If you have trouble making any of the models in this book, take a look at the videos. (Download )
Understanding Glow-Fold Diagrams Glow-fold is a new diagramming method for conveying folding instructions. It is particularly useful for origami applications. Glow-fold works by highlighting the surface of the area which will move during the fold with an orange, semi-transparent glow.In the diagram immediately following, a narrow trace of orange, semi-transparent glow will be visible along any open edges. This narrow trace is called afterglow and indicates where the glowing surface went. After glow appears only along edges where the initial glow would normally leak through; in other words, there wont be afterglow along the folded side of the area that just moved. Glow-fold dramatically decreases the time it takes to learn a new folding pattern. Instead of trial and error style experimentation, glow-fold allows the folder to navigate diagrams with confidence. It turns the process of completing a new model from a frustrating puzzle into a coherent step-by-step progression.
This diagramming system makes origami accessible to scores of people who thought they didnt have the patience to do origami! See the facing page for a simple demonstration of how glow-fold instructions work. 
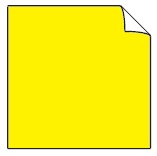 We begin with a square piece of paper. It is yellow on one side and white on the other. We start with the yellow side facing us.
 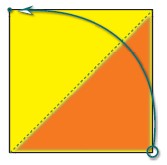 Were going to fold the square in half on a diagonal.
  Imagine the overlay on top of the square in front of you. Imagine the overlay on top of the square in front of you.
It would look like this, and you would fold the bottom right corner up to the top left corner. 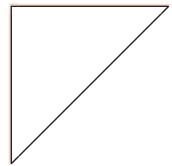 The next diagram would look like this. Notice that there is a narrow band of orange afterglow along the top and left edges. This afterglow represents light that would leak out along the open edges. There is no afterglow along the fold because light from the original glow would not leak out there.
A small Primrose is used as the center flower in the Columbine assembly that youll find on page . 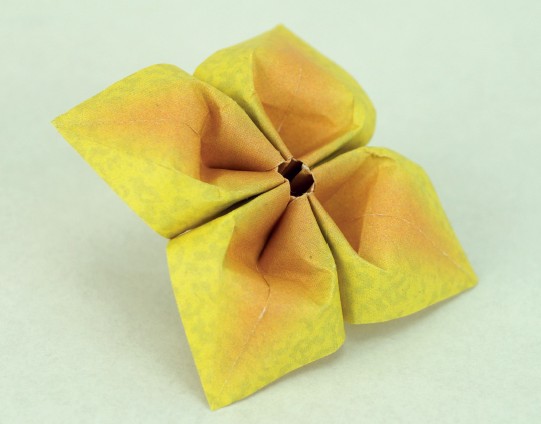
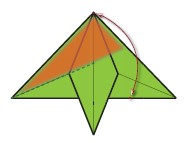
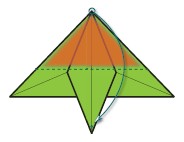 The upper tip of the Basic Flower Form (page ) is made up of four tips. Fold the uppermost tip down, as far as it will go. Notice that it will not go all the way to the bottom point.
 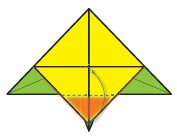 Fold the tip you folded in step 1 up, with the point reaching just barely below the fold you made in step 1.
 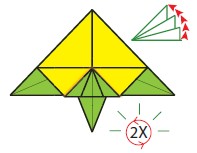 Your model should look like this.
Flip it and perform the folds in step 1 and 2 on the opposite side, then book-fold it and perform the steps on the two inner tips. 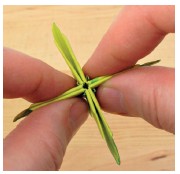 Separate the petals.
 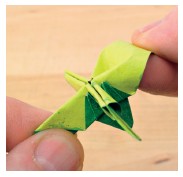 Open a petal from underneath and push it up as shown. Repeat on all four petals.
 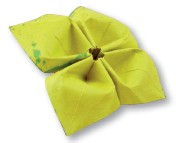 Your completed Primrose should look like this.
I have used it in many sculptures. 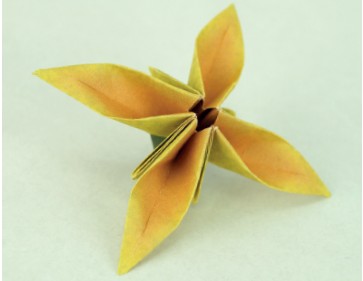
 Begin with the Basic Flower Form (page ). Fold and then unfold the left edge of the top layers as shown, scoring the fold only to the center and not beyond.
 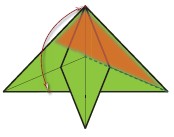 Fold and then unfold the right edge of the top layers as shown, scoring the fold only to the center not beyond.
 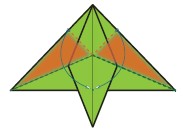 Now bring both edges down simultaneously
 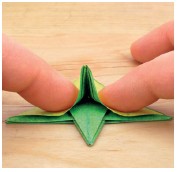 ...like this, and then
 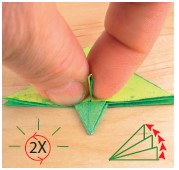 ... pinch the little flap closed.
Flip your model and repeat steps 1 through 5 on the other side, then book-fold it and repeat again on the two hidden sides. 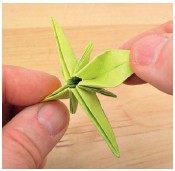
Font size:
Interval:
Bookmark:
Similar books «Origami Bonsai: Create Beautiful Botanical Sculptures»
Look at similar books to Origami Bonsai: Create Beautiful Botanical Sculptures. We have selected literature similar in name and meaning in the hope of providing readers with more options to find new, interesting, not yet read works.
Discussion, reviews of the book Origami Bonsai: Create Beautiful Botanical Sculptures and just readers' own opinions. Leave your comments, write what you think about the work, its meaning or the main characters. Specify what exactly you liked and what you didn't like, and why you think so.