
Copyright
Copyright 2018 by Cari Buziak
All rights reserved.
Bibliographical Note
Creating Celtic Knotwork: A Fresh Approach to Traditional Design is a new work, first published by Dover Publications, Inc., in 2018.
Library of Congress Cataloging-in-Publication Data
Names: Buziak, Cari, author.
Title: Creating Celtic knotwork : a fresh approach to traditional design / Cari Buziak.
Description: Mineola, New York : Dover Publications, Inc., [2018]
Identifiers: LCCN 2017034178| ISBN 9780486820330 | ISBN 0486820335
Subjects: LCSH: Knotwork, Celtic. | DrawingTechnique.
Classification: LCC NK1264 .B89 2018 | DDC 746.44028dc23
LC record available at https://lccn.loc.gov/2017034178
Manufactured in the United States by LSC Communications
82033501 2017
www.doverpublications.com
ACKNOWLEDGMENTS
This book is dedicated to my dad and my sister.
I love you both very much!
Contents


 Getting Ready.
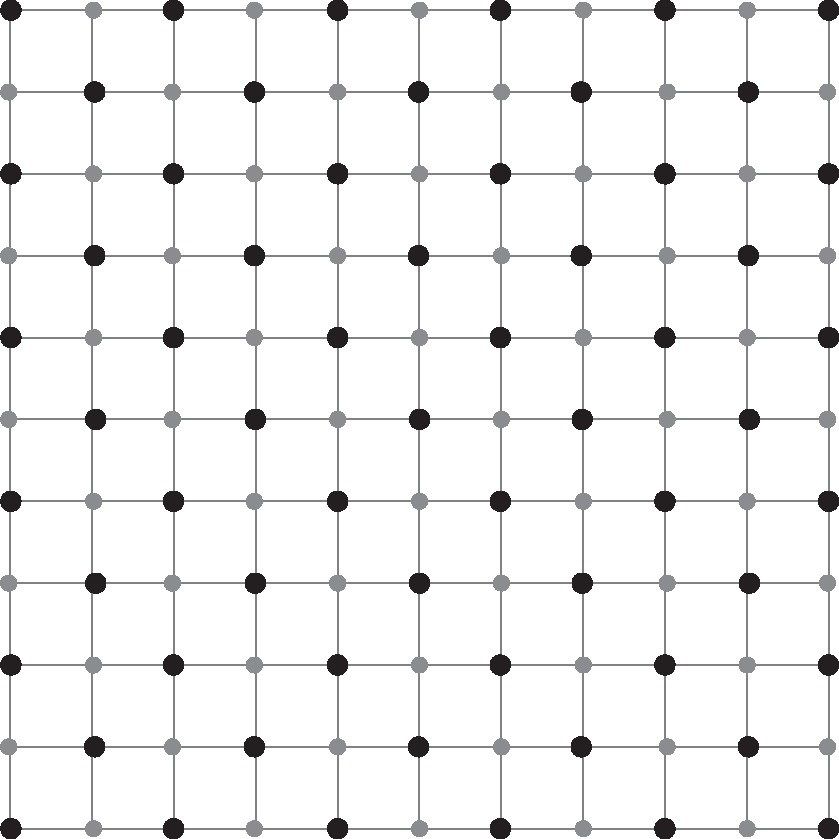
To create Celtic knots I use a technique thats based on a gridwork of alternating big and small dots. The dots create a pattern that allows you to make new knotwork designs easily and even in shapes other than just rectangles or squares, as youll see later in this and other chapters. This book includes a few sheets of ready-made dot paper for you, but to create your own is easy.
 Tip
Tip 
Photocopy the sheets in the back of this book before you begin working. That way youll always have a master page to copy from and wont have to make dotted paper again for each project!
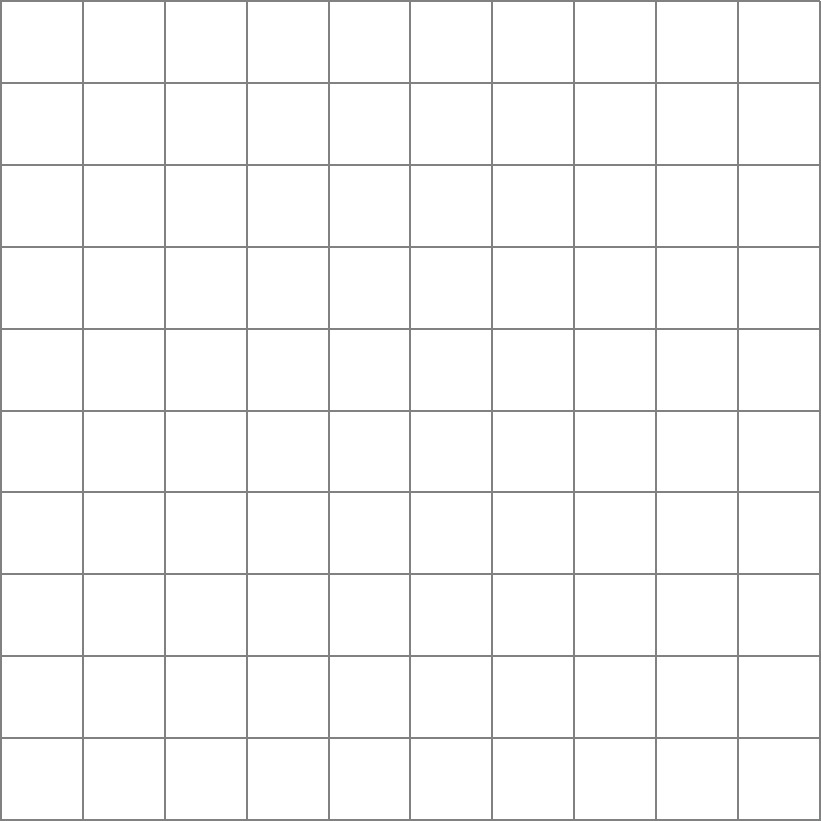
Normal graph paper is made up of a series of squares all over the page. You can sometimes purchase it with bigger or smaller squares, depending on the size of knot you want to create. If only one size is available it can be scaled up or down using a photocopier, or made from scratch at any size using a computer.
Using different-colored markers or a pen, alternate coloring one big dot, followed by a smaller dot, all across the page of graph paper. Make sure that as you move down to the next row you continue to alternate the dots. If there is a big dot above in the previous row, then below it there should be a small dot, and so on. Once the whole sheet is covered, make a photocopy before using itthat way you wont have to make it again next time.
 Basic Celtic Knotwork
For clarity, in my examples I will display only the big and small dots and not the graph paper lines.
To make your first knot, mark off a box anywhere on the sheet, at least 5 big dots and 4 little dots across. Mark the same distance down (5 big and 4 little dots) so you have an even square. For the dot system to work properly, make sure box corners are always on a BIG dot.
Each small dot is going to be an intersection where two ropes of knots are going to cross over each other. Begin to add a double-lined X over the little dots within the marked-off box, with each set of the X lines running to either side of the little dot like a tic-tac-toe board tipped on its side.
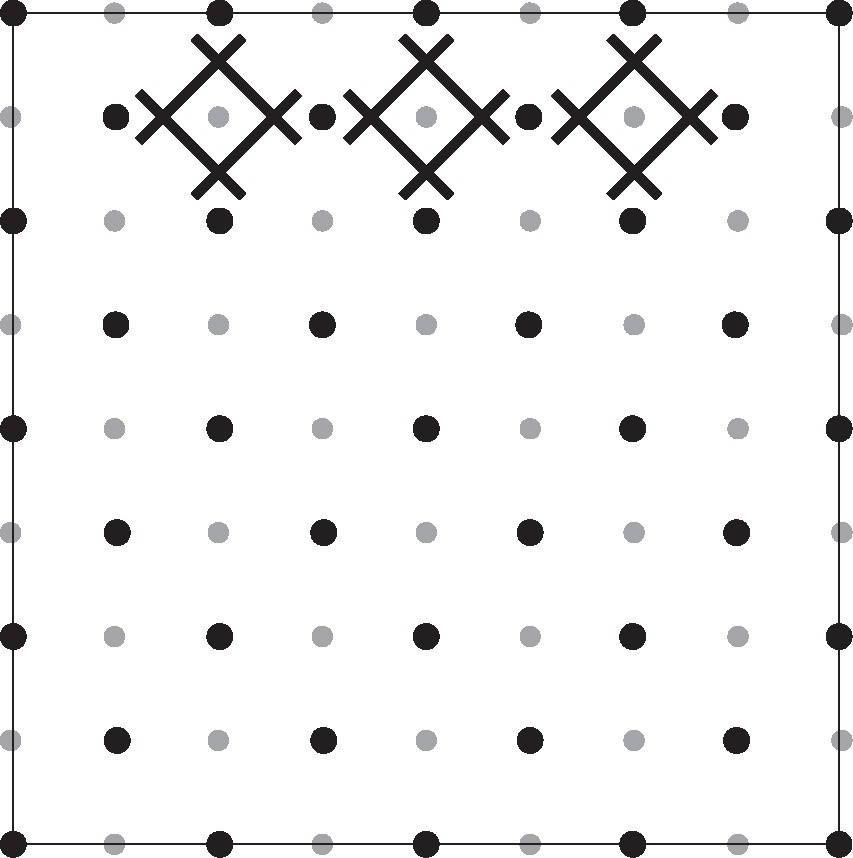
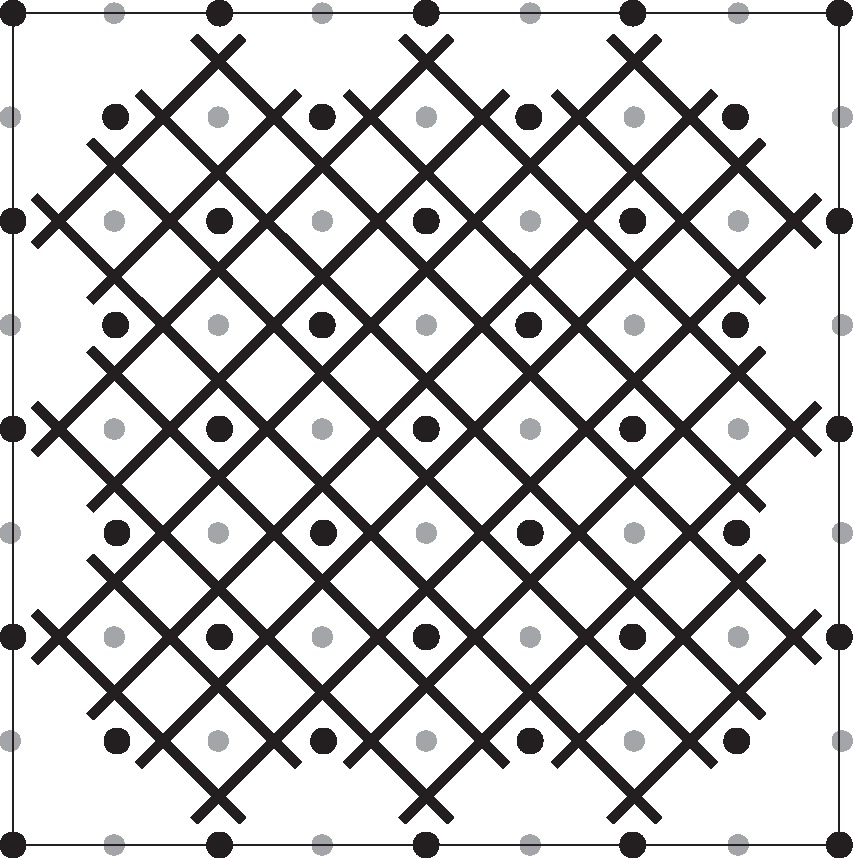
Continue drawing a double-lined X over each little dot until reaching the box border. Do not X the little dots that lie right on the border line, just those that fall within the border. Your big dots never get crossed over by the knot. Think of the big dots as posts that the knot must bend around to follow its path. You will find that the X patterns will meet up on the diagonal, which is correct. If youre making a very large knot, you can make this step go faster by using a ruler and just drawing a line along the diagonal of the little dots. However, when you begin to make very complicated knots, the X method keeps things from getting tangled up because its easier to see clearly whats going on as you proceed.
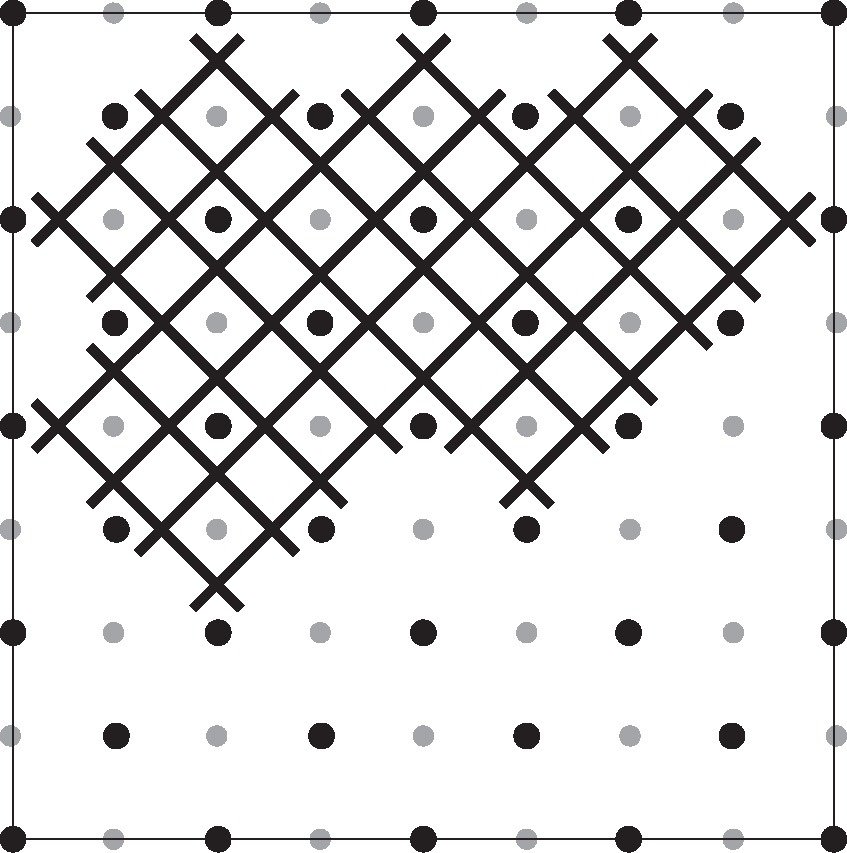
At this point, there should be a double X over every little dot in the box. There will be empty spaces along the sides of the box and at the corners, but the center portion should be filled with the X pattern, as shown here.
Now that all the little dots are bordered with the X pattern, join the knot lines along the sides, top, and bottom of the box. Along one side (it doesnt matter which you begin with) find two pairs of lines angling out toward each other from the body of the X pattern. Connect these to each other with a smooth curve. Vary the sharpness of the turn to suit your tastes, from a 90-degree angle to a soft, round curve. There are many variations you can create by varying the angle of the bends.
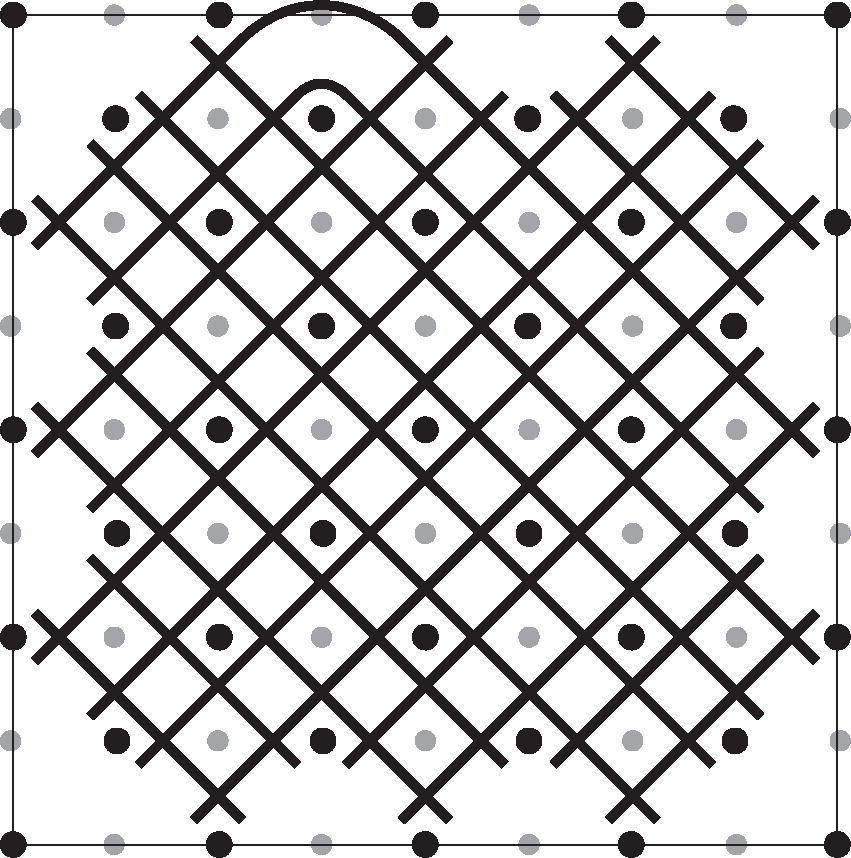
).
Joining the corners is easy, as there are only two pairs of lines in each corner to join. If there are other lines left over, then you have probably drawn the marked-off box incorrectly and put a corner on a small dot. Remember, for the pattern to work every corner of the marked-off box must be on a BIG dot. Also, check that you have not added an X to any of the small dots on the box border line. That will also break the pattern.
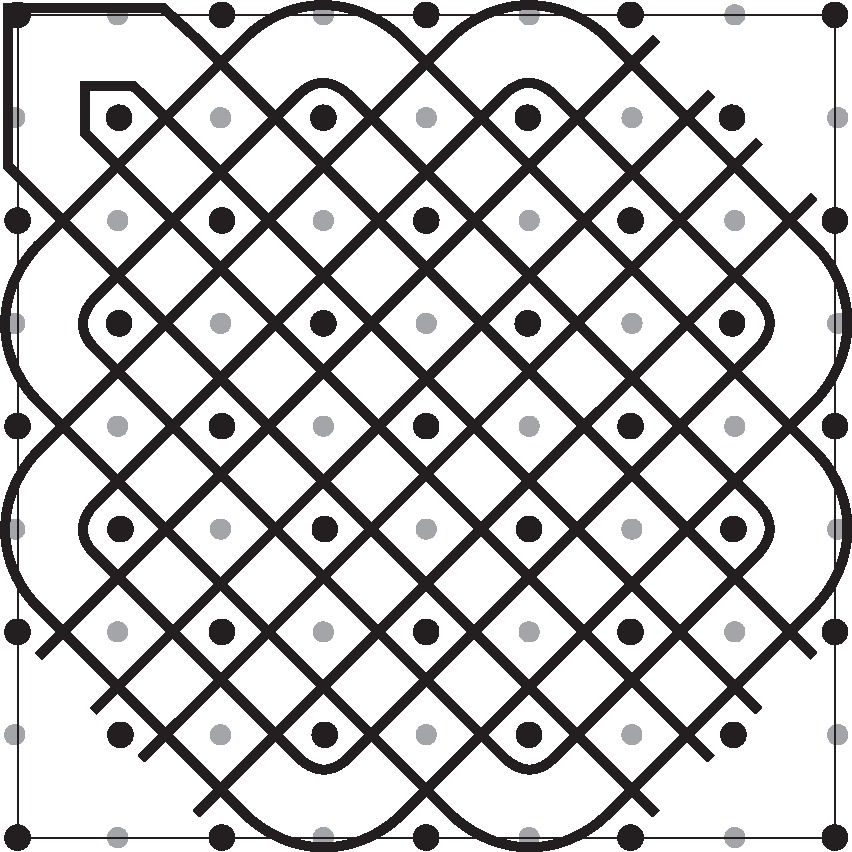
With all the lines connected on the knot we can begin to make the strands weave, or interlace. Each strand, if you follow it with your finger, will be made to appear as though it alternates over and then under and then over any other strand it intersects with. So any strand in the knot will appear to go over-under-over-under the other strands in the knot.
To begin, pick an intersection on the knot over a little dot. It doesnt matter which you choose. Erase part of the double lines, making the illusion that one strand is crossing over the other (see top left of the graph).
Next page





 Getting Ready.


