Publisher: Amy Marson Creative Director: Gailen Runge Editor: Liz Aneloski Technical Editors: Del Walker and Debbie Rodgers Cover Designer: Kristy Zacharias Book Designer: Casey Dukes Production Coordinator: Tim Manibusan Production Editors: Jessica Brotman and Alice Mace Nakanishi Illustrator: Kirstie L. Pettersen Photo Assistant: Sarah Frost Style photography by Page + Pixel and instructional photography by Diane Pedersen, unless otherwise noted Published by C&T Publishing, Inc., P.O. Box 1456, Lafayette, CA 94549 Introduction I love quilts. Are there any new quilters out there? The answer is yesyou! I am often asked where a person interested in quilting should begin, so I decided to write this book to get you, the beginning quilter, started with the basics to make your first quilt. You must remember that there are many different approaches to quiltmaking, and one is not better than the others, just different. A quilt is like a sandwich.
It has three layers: The quilt top is usually made of many 100% cotton fabrics that are cut into pieces of various sizes and then sewn together either by hand or by machine. This is called piecing. The middle layer, called the batting, is usually either polyester or cotton. The backing is another piece of 100% cotton fabric. The three layers are then stitched together, joining the three components (pieced top, batting, backing) into one. This is called quilting.
What this book provides is an introduction to the world of quiltmaking using rotary cutting (as opposed to the templates that my grandma used), with a simple wall quilt you can complete by making 16 of one basic, 12 12 finished quilt block and one additional block if you choose to add the border. You will learn 3 basic techniques you will use over and over again in your future quilting; strip piecing (four-patch units), quick half-square triangles, and sew-and-flip construction (Flying Geese units). Fabric requirements are based on standard 42-wide fabric. I recommend that you start with an easy, manageable project as your first quilt so you will be able to finish it and feel successful. I find that when first-time quilters start with a large project, the whole process becomes overwhelming, and they either give up in frustration or lose the enjoyment of the process. NOTE ASSUMPTIONS You know the following:  How to use your sewing machine (This book is written for the new quilter, not the new sewist.)
  How to sew a straight line
  The basics of how to use a rotary cutter I will teach you how to make one quilt block, so the fun of figuring out how to arrange the blocks and put the quilt together can begin sooner. NOTE ASSUMPTIONS You know the following:
  How to use your sewing machine (This book is written for the new quilter, not the new sewist.)
  How to sew a straight line
  The basics of how to use a rotary cutter I will teach you how to make one quilt block, so the fun of figuring out how to arrange the blocks and put the quilt together can begin sooner.
Wait until you see how many options there are for arranging 16 of this one block! 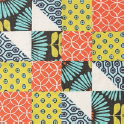 If you find that you really enjoy making this block, you can make more to complete a twin- or queen-size quilt (see the Appendix). As you progress with your quilting, be sure to take classes. And be sure to check out your local quilting guild. You will meet great people there.
  Quiltmaking is a journey both men and women have loved for generations. We all started at the same place, so theres no need to feel intimidated by a lack of experience.
My hope for you is that through making this quilt you will become familiar with a few of the basics of quiltmaking and develop into a quilt lover, as I have. Alex Anderson, QuiltmakerTools Quilters love gadgets, and every year more tools are introduced to the quiltmaking world. Your first visit to a quilt shop or the quilting section of a fabric store might be overwhelming. Many decisions need to be made when purchasing the necessary tools to get started quilting. The following shopping list provides the must-haves for anyone getting started. Many of the products come in different sizes.
Please obtain the sizes recommended here. Later, you may want to add companion supplies, but the following are the best sizes to start with. Although the initial investment will seem costly, these tools will serve you for years if taken care of properly. TOOLS AND SUPPLIES CHECKLISTFor more information, see Tools, Fabric, and The Basics. Rotary cutter
  Rotary cutting mat
  Rotary cutting ruler
  Scissors
  Pins
Pins  Thread
  Seam ripper
  Iron
Iron  Sewing machine
  Fabric
  Marking tools for quilting
  Batting
  Blue painters tape ( and 1 widths)
  Thread for hand sewing
  Needles for hand sewing
  Walking foot for machine quilting
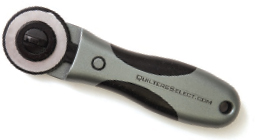
  Safety pins for machine quilting basting ROTARY CUTTER This rolling razor blade mounted on a plastic handle is extremely dangerous and should be kept away from young children. I recommend the medium-size (45mm) cutter.
  ROTARY CUTTING MAT This self-healing plastic mat must be used in conjunction with the rotary cutter.
I recommend either the medium or large mat. The medium one is great for starting out or for taking to a quilting class. The larger one is more versatile. Eventually you will want both sizes. Keep the mat out of direct sunlight and never leave it in a hot car, as the heat will cause the mat to warp and become unusable. 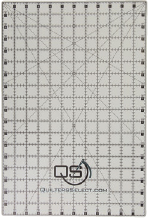
Next page

 How to use your sewing machine (This book is written for the new quilter, not the new sewist.)
  If you find that you really enjoy making this block, you can make more to complete a twin- or queen-size quilt (see the Appendix). As you progress with your quilting, be sure to take classes. And be sure to check out your local quilting guild. You will meet great people there.
  Quiltmaking is a journey both men and women have loved for generations. We all started at the same place, so theres no need to feel intimidated by a lack of experience.
 Rotary cutter
  ROTARY CUTTING MAT This self-healing plastic mat must be used in conjunction with the rotary cutter.