INTRODUCTION
Ive always been a big fan of books. Fiction, sure, but also DIY and how-to books. As a kid, I got really into origami and crafting, and I always searched the shelves at the library, hoping to find a book that would impart some new and magical knowledge. Nowadays, you can find just about anything on any subject online, especially DIY and how-to videos. And these are great. Thats how this book came into being, actually. I created an online course that teaches kids how to invent their own machines using stuff they can find around the housecardboard, coat hangers, and pencils, held together by hot glue and tape. Things found online are great because theyre so easily accessible and the subject matter is broad. But theres something that will always be special about a physical book that you can hold in your hand, whose pages you can turn.
This book is for anyone with curiosity, especially people curious about what makes things tick. Its been said a hundred times, but this is the book I wish I had as a kid. To the best of my knowledge, theres nothing that currently exists thats quite like this book. Its not just another kids book about making catapults. The chain reaction machines in this book are limited in steps but not in their quality and content. Theyre laid out step by step, sure, but theyre also a bit magical.
Some of these machines take a long time to make. While simple in materials, the mechanisms can be quite complex and the interactions have to work just right in order for everything to come together smoothly. They take patience (something I had little of when I was a kid) and a bit of grit. Often, you might find that your machine wont work on the first, second, or even tenth time. This is normal, even good. Itll just be that much sweeter when it does work. If the words dont make sense, look at the pictures. If youre a visual learner like me, the images will probably be more helpful than the written instructions.
While the materials needed to make the machines in this book are simple, everyday things, dont think you have to use exactly whats listed in the instructions. This is not that type of book. If the instructions say to use a coat hanger and all you have is some wire you found in a drawer, try using that. Everything in this book is a suggestion. If you dont have a pencil long enough to use as a shaft, get creative. The real hope is that this book teaches you the basics, but also inspires. While it allows you to successfully make a machine that can dunk a cookie in milk, I hope it doesnt end there. The point is to take that gained knowledge and apply it to something else, something more creative and more you.
RUBE GOLDBERG AND CHAIN REACTIONS
Chain reaction machines are also known as Rube Goldberg machines. Rube Goldberg (Reuben Garrett Lucius Goldberg, 18831973) was a cartoonist and inventor who drew comics that depicted really roundabout ways of doing ordinary, everyday tasks. At some point, people started making physical versions of these crazy contraptions. There are even Rube Goldberg machine contests. I hope you enter one someday.
CHAPTER I
ESSENTIAL TOOLS, TECHNIQUES, AND MECHANISMS
Just as in construction, you need a good foundation before you get started. Here youll get a glimpse of the best tools to use, along with a few simple but strong tips to give you a head-start on your chain reaction machines.
The Music Maker (see ) is one of the nonsensical machines in this book.
BASIC TOOLS
You can make just about anything with cardboard using only a few simple tools. Heres what I use the most:
1. Scissors: I normally dont cut cardboard with scissors, but its great for just about anything else: cereal boxes, cardstock, printer paper, string, fabric, you name it.
2. Ruler: The ruler I use is great because its clear and slightly thick. This makes it perfect to use as a straightedge guide when cutting with the knife. Because the ruler is clear, I can easily cut things to width.
3. Measuring tape: For measuring, of course. If you have a ruler, you dont necessarily need this, but its nice to have.
4. Utility knife: I use an Olfa utility knife. The blades are very sharp, and I like the feel of it. This type of knife is best for making long, straight cuts.
5. Cutting mat: Cutting mats are fairly cheap and they save you from ruining your kitchen table. The bigger the better, but a 12 18" (30.5 45.7 cm) works just fine.
6. Precision knife: You can use something like an X-acto, but I prefer the Olfa 9 mm knife with the snap-off art blades. They have the same profile as the X-acto, but you can snap them off when they get dull. This knife is best for detailed work, like cutting out circles and other curved cuts.
7. Awl: An awl is basically a sharp nail. Its great for poking holes in cardboard when you want to put a toothpick or coat hanger through a piece. I use a cheap leatherworking awl.
8. Cutting pliers: These are great for bending and cutting wire. You can also cut toothpicks and other small pieces of wood like craft sticks.
9. Pencil: Obviously, youll need something to make marks with. I like mechanical pencils because the lead stays small and sharp.
10. Hot glue gun: Possibly the one tool I couldnt do without. Its not the prettiest glue there is, but it sets super quick, which means you can move on with your making. I like the small, cheap guns best. The smaller sticks heat up fast, theyre easier to control, and they dont get as hot, so if you do happen to burn yourself, it wont be too terrible.
DIY TOOLS
POKEY PAD
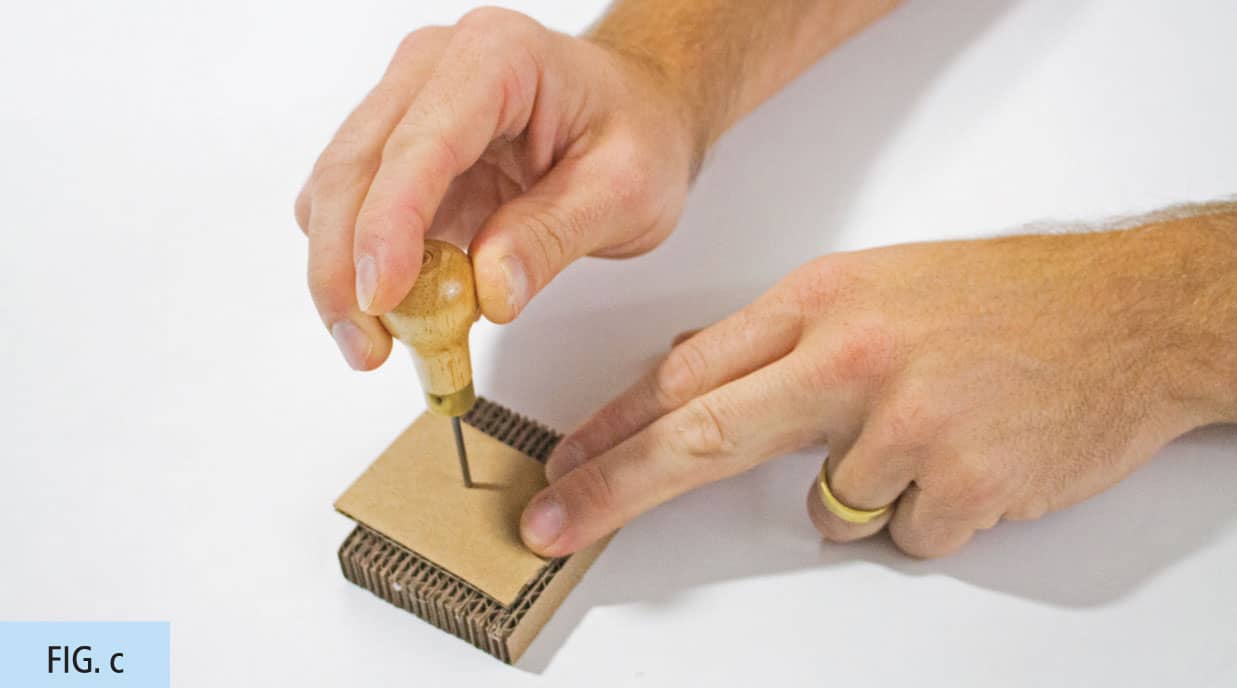
There will be many times in this book when youll need to poke a hole in your cardboard pieces. If you set your cardboard on a cutting mat and try to poke a hole, it wont go all the way through. You could hold the piece in your hand to make sure you poke all the way through, but then you risk poking your hand. Thats where the pokey pad comes in handy. It lets you poke a hole all the way through your piece while its sitting on a flat surface.
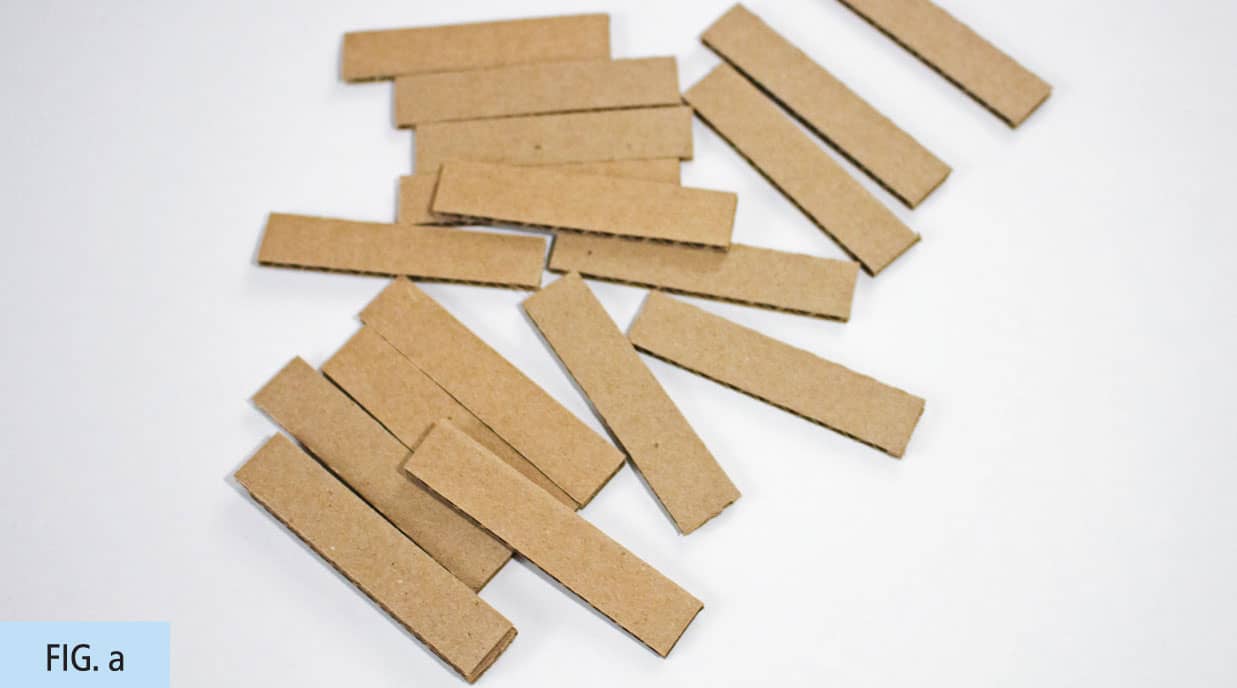
1. Cut a bunch of /-inch (1.3 cm)-wide strips out of cardboard, approximately 2 inches (5 cm) long (fig. a). Sixteen pieces should be plenty.
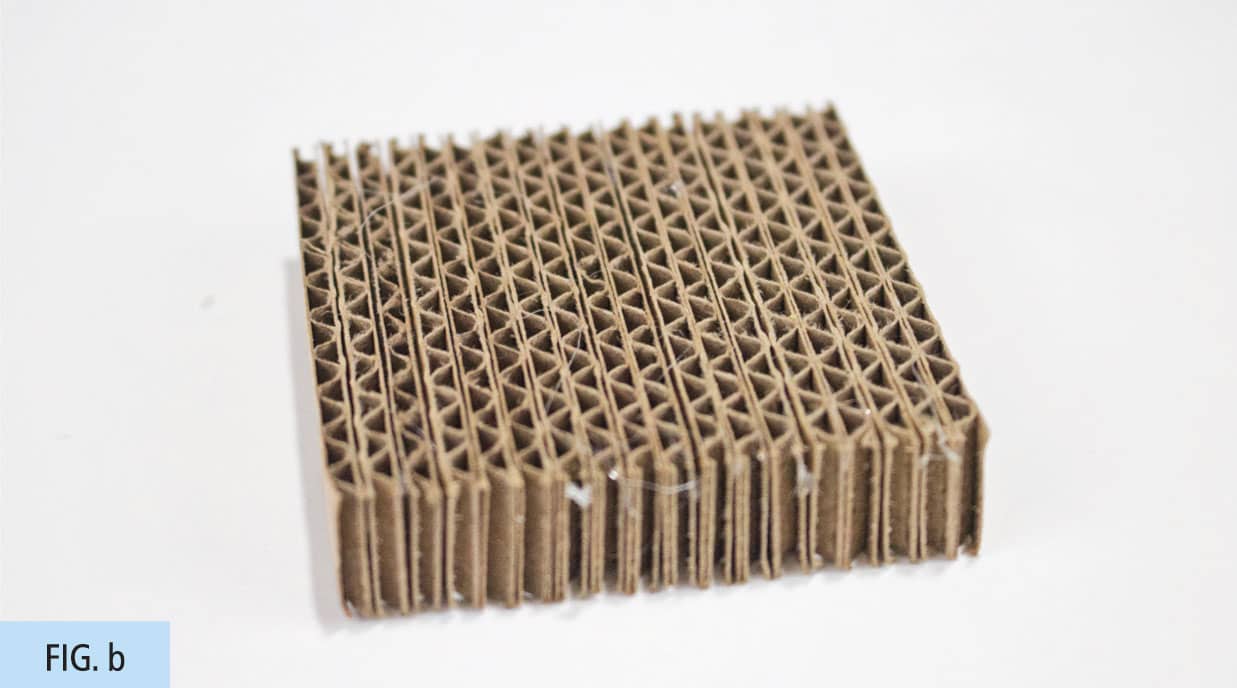
2. Glue together the strips to make your pokey pad (fig. b).
3. Now you can poke a clean hole through your entire piece and not poke your hand (fig. c).
CENTER FINDER
Normally well make our own circles, which means well always knows the center. But sometimes, if you need a perfect circle, its easier to use one thats been made in a factory. Lids and CDs are especially great choices for found circles. The only issue is you dont always know the exact center. This jig, made out of cardboard, will help you find the exact center every time.


