Kanzashi Tutorial
How to M ake an Un usual K anzashi F lower

by Ivanna Stepaniuk
Introduction to Kanzashi Art
By general definition, the term kanzashi refers to any type of hair ornament, including combs and hairpins. Being originally one of the traditional Japanese hairstyles, over time Kanzashi turned into a specific art technique of making finely crafted fabric flowers. Though stemming back to the prehistoric period of the Japanese history, it was only d uring the Edo period (1603-1868) , when Kanzashi came into a wide use. Ancient kanzashi resembled hair pins of specific form and were used by Japanese women no t only for hair embellishment but also for self-defense in case of emergency. However, these days delicate kanzashi flowers , usually made of fine fabric, such as silk, are used for decorative purposes only and are frequently worn by brides, professional geisha and participants of the traditional tea ceremony.
There are many various forms and types of kanzashi , which are differentiated by the particular material they are made from and/or the purpose they are worn for . Traditional kanzashi can be made f rom wood, silver and gold plated m e t a l, tortoiseshell , and, surely, silk. From this tutorial you will learn how to make your own tsumami kanzashi . Literally, this term means folded fabric hair ornament.
The art of making kanzashi make s use of some origami techniques, when tiny squares of fabric material are folded in a special way in order to get a single petal of a flower. Such petals are then sewn together to form a flower. The number of petals may vary from 5 to 75 or even more, depending on the particular flower being made.
Though Kanzashi appeared in Japan and is commonly perceived as the exclusive Japanese art, I believe it is part of the world cultural and art legacy. During many centuries masters polished this technique to turn it into a real fine art. I believe, beauty has no boundaries and the sense of beauty is common to all the nations. I made my best writing this tutorial to give you a chance to make your own kanzashi of a unique style. Hope you will enjoy the process of making kanzashi and remember that it is not only skills, which influence the final result. Your own feelings and emotions during the process of making kanzashi is very important, so stay positive and try to share joy, happiness , and love with your kanzashi .
Ivanna Stepan i uk
What you will learn to make with this tutorial
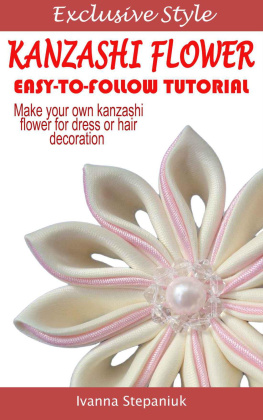
These guidelines will lead you step-by-step to creating a beautiful and quite unusual pointed tsumami kanzashi flower , which special feature is a stripe of a different color fabric inserted into a petal of the flower. It measures 2. inches in diameter. As any other kanzashi , it can have multiple uses starting from the tradition al hair embellishment and finishing with scrapbooking or purse decoration .

M aterials required for making a kanzashi flower
These days fabric used for making kanzashi flowers is not limited by any factors: practically any fabric type can be used for this purpose, though some of them are more comfortable to work with , while others may give you hard times during the process of petals formation .
Beginners usually feel more comfortable working with non-stretching, moderately thick, and natural fabrics. Cotton may be the best choice in this case. However, this material lacks the gloss and glamour of such fabrics as silk or satin.
On the other hand, too thin and light fabrics (e.g. chiffon, organza, silk) are quite hard to work with , as the small pieces, necessary for kanzashi flowers , always try no matter what to slip through your fingers . Or it may be difficult to make them keep the necessary shape after being folded. Some fabrics will make beautiful flowers, but they require ironing of the fold lines to keep the nice shape.
I believe the ideal choice may become a non-stretching and not too soft or thin satin. It is glossy and shiny enough and it is not too slippery. This is what our flower will be made of. Thus, you will need:
- two different colors of satin fabric (ivory and light pink in our case) ;
- scissors, ruler, pen, matches, candle, iron;
- glue, needle with the matching cotton thread;
- beads .
So, lets get started!
How to make a flower
- 1 -
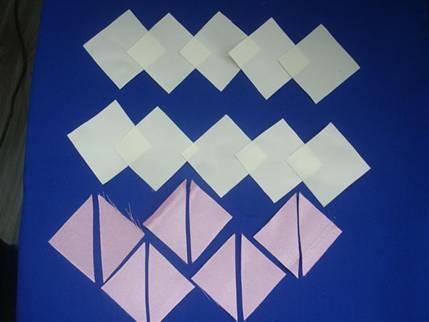
Mark and cut out 10 squares with a side of 2 inches from the ivory fabric. Then mark and cut out 5 squares of the same size from the pink fabric. These will be later cut diagonally into triangles.

-2-
The next step is to cut the pink satin diagonally, so that you would have 10 triangles. It is already done on the picture.
-3-
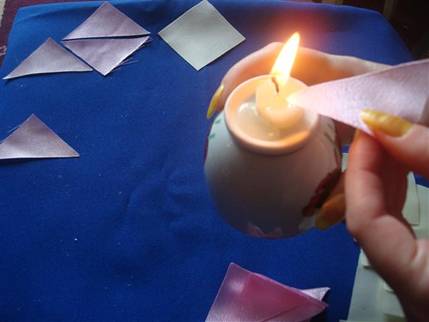
Singe all the cut edges with a candle to ensure comfortable and safe work with the fabric pieces. Hold the squares and triangles firmly and move candlelight along them quite fast not to set fabric on fire. You can control the process best if you use the base of the candlelight.
TIP Practically any fabric containing at least some amount of synthetic fiber can be successfully singed without burning it.
-4-
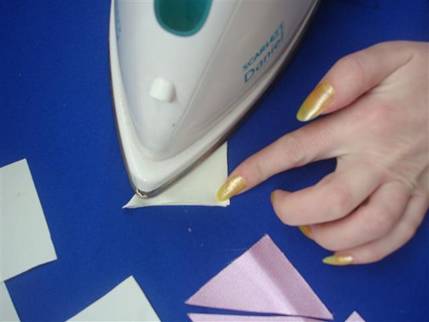
When the edges are secured, fold the ivory squares diagonally and iron the fold lines. You need them neat and thin.
-5-
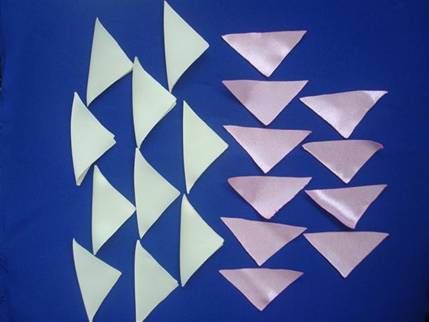
Now that ironing is over, you have 10 triangles of the diagonally folded ivory squares and 10 triangles of the pink satin. Fabric preparation is over.
-6-
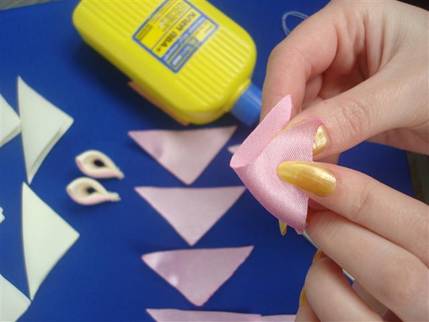
Now finally comes the actual process of flower making. First of all, you have to take one pink triangle and fold it in two.
-7-
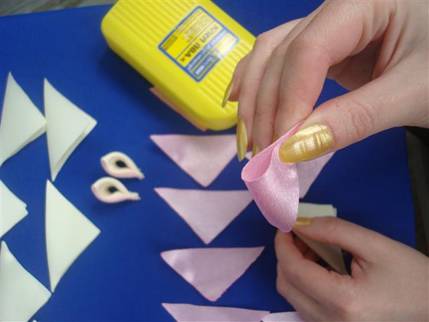
Hold it tight.
-8-
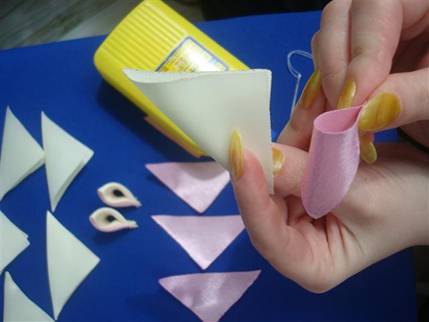
Now take one ivory folded square
-9-
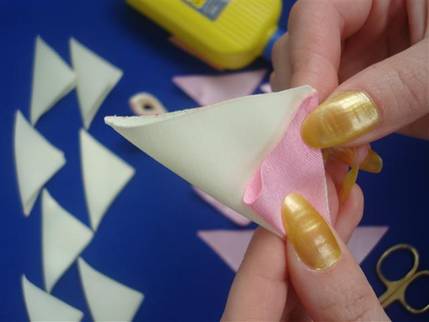
and place the pink fabric on it. This pink triangle will cover the half of the ivory one. Do not let the fabric pieces glide on one another.
-10-
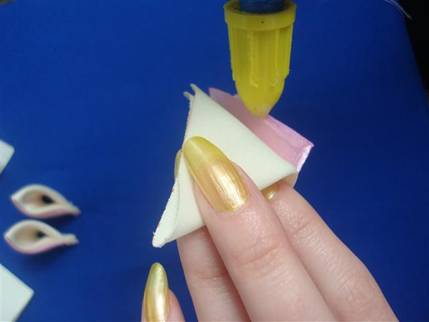
To prevent fabrics possible sliding, it is recommended to cover the edge of the pink triangle with glue and press it tightly to the ivory fabric.
Next page
