If you are an Annies customer and have a question about the instructions on a pattern you have purchased, please visit:
http://www.anniescatalog.com/pages/customer_care/pattern_services.html
Flower Loom Crochet
Table of Contents
General Information
Table of Contents
Guide
Pages
Basic Instructions
Select loom shape and set shape on the base, lining the notches on the bottom of the loom to the opposite indentations on the base.

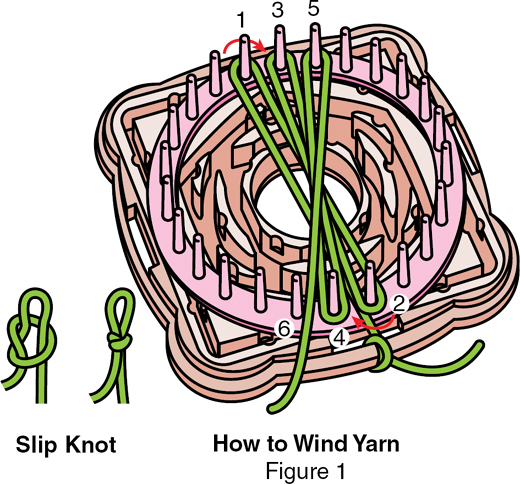
Thread end of working yarn through the hole on the edge of the base, leaving a 4-inch end. Tie the end and working yarn once over each other to secure the end or make a slip knot in the working yarn to secure yarn at opening on side of base.
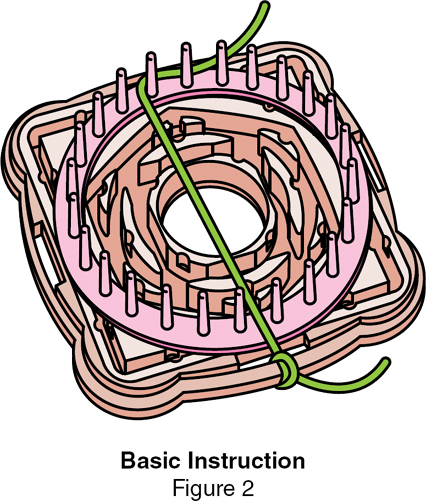
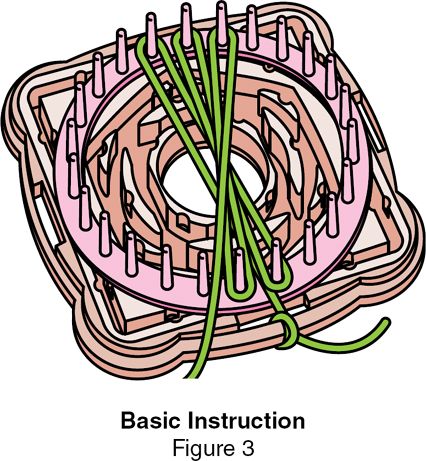
Wind the yarn around the pegs as shown in How to Wind Yarn instructions.
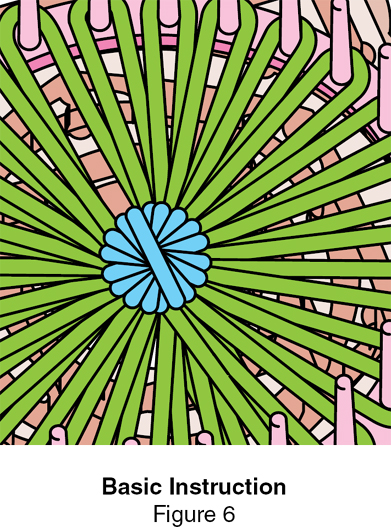
After winding yarn around all pegs in your pattern, cut yarn, leaving a 4-inch end if using a different yarn for darning. If using the working yarn for darning, leave a 28-inch end. Tie end to the beginning end.
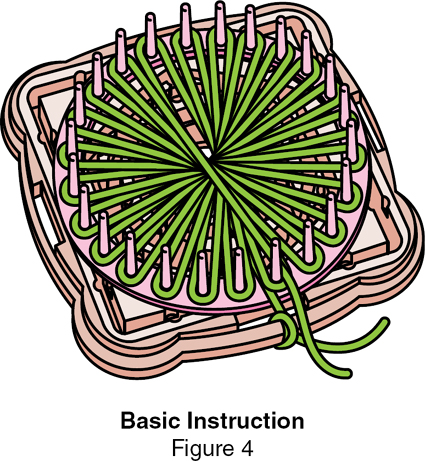
Thread tapestry needle with a separate strand of yarn and darn as shown in How to Darn: Basic Darning instructions.

Remove loom from base; trim and hide ends of yarn. Secure knots with fabric adhesive if desired. Carefully remove flower from loom.
How to Wind Yarn
When winding yarn, always wind yarn from left to right (clockwise) around pegs. Hold the yarn down on the last peg wrapped with free hand when moving to next peg. Keep gentle tension on working yarn to keep shape of flower.
Bring working yarn straight across the loom from the starting end, making sure the yarn is to the left of the peg closest to the end. Wind yarn around Peg 1 from left to right (clockwise), bringing yarn straight down to Peg 2 on opposite side.
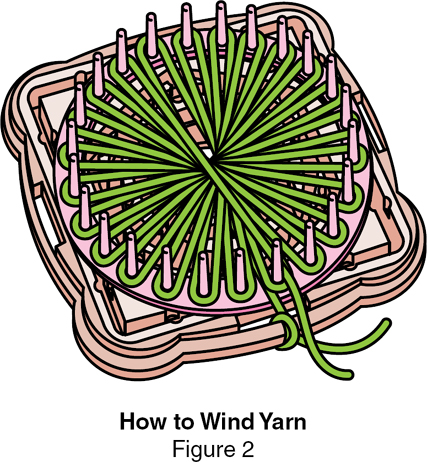
Continue to wind yarn around pegs in order, alternating sides of loom. Continue in a clockwise fashion until all pegs specified in pattern are wrapped.
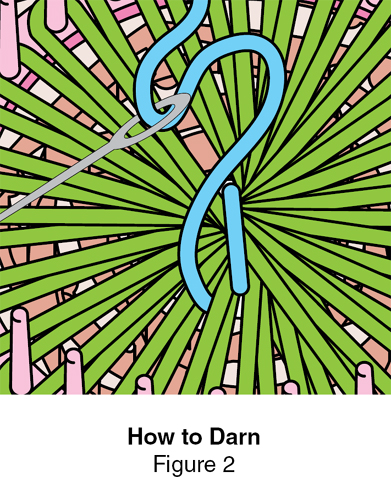
How to Darn
Basic Darning
Thread tapestry needle with strand of darning yarn. Bring the needle up from the back of the base and through the middle of opposite petal last made, leaving a 4-inch end. If using the yarn from the last petal for darning, first bring the long end to the back through the middle of a petal, then follow directions above.

Next, insert the needle through the middle of the opposite petal on the front side and pull entire strand through keeping strand tight to create the flower center. This completes one darning stitch.
Continue to darn each petal around the flower. After all petals are darned, untie yarn ends from loom base.
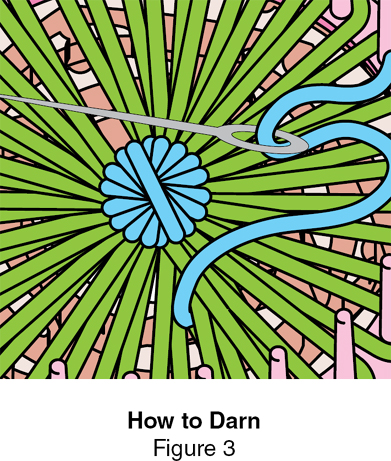
To fasten off yarn, pull ends of the yarn to the back side of the loom; tie together and trim. Secure with fabric adhesive if desired.
Backstitch
Thread tapestry needle with a strand of yarn 36 inches long.
From the top of the loom, insert needle under 4 strands of flower and pull yarn through, leaving a 4-inch beginning tail.
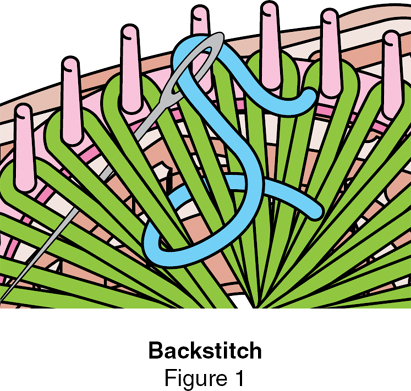
Beginning in center of last stitch, insert needle under next 4 strands of Flower and pull yarn through to complete next stitch. Stitch a full circle around flower, keeping each stitch tight and pushed toward center.

To fasten off, tie ends together on back of loom. Weave ends in darning stitches and trim. Secure with fabric adhesive if desired.
Weaving
Darn flower center as shown in How to Darn: Basic Darning to secure flower. Yarn amount varies depending on how much of flower is woven.
Thread tapestry needle with strand of desired yarn. Beginning in center of flower, weave working yarn over and under the strands of loops on two pegs. Pull all slack from yarn tight with each stitch.
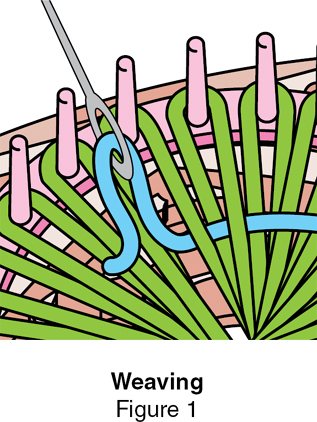
Weave working yarn under and over the same strands. Always push the weave back firmly toward the center before starting the next row.
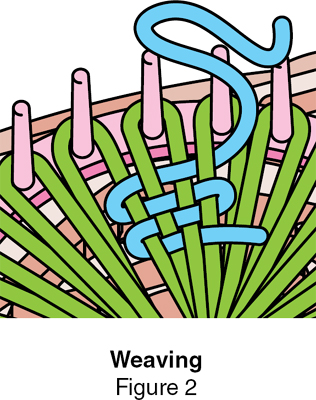
Continue weaving until reaching the desired amount of coverage; fasten ends at back.
To fasten off yarn, pull ends of the yarn to the back side of the loom; tie together and trim. Secure with fabric adhesive if desired.
Chain Stitch
Darn flower center as shown in How to Darn: Basic Darning to secure flower.
Thread tapestry needle with strand of desired yarn 1 yards long.
From the top of the loom and leaving a 4-inch beginning tail, insert needle under 2 strands of flowerone strand from each petaland tie together. Push beginning tail to back of loom to the right of knot just made.

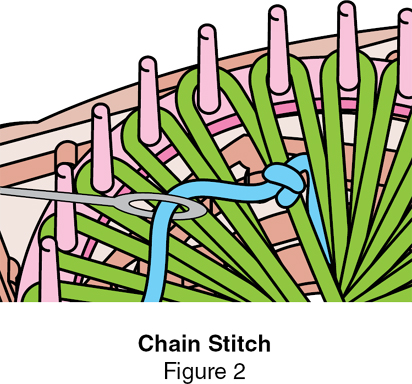
Make a loose loop of working yarn to lie over the next two neighboring petal loops of flower and toward the left. Insert needle under working loop and next 2 strands of flower. Pull yarn through strands and loop. Tighten loose yarn to create your first chain. Adjust chain as needed to position on flower by sliding stitch with needle.


