This chapter walks you through installing and setting up your development environment so you can follow the examples and labs in this book. First, you will install an essential prerequisite component called the Java Development Kit (JDK). Then you will download and install Android Studio as well as the Android Software Development Kit (SDK), which is a suite of software tools required to build Android apps. We will show you how to use the New Project Wizard to create a simple project called HelloWorld. Last, we will show you how to establish a connection to both an Android Virtual Device (AVD) and a physical Android device. By the end of this chapter, you will have everything you need to start developing apps in Android Studio.
Installing the Java Development Kit on Windows
This section pertains to Windows users. If youre a Mac user, skip ahead to the section titled Installing the Java Development Kit on Mac. Android Studio uses the Java tool chain to build, so you need to make sure that you have the Java Development Kit (JDK) installed on your computer before you start using Android Studio. Its quite possible that you already have the JDK installed on your computer, particularly if youre a seasoned Android or Java developer. If you already have the JDK installed on your computer, and youre running JDK version 1.6 or higher, then you can skip this section. However, you may want to download, install, and configure the latest JDK anyway. You can download the JDK from the following Oracle site:
www.oracle.com/technetwork/java/javase/downloads/index.html
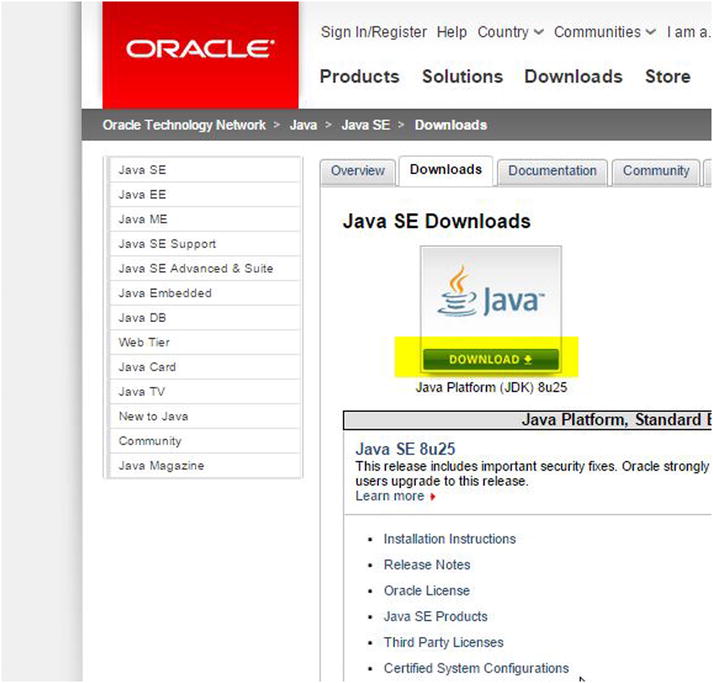
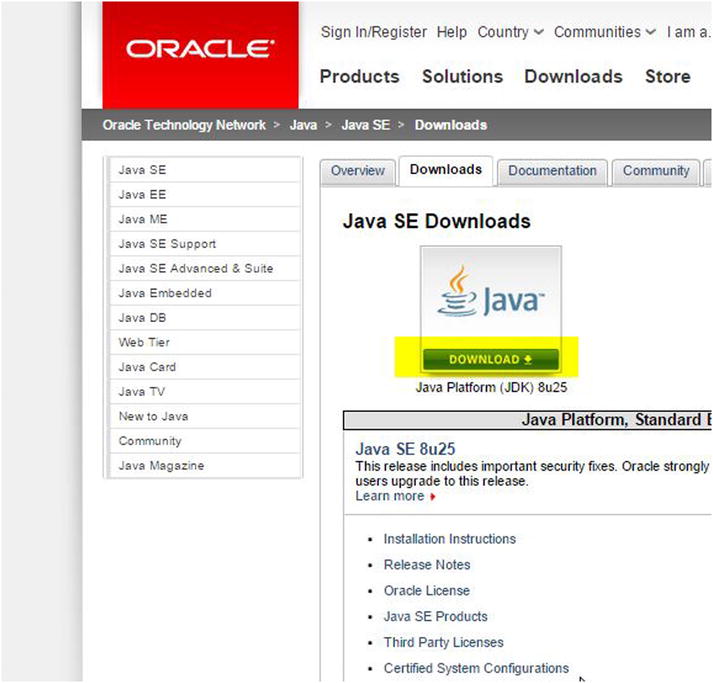
When you land on this page, click the Java Download button, shown in Figure .
Figure 1-1.
The Java Download button on the Java Downloads page
Downloading the JDK on Windows
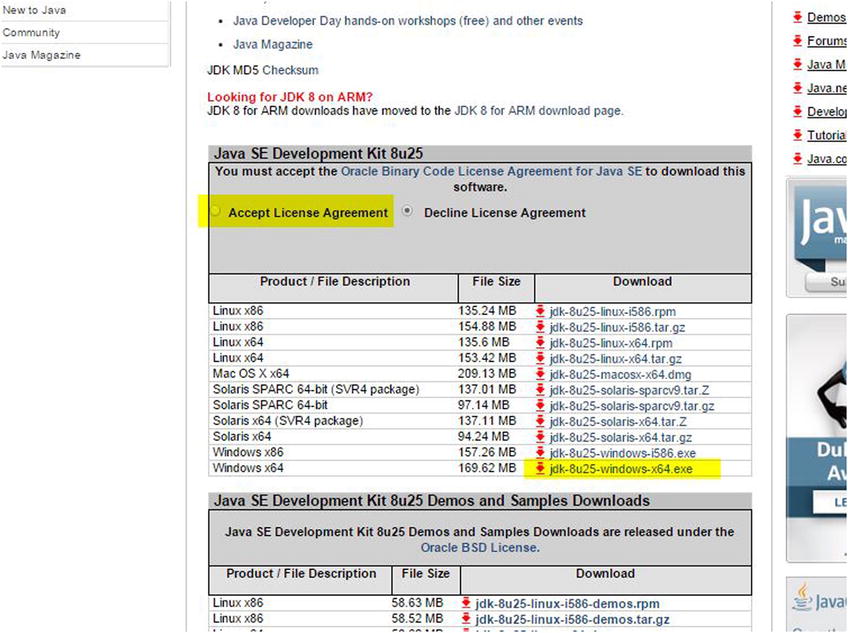
The next step in the installation, shown in Figure . Oracle makes frequent release updates to the JDK. By the time this book goes to press, a newer version of the JDK will almost certainly be available, so please be sure to download the latest version. Wait for the installation file to download. This file is usually around 125MB, so the download shouldnt take long.
Figure 1-2.
Accept the license agreement and click the appropriate link for Windows
Executing the JDK Wizard on Windows
Before you install the JDK, create a directory in the root of your C: drive called Java . The name of this directory is arbitrary, though we call it Java because many of the tools we are going to install here are related to Java, including the JDK, Android Studio, and the Android SDK. Consistently installing the tools related to Android Studio in the C:\Java directory also keeps your development environment organized.
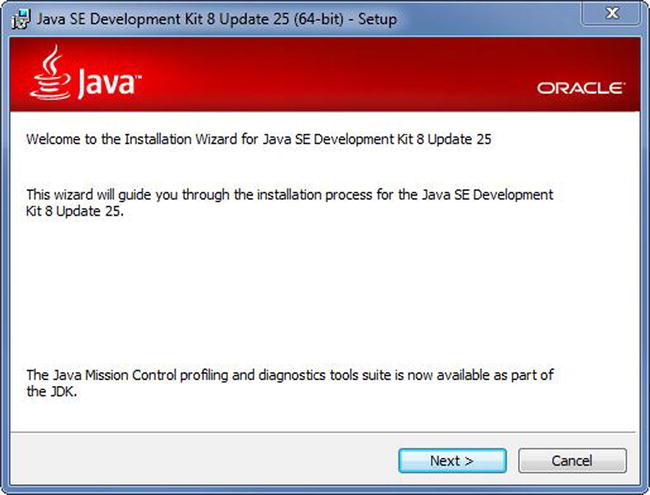
Navigate to the location where your browser downloaded the installation file and execute that file by double-clicking it. Once the installation begins, you will be presented with the Installation Wizard, shown in Figure .
Figure 1-3.
Installation Wizard for the JDK on Windows
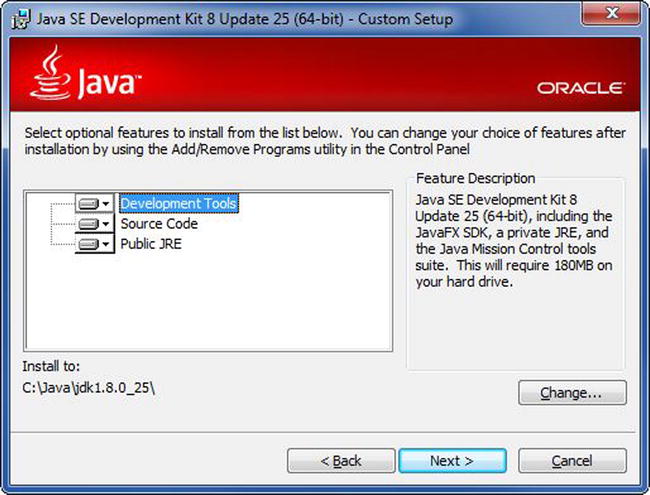
Figure 1-4.
Select the JDK installation directory
Make a note of where you are installing your JDK. Follow the prompts until the installation is complete. If prompted to install the Java Runtime Edition (JRE), choose the same directory where you installed the JDK.
Configuring Environmental Variables on Windows
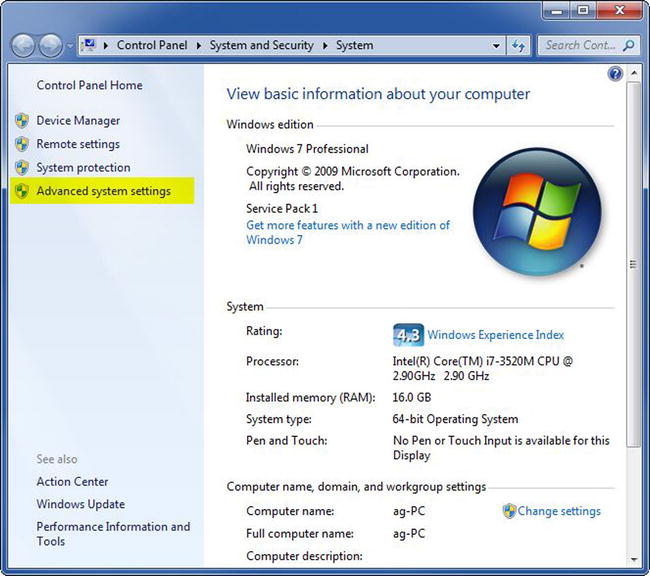
This section shows you how to configure Windows so that the JDK is found by Android Studio. On a computer running Windows, hold down the Windows key and press the Pause key to open the System window. Click the Advanced System Settings option, shown in Figure .
Figure 1-5.
Windows System window
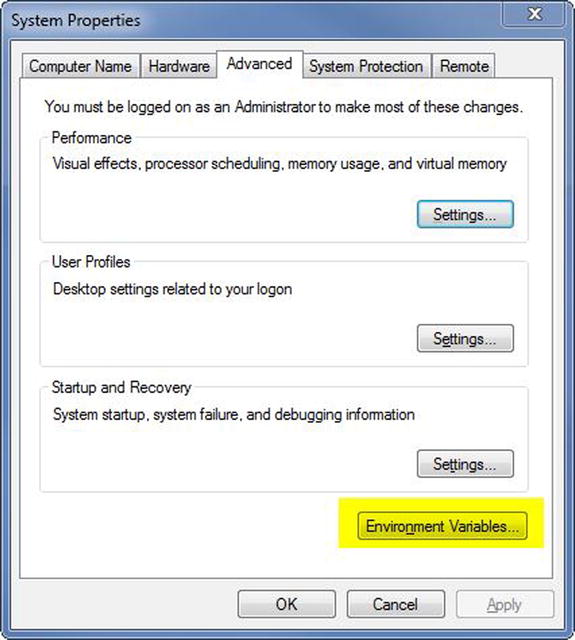
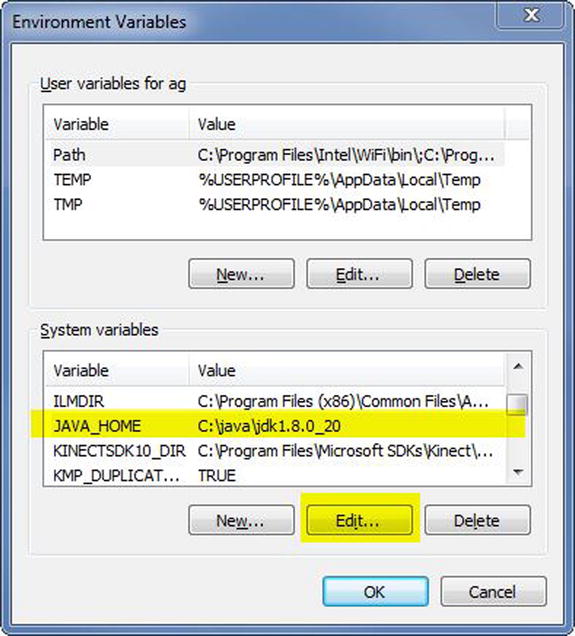
Click the Environmental Variables button, shown in Figure , navigate to the JAVA_HOME item. If the JAVA_HOME item does not exist, click New to create it. Otherwise, click Edit.
Figure 1-6.
System properties
Figure 1-7.
Environmental variables
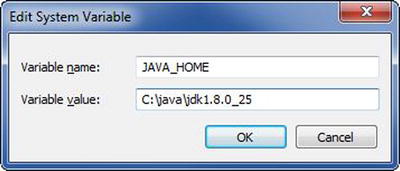
Clicking either New or Edit displays a dialog box similar to Figure . Now click OK.
Figure 1-8.
Edit the JAVA_HOME environmental variable
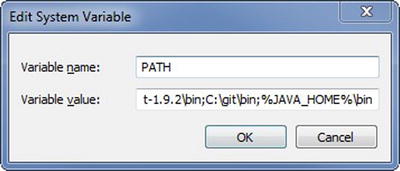
Just as you did with the JAVA_HOME environmental variable, you will need to edit the PATH environmental variable. See Figure . Place your cursor at the end of the Variable Value field and type the following:
Figure 1-9.
Edit the PATH environmental variable
;%JAVA_HOME%\bin
Now click OK, OK, OK to accept these changes and back out of the system properties.
To test that the new JDK has been installed properly, pull up a command line by clicking the Start button, typing cmd , and then pressing Enter.
In the command-line window, issue the following command and press Enter:
java version
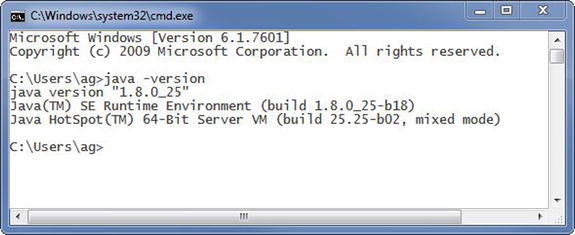
If you get a response like the one shown in Figure , congratulations. You just installed the JDK properly.
Figure 1-10.
Confirm the proper JDK installation
Installing the Java Development Kit on Mac
The first two steps in installing the JDK for Mac and Windows are identical. Point your browser to the following site:
www.oracle.com/technetwork/java/javase/downloads/index.html
When you land on this page, click the Java Download button, shown in Figure .


![J. F. DiMarzio [J. F. DiMarzio] - Android Studio Game Development: Concepts and Design](/uploads/posts/book/119418/thumbs/j-f-dimarzio-j-f-dimarzio-android-studio.jpg)


