TinyCalculator is the first and simplest application discussed in this book. Its nothing more than a simple calculator for basic arithmetic. But it is useful to show some fundamental concepts of web applications with Java and JSF.
As a kind of appetizer, and unlike how Ill handle the other applications, Ill first show you the whole application, with a little explanation afterwards. Then, as a kind of restart, I talk about the foundations of web applications and explain TinyCalculator and different approaches.
You can access the source code for TinyCalculator by clicking the Download Source Code button at www.apress.com/9781484230299 . You can also find the source code at http://webdevelopment-java.info .
Creating the Application
A web application with Java and JSF uses an application server to run. Dont be afraidyour IDE usually deals with that. Later on, Ill discuss that in more detail. Well start with the application.
For this book, I had to decide which IDE to use in the tutorial parts. NetBeans, either the Java EE or All edition, comes with GlassFish. At the time of writing, the direct link to the download page is https://netbeans.org/downloads/index.html . Because NetBeans has been donated to Apache, this location may change. If that link isnt available anymore, refer to https://apache.netbeans.org . Just install it, and no further configuration is needed to start with simple applications. Its quite easy.
Many of this books basic examples are based on NetBeans 8 (English), which is bundled with GlassFish 4. GlassFish 4 is the reference implementation of Java EE 7, which is fine for TinyCalculator. To enable the brand new Java EE 8 features, you need GlassFish 5 or any other Java EE 8compliant server, once available. GlassFish 5 will be bundled with NetBeans 9. Since the first donation (IDE) is still in progress, and Java EE is part of the second Java EE 8 donation, this may be a lengthy process. Ill describe how to update to Java EE 8 just after TinyCalculators explanation.
All applications in this book are built with Apache Maven ( ). Depending on your IDE, you may open Maven projects directly (for example, with NetBeans) or you may need to perform a simple import (for example, with Eclipse).
As a novice to JSF or Java EE, you may not have created any Java-based web application before. So, Ill start this one from scratch in the form of a step-by-step tutorial. Unlike in future chapters, Ill cover the whole application here without detailed explanation, and then well catch up after the tutorial:
Launch NetBeans.
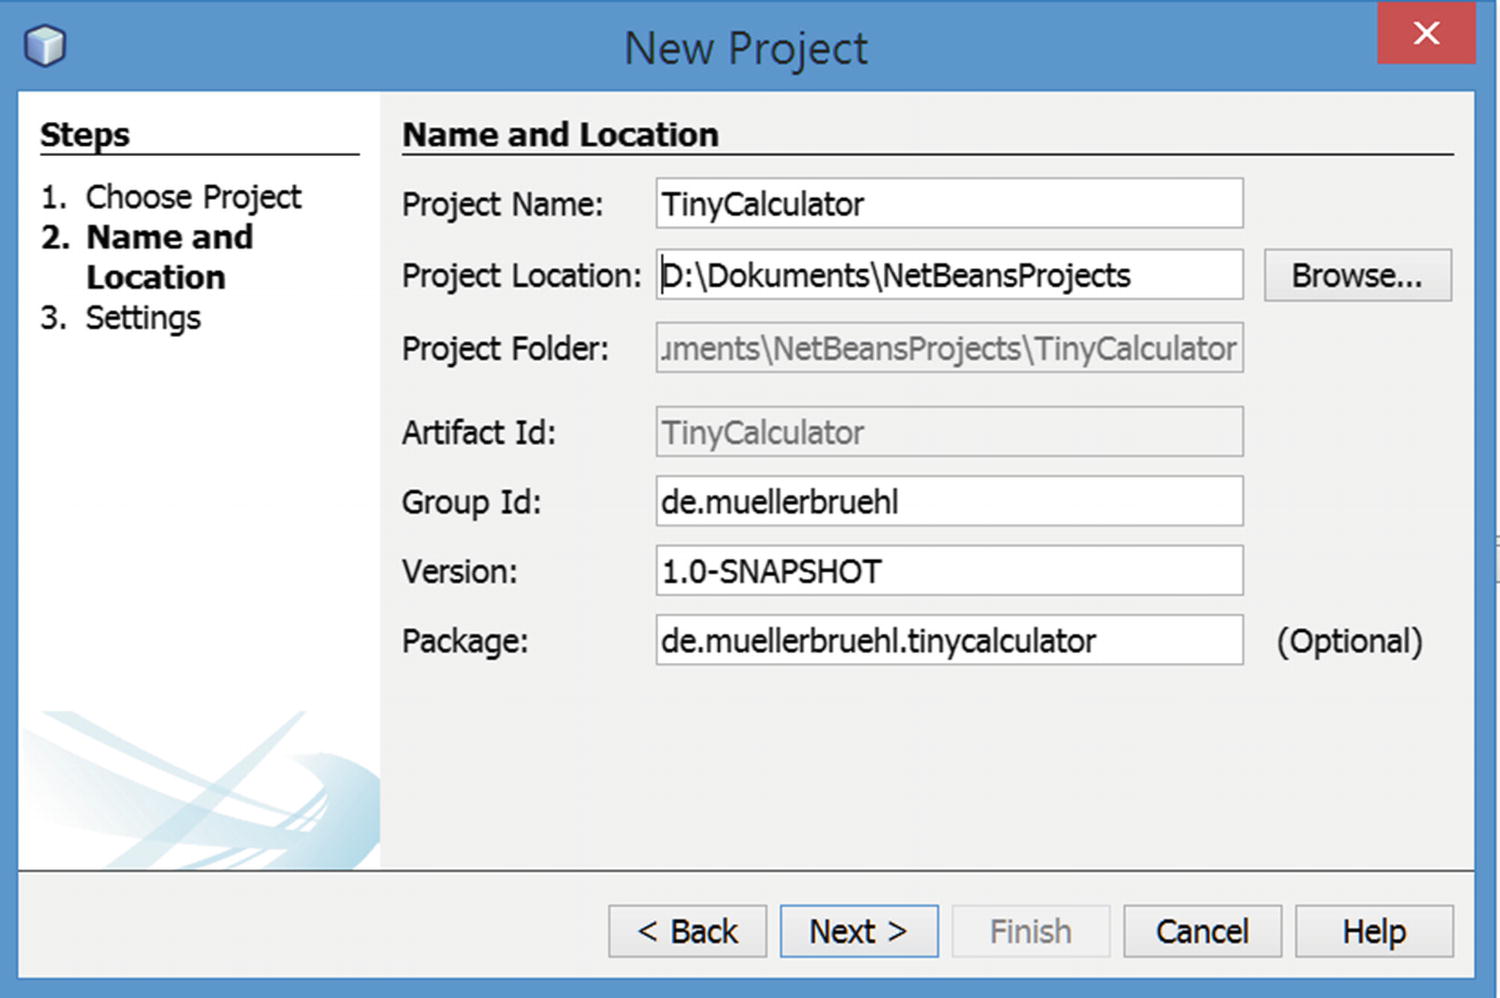
From the File menu, choose New Project. NetBeans displays the New Project wizard , as shown in Figure .
Figure 1-1
New Project wizard
Click the category Maven, click Web Application, and then click Next. NetBeans displays the New Web Application wizard , as shown in Figure .
Figure 1-2
New Web Application wizard
For the Project Name, enter TinyCalculator . You may adapt the other fields as desired, or just keep them unchanged. Its good practice to set the Group Id to the reverse notation of your domain. Click Next, keep the settings in the next dialog unchanged, and click Finish.
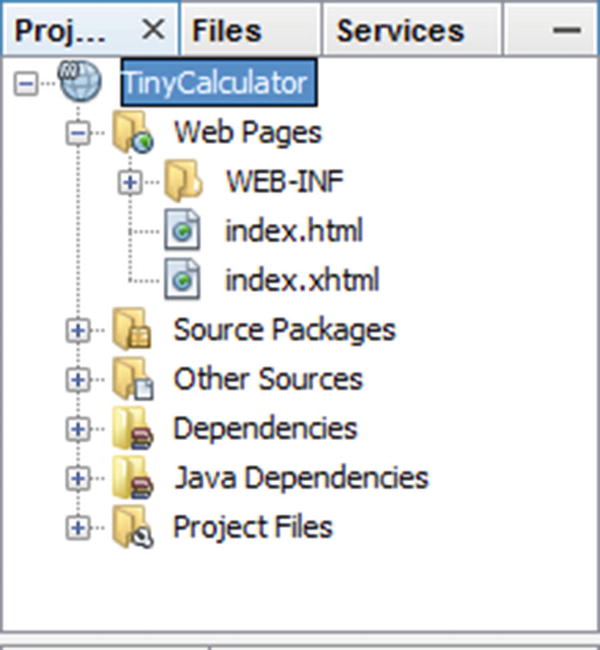
NetBeans creates a skeleton of a new web application for you and displays it within the projects tree , as shown in Figure .
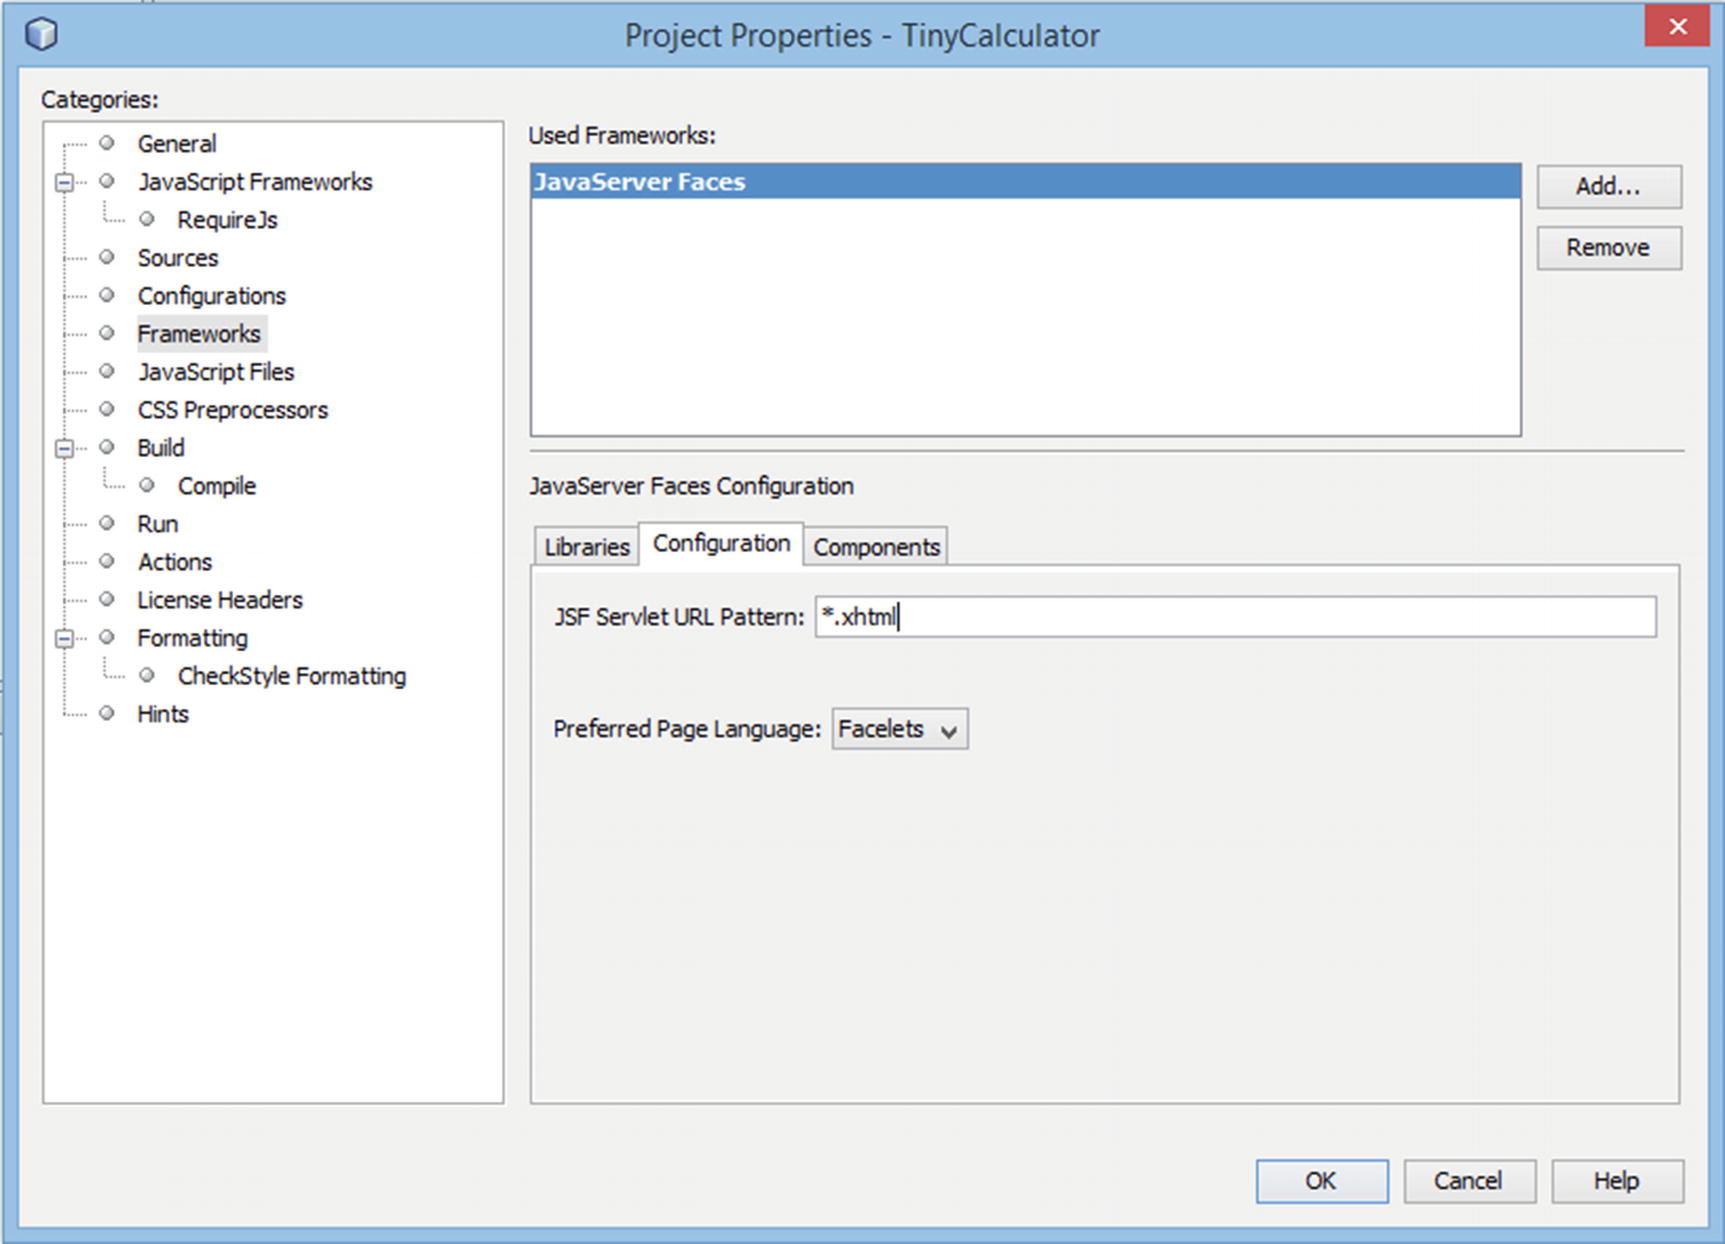
Right-click (secondary click) TinyCalculator in the projects tree and choose Properties from the context menu. The Project Properties screen appears, as shown in Figure .
Figure 1-4
Framework configuration
Choose the Frameworks category. Choose JavaServer Faces and click the Add button. Click the Configuration tab and change the contents of the JSF Servlet URL Pattern box to *.xhtml . Click OK.
While adding JSF to your project, NetBeans creates a web page called index.xhtml within the web pages, keeping the formerly created index.html file.
On the projects tree open the Web Pages node (if its not already open), as shown in Figure . Select index.html and delete it.
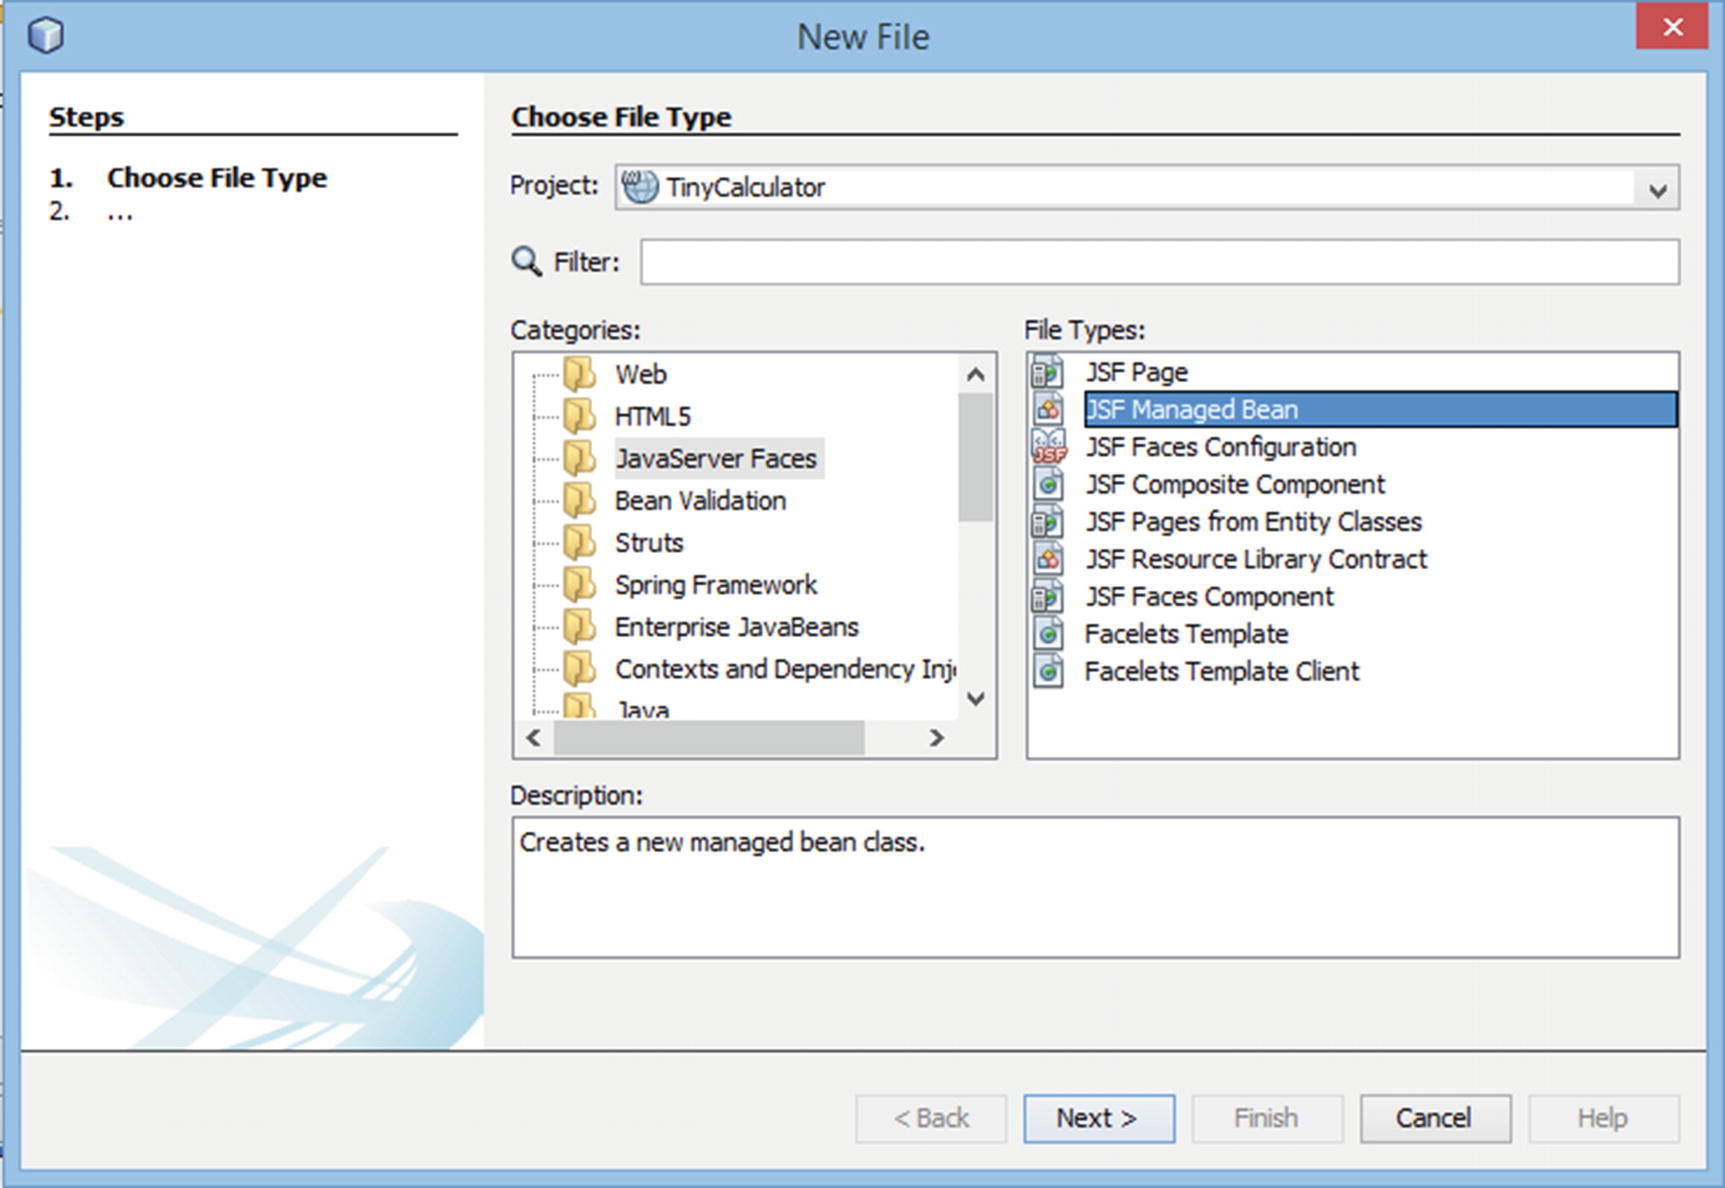
From the File menu , choose New Fileor press the shortcut key shown in the menu, which is faster than clicking. The IDE opens the New File wizard, as shown in Figure .
Figure 1-6
New File wizard
Choose the category JavaServer Faces and then choose JSF Managed Bean. Click Next.
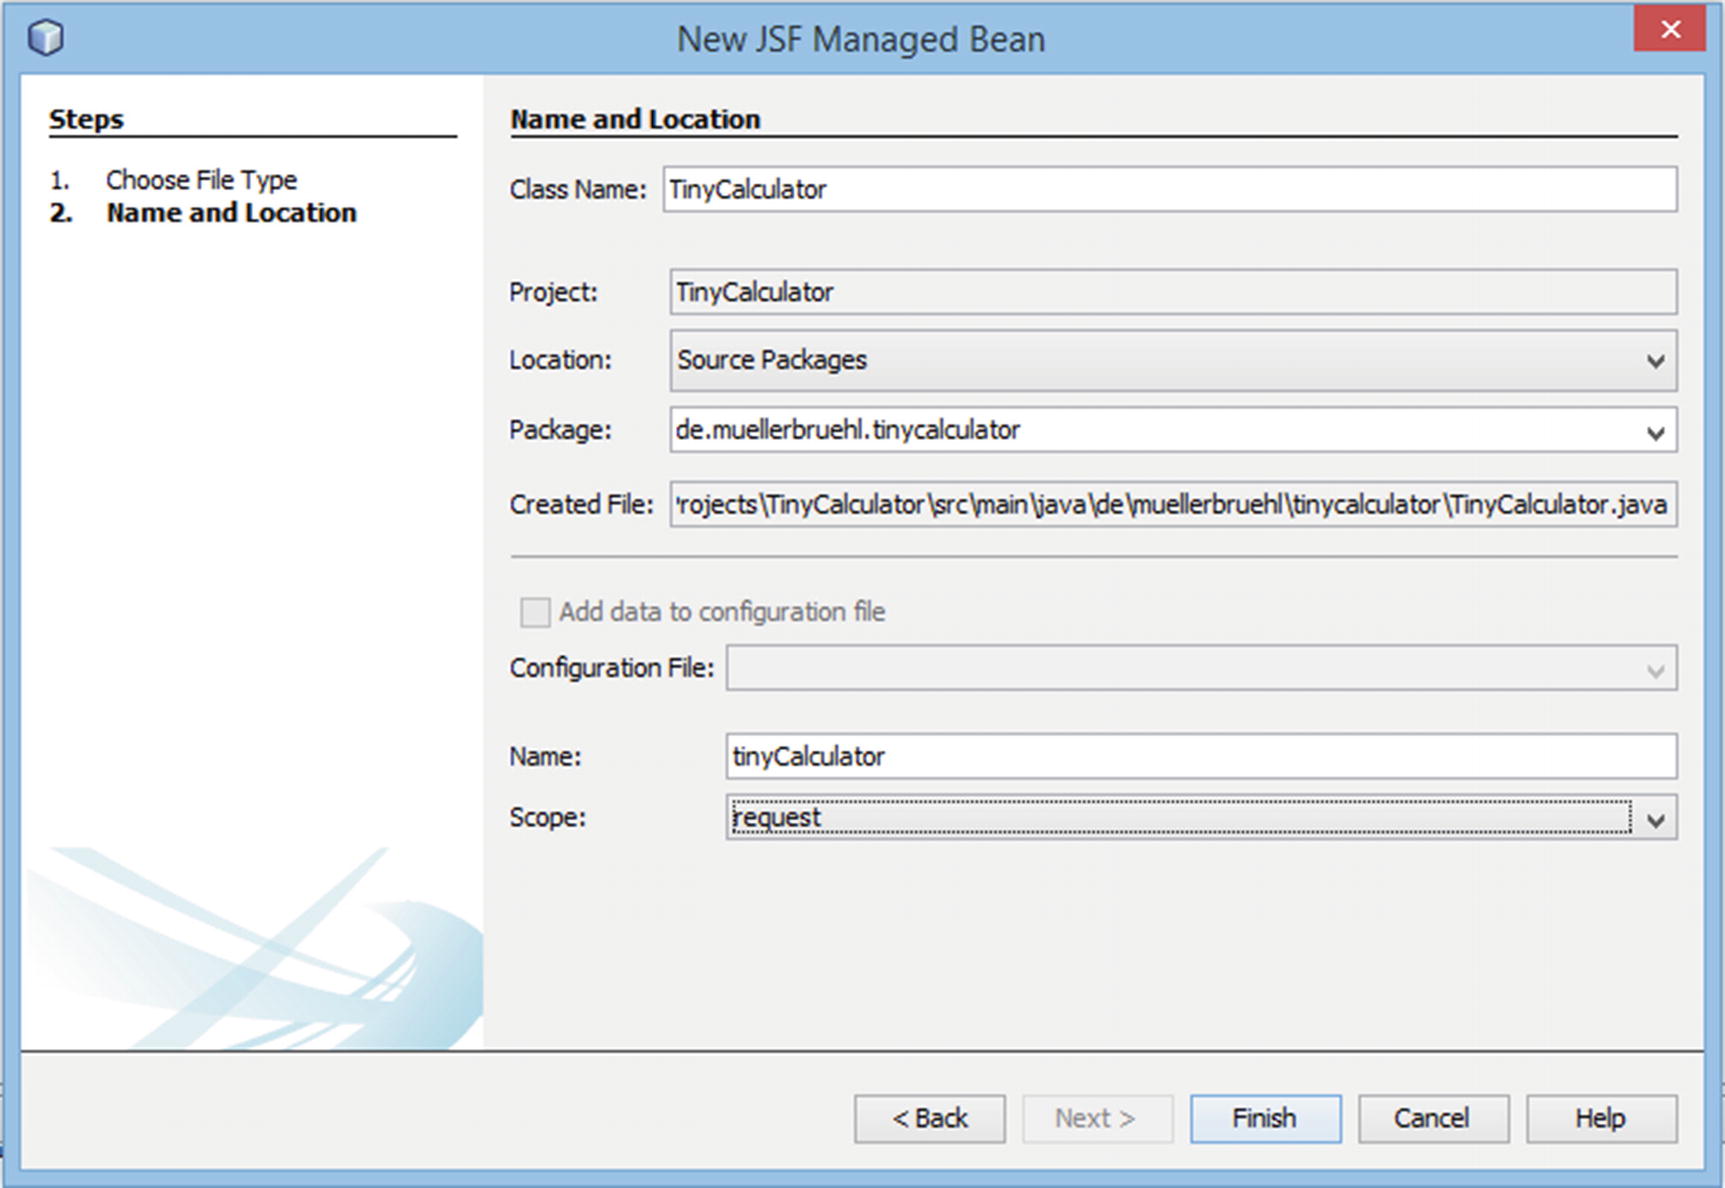
The New JSF Managed Bean window appears, as shown in Figure .
Figure 1-7
New JSF Managed Bean
Enter TinyCalculator as the Class Name and from Scope select request. Click Finish.
NetBeans creates and opens a Java class file named TinyCalculator .
Now, edit this class. Key in or paste the code shown in Listing .
1 package de.muellerbruehl.tinycalculator ;
3 import javax.inject.Named ;
4 import javax.enterprise.context.RequestScoped ;
6 /**
7 *
8 * @author mmueller
9 */
10 @Named
11 @RequestScoped
12 public class TinyCalculator {
14 public TinyCalculator() {
15 }
17 private double _param1;
18 private double _param2;
19 private double _result;
21 public double getParam1() {
22 return _param1;
23 }
25 public void setParam1( double param1) {
26 _param1 = param1;
27 }
29 public double getParam2() {
30 return _param2;
31 }
33 public void setParam2( double param2) {
34 _param2 = param2;
35 }
37 public double getResult() {
38 return _result;
39 }
41 public void setResult( double result) {
42 _result = result;
43 }
45 public String add(){
46 _result = _param1 + _param2;
47 return "";
48 }
50 public String subtract(){
51 _result = _param1 - _param2;
52 return "";



![Michael Müller [Michael Müller] - Practical JSF in Java EE 8 : Web Applications ​in Java for the Enterprise](/uploads/posts/book/124065/thumbs/michael-mg-ller-michael-mg-ller-practical.jpg)

