
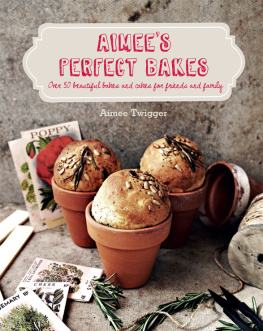
 50 beautiful sweet gifts for friends and family Aimee Twigger
  CONTENTS
 A NOTE FROM AIMEE For as long I can remember I have been creative, and when I found my love for baking a couple of years ago, the two seemed to naturally merge together. As the theme of this book tells you, creating sweet things is what I love to do most I have always had a sweet tooth. And the treat should not only taste sweet, it should look sweet as well. When I bake I want to create a work of art; I always imagine how the finished product might look before I even start to think about the recipe. I enjoy styling my treats as much as I do baking them. I dont have fancy equipment just a standard camera and loads of wonderful props and baking tools.
Ive included a list of equipment stockists at the back of the book; however, I often search in local thrift stores and on eBay for props and vintage baking equipment. I love these vintage pieces because I always imagine they have a story behind them, and they look great in photos. Thrift stores are great places even when youre not styling your food for a photograph. Vintage tins and boxes make great gifts, especially when theyre filled with beautiful treats. All of the recipes in this book work perfectly as edible gifts that you can share with loved ones and friends.  BAKERS NOTES Ingredients Butter: I always use butter at room temperature for cakes and chilled, cubed butter for pastry or cookies. Eggs: When baking cakes or cupcakes, make sure your eggs are at room temperature. Baking powder: To check if your baking powder is still active add a spoonful into some water. Baking powder: To check if your baking powder is still active add a spoonful into some water.
If it fizzes up, its still good to use. Flour: There are so many different types of flour with different gluten levels, such as plain flour, self-raising flour, spelt flour and rye flour. I tend to use plain or self-raising flour for most of my recipes but I like to use spelt flour, too it is thought of as an ancient grain. Sieve the flour to help prevent any lumps in a batter. When making a cake, always fold in the flour rather than mix it with a hand-held electric beater. When flour is folded in, it doesnt build up as much gluten, which helps to make the cake light and fluffy.
Equipment Food processor: I swear by my food processor and recommend that you get one. I use it for so many things, from making cookie dough and pastry to pureing fruit and chopping up ingredients I just love it. You dont need to waste money on an expensive one with loads of attachments. Mine is just a cheap one, and I never use any of the attachments except the cutting blade. Ive noted in the recipes when a food processor is required. Standmixer: Another kitchen gadget I would recommend is a standmixer; it is very handy when making meringues or marshmallows.
Ive noted in the recipes when a standmixer is required. Rubber spatula: This is my favourite kitchen tool. I use it for most of my baking because its so versatile. Spatulas are great for folding in mixtures, and they scrape the sides of a bowl very well so everything is mixed properly and there is no waste. A spatula can also be used to spread icing over cakes and cupcakes. 
 1.
1.
Cupcakes 
 Little honey cakes with figs,
pistachios and mascarpone Makes 6 cakes Difficulty rating For the cakes 125 g (4 oz) butter 110 g (3 oz/ cup) caster (superfine) sugar 2 eggs 2 tablespoons honey, plus extra for drizzling 110 g (3 oz/ cup) self-raising flour 2 tablespoons crushed pistachk kernels, plus extra for sprinkling For the icing and topping 240 g (8 oz/1 cup) mascarpone cheese 125 g (4 oz/1 cup) icing (confectioners) sugar 3 figs Equipment Silicone cupcake mould Prep time: 10 minutes Baking time: 12 minutes Decorating time: 15 minutes For the cakes Preheat the oven to 180C/350F. Cream the butter and sugar together in a bowl until pale and creamy. Beat in the eggs one at a time, making sure that each one is properly combined before adding the next. Add 2 tablespoons honey and mix through. Sift in the flour, add 2 tablespoons of pistachios and fold into the mixture. Spoon the batter into the cake mould, filling the mould about three-quarters full.
Bake for 12 minutes and then allow to cool. For the icing and topping Mix the mascarpone with the icing sugar. Slice any risen tops off the cakes and sandwich two of the small cakes together with the mascarpone mixture. Drizzle on a little of the honey. Add some more mascarpone mixture on top, drizzle on some honey and then sprinkle with crushed pistachios. Top each cake with half a fig.
EDIBLE ROSE CAKE POPS  I had the idea one day to create an edible bouquet. These roses are in fact cake pops with sugar paste petals. I used stems from faux flowers instead of lollipop sticks to make them appear more realistic. This would be great for Mothers Day.
 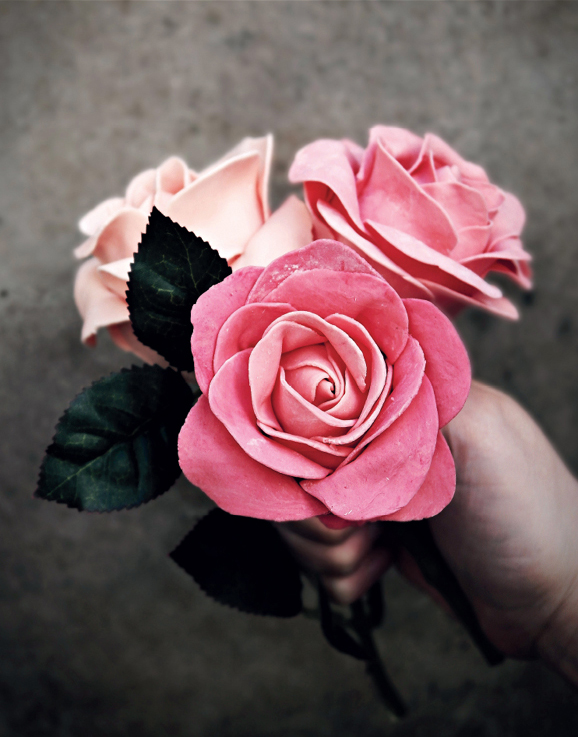 Edible rose cake pops Makes 20 cake pops Difficulty rating
 For the cake balls 125 g (4 oz) butter 110 g (3 oz/ cup) caster (superfine) sugar 2 eggs teaspoon vanilla bean paste 110 g (3 oz/ cup) caster (superfine) sugar 110 g (3 oz/ cup) self-raising flour teaspoon salt For the petals Pink food colouring 250 g (9 oz) package of sugar paste or modelling chocolate Equipment Cake pop mould Faux flower stems or lollipop sticks Rolling pin Prep time: 10 minutes Baking time: 1115 minutes Decorating time: 15 minutes per cake pop For the cake balls Preheat the oven to 180C/350F. Cream the butter and sugar together in a bowl until pale and creamy.
Beat in the eggs one at a time, then stir in the vanilla bean paste. Sift in the flour and salt and fold into the mixture. Spoon the batter into a cake pop mould, filling the mould to the top. Put the lid on the mould, bake for 1115 minutes and then allow to cool. When completely cool, insert faux flower stems or lollipop sticks into the cake balls. For the petals Knead a little food colouring into the sugar paste or modelling chocolate, adding a small amount at a time until you achieve the desired colour.
Next page





 50 beautiful sweet gifts for friends and family Aimee Twigger
  CONTENTS
 A NOTE FROM AIMEE For as long I can remember I have been creative, and when I found my love for baking a couple of years ago, the two seemed to naturally merge together. As the theme of this book tells you, creating sweet things is what I love to do most I have always had a sweet tooth. And the treat should not only taste sweet, it should look sweet as well. When I bake I want to create a work of art; I always imagine how the finished product might look before I even start to think about the recipe. I enjoy styling my treats as much as I do baking them. I dont have fancy equipment just a standard camera and loads of wonderful props and baking tools.
 BAKERS NOTES Ingredients Butter: I always use butter at room temperature for cakes and chilled, cubed butter for pastry or cookies. Eggs: When baking cakes or cupcakes, make sure your eggs are at room temperature. Baking powder: To check if your baking powder is still active add a spoonful into some water. Baking powder: To check if your baking powder is still active add a spoonful into some water.
 1.
1.
 Little honey cakes with figs,
 For the cakes 125 g (4 oz) butter 110 g (3 oz/ cup) caster (superfine) sugar 2 eggs 2 tablespoons honey, plus extra for drizzling 110 g (3 oz/ cup) self-raising flour 2 tablespoons crushed pistachk kernels, plus extra for sprinkling For the icing and topping 240 g (8 oz/1 cup) mascarpone cheese 125 g (4 oz/1 cup) icing (confectioners) sugar 3 figs Equipment Silicone cupcake mould Prep time: 10 minutes Baking time: 12 minutes Decorating time: 15 minutes For the cakes Preheat the oven to 180C/350F. Cream the butter and sugar together in a bowl until pale and creamy. Beat in the eggs one at a time, making sure that each one is properly combined before adding the next. Add 2 tablespoons honey and mix through. Sift in the flour, add 2 tablespoons of pistachios and fold into the mixture. Spoon the batter into the cake mould, filling the mould about three-quarters full.
 Edible rose cake pops Makes 20 cake pops Difficulty rating
 For the cake balls 125 g (4 oz) butter 110 g (3 oz/ cup) caster (superfine) sugar 2 eggs teaspoon vanilla bean paste 110 g (3 oz/ cup) caster (superfine) sugar 110 g (3 oz/ cup) self-raising flour teaspoon salt For the petals Pink food colouring 250 g (9 oz) package of sugar paste or modelling chocolate Equipment Cake pop mould Faux flower stems or lollipop sticks Rolling pin Prep time: 10 minutes Baking time: 1115 minutes Decorating time: 15 minutes per cake pop For the cake balls Preheat the oven to 180C/350F. Cream the butter and sugar together in a bowl until pale and creamy.