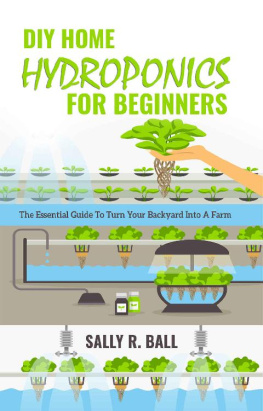
Congratulations on getting DIY Home Hydroponics for Beginners: The Essential Guide to Turn Your Backyard into a Farm. There are many books on the market about this topic, so thank you for choosing this one. The following chapters in this book will cover the difference between soil gardening and hydroponics, different types of hydroponic systems, choosing the right system and building it, managing lighting, providing the right nutrients, water maintenance, best plants to grow, and common issues and troubleshooting.
The world is changing quickly, and vast expanses of grass that waste water are a thing of the past. We need to take care of our planet and ourselves. What better way to do so than to plant food in our yards instead of grass. This way we can control the chemicals and pesticides put on our foods and know that we are nourishing our bodies with the healthiest food possible. Plus, it is a great way to save money. Organic produce can be expensive. When you invest a little money in building a sustainable hydroponic system, it will definitely pay off in the long run.
Read on to learn about how to make this dream a reality. With the right know how and a little elbow grease you can have an amazing garden that will be the envy of the neighborhood. Sleep well knowing that you are doing what you can to help the planet and put the best food possible in your body. It just might be easier than you think.
Chapter 1: The Difference Between Soil Gardening and Hydroponics
Everyone has heard of gardening. Put plants in the ground, water them, and cross your fingers that they grow. Of course, this method has worked for thousands of years. Over time, these methods have been tweaked and made better. We know that plants need several things to grow: water, air, nutrients, light, and a place to anchor their roots. All of these things can be accomplished in the soil, but soil farming takes up a ton of space. Open lands are shrinking and the population that needs to be fed is growing. What if there was a better way?
The emerging answer is hydroponics. The basis of a hydroponic system is simple, it is growing plants without soil, in a water-based environment. Nutrients are fed to the plants through the water. With a hydroponic system, food can be grown inside a house, in a warehouse, outside, in places with poor soil, and even in outer space. Using hydroponics has many up sides. It is more sustainable and produces a higher yield. The water and nutrients are used through a recirculating system, which means less is wasted. When you grow plants without soil, that means there are no weeds, diseases, or pests such as gophers or moles. When these issues go away, so can pesticides, which means healthier, higher quality produce emerges.
It is certainly a great idea to create a hydroponic garden indoors. However, many people do not have the space and it can get a little more expensive with all of the lights, air conditioners, dehumidifiers, and other trinkets needed to get things going inside. Therefore, it could definitely be in your best interest to create a great summer hydroponic garden in your backyard. This will be much more cost effective and not take up a ton of room in your home.
Perhaps you could even take the learning experience of building an outdoor hydroponic garden and make a small one inside during the winter months. It could be very nice to have something like a tower garden going during the winter months to continually provide your family with fresh produce year-round.
This all sounds great right? Healthy food that uses less of the planets resources and contains fewer pesticides. There are six main methods of hydroponic gardening. There are easier systems such as wicking or deepwater culture, and more advanced ones such as aeroponics, drip, ebb and flow, and nutrient film techniques. Consider starting with an easier system, and once that one is mastered, move on to a more advanced system. It is likely that one successful gardening venture will surely lead to others. Lets take a closer look at each type of these systems, so that it will hopefully become clear which one is the best to start with.
Chapter 2: Wicking
What is Wicking?
Lets start simple. As a full disclaimer, a wicking bed does still use soil, so it is not a pure hydroponic system, but this system waters the plants from the bottom up. In a normal garden, it is difficult to keep the soil happy. When watering from the top, much is lost to evaporation, and it is also hard to ensure the water reaches the correct depth; one foot for most vegetables, two feet for larger plants. This depth is not only hard to achieve with typical watering, but nearly impossible to maintain. When using a wicking bed, the moisture level can be kept constant. When there are even moisture levels, there are happy plants.
How to Build a Wicking Bed Garden
1. Choose a container to use for your garden. This should be sturdy, non-toxic, able to hold water, and 18 to 24 inches deep. This allows room for the roots to grow. Purchase something new or look around your property for something to use. Also, check out social media or check with friends to see if anyone is giving a suitable container away.
2. Choose a good location to place the container. It is wise to position the container in an optimal place before filling it with water, soil, and plants. It will be awfully heavy once filled up! The container should be in a location that gets at least 6 hours of sunlight per day. If the sun is intense where you live, it may be a good idea to also provide some afternoon shade. It is also a good idea to put the container near a water source and in a convenient place for running out to grab some produce for dinner.
3. Level the container so that the water is distributed evenly.
4. Place a pipe or drip hose in the container. This should run from the top of the container all the way to the bottom. This is how you will add water to the reservoir. A strong drip hose, a piece of perforated PVC pipe, or a weeping tile would work well. Just find something that will not be pinched or crushed when the soil is added. Make sure the pipe or hose sticks out of the top of the container so that water can be easily added.
5. Place five to ten inches of clean gravel in the bottom of the container. This should cover the pipe. It is a good idea to use clean, sterile, medium-sized gravel so no preexisting pathogens are present in your bed, and so there is space for water to flow between the rocks.
6. Use landscape fabric to line the bed and keep the water reservoir separate from the soil. Cut the fabric so its edges run up the sides of the container, so that the soil does not fall into the water reservoir. Do not use plastic; the water needs to be able to wick up into the soil.
7. Place a half-inchand only a half-inchof sand over the fabric to help keep the soil level.

