Brandon - DIY Household Hacks: Discover Proven Household Hacks to Increase your Productivity, Save Time and Money
Here you can read online Brandon - DIY Household Hacks: Discover Proven Household Hacks to Increase your Productivity, Save Time and Money full text of the book (entire story) in english for free. Download pdf and epub, get meaning, cover and reviews about this ebook. year: 2015, genre: Home and family. Description of the work, (preface) as well as reviews are available. Best literature library LitArk.com created for fans of good reading and offers a wide selection of genres:
Romance novel
Science fiction
Adventure
Detective
Science
History
Home and family
Prose
Art
Politics
Computer
Non-fiction
Religion
Business
Children
Humor
Choose a favorite category and find really read worthwhile books. Enjoy immersion in the world of imagination, feel the emotions of the characters or learn something new for yourself, make an fascinating discovery.

- Book:DIY Household Hacks: Discover Proven Household Hacks to Increase your Productivity, Save Time and Money
- Author:
- Genre:
- Year:2015
- Rating:3 / 5
- Favourites:Add to favourites
- Your mark:
DIY Household Hacks: Discover Proven Household Hacks to Increase your Productivity, Save Time and Money: summary, description and annotation
We offer to read an annotation, description, summary or preface (depends on what the author of the book "DIY Household Hacks: Discover Proven Household Hacks to Increase your Productivity, Save Time and Money" wrote himself). If you haven't found the necessary information about the book — write in the comments, we will try to find it.
Brandon: author's other books
Who wrote DIY Household Hacks: Discover Proven Household Hacks to Increase your Productivity, Save Time and Money? Find out the surname, the name of the author of the book and a list of all author's works by series.


DIY Household Hacks: Discover Proven Household Hacks to Increase your Productivity, Save Time and Money — read online for free the complete book (whole text) full work
Below is the text of the book, divided by pages. System saving the place of the last page read, allows you to conveniently read the book "DIY Household Hacks: Discover Proven Household Hacks to Increase your Productivity, Save Time and Money" online for free, without having to search again every time where you left off. Put a bookmark, and you can go to the page where you finished reading at any time.
Font size:
Interval:
Bookmark:

- Involve and inform everybody in your household about the project/s. This could mean extra hands to help you, or even better ideas as you get input from your loved ones.
- If you have more than one project planned prioritize by Emergency (serious repairs that need immediate attention like smoke detectors or escape routes that are blocked); then by Security (locks, gates, alarm system etc.); then prioritize the rest by time available and resources.
- Once a job is complete, remove the documentation from your clipboard and file in your project file. This will give you access to suppliers or contacts for specialists if you need them in the future.
- Remove the clutter. Get as much as possible off the floor to make cleaning fast and easy. Remember this room sees a lot of traffic.
- Install castors or wheels to the coffee table, ottomans and pieces of furniture that you need to move around.
- Install drawers or baskets into the coffee table to house items that you need every day for example remote controls, TV guides and coasters.
- Install shelving for books, games, DVDs and other dust gathering items. Bonus points for installing doors to the shelves. Take time to sort the books and DVDs to find your favorites quickly! If guests arrive, close the doors and the room will be instantly neat.
- Use baskets (in the coffee table or shelving) to group common things together. This could be a box of candles, platters for snacks, toys, extra batteries, globes, or even your knitting. Now you only need to take one container out and have everything ready for a specific function.
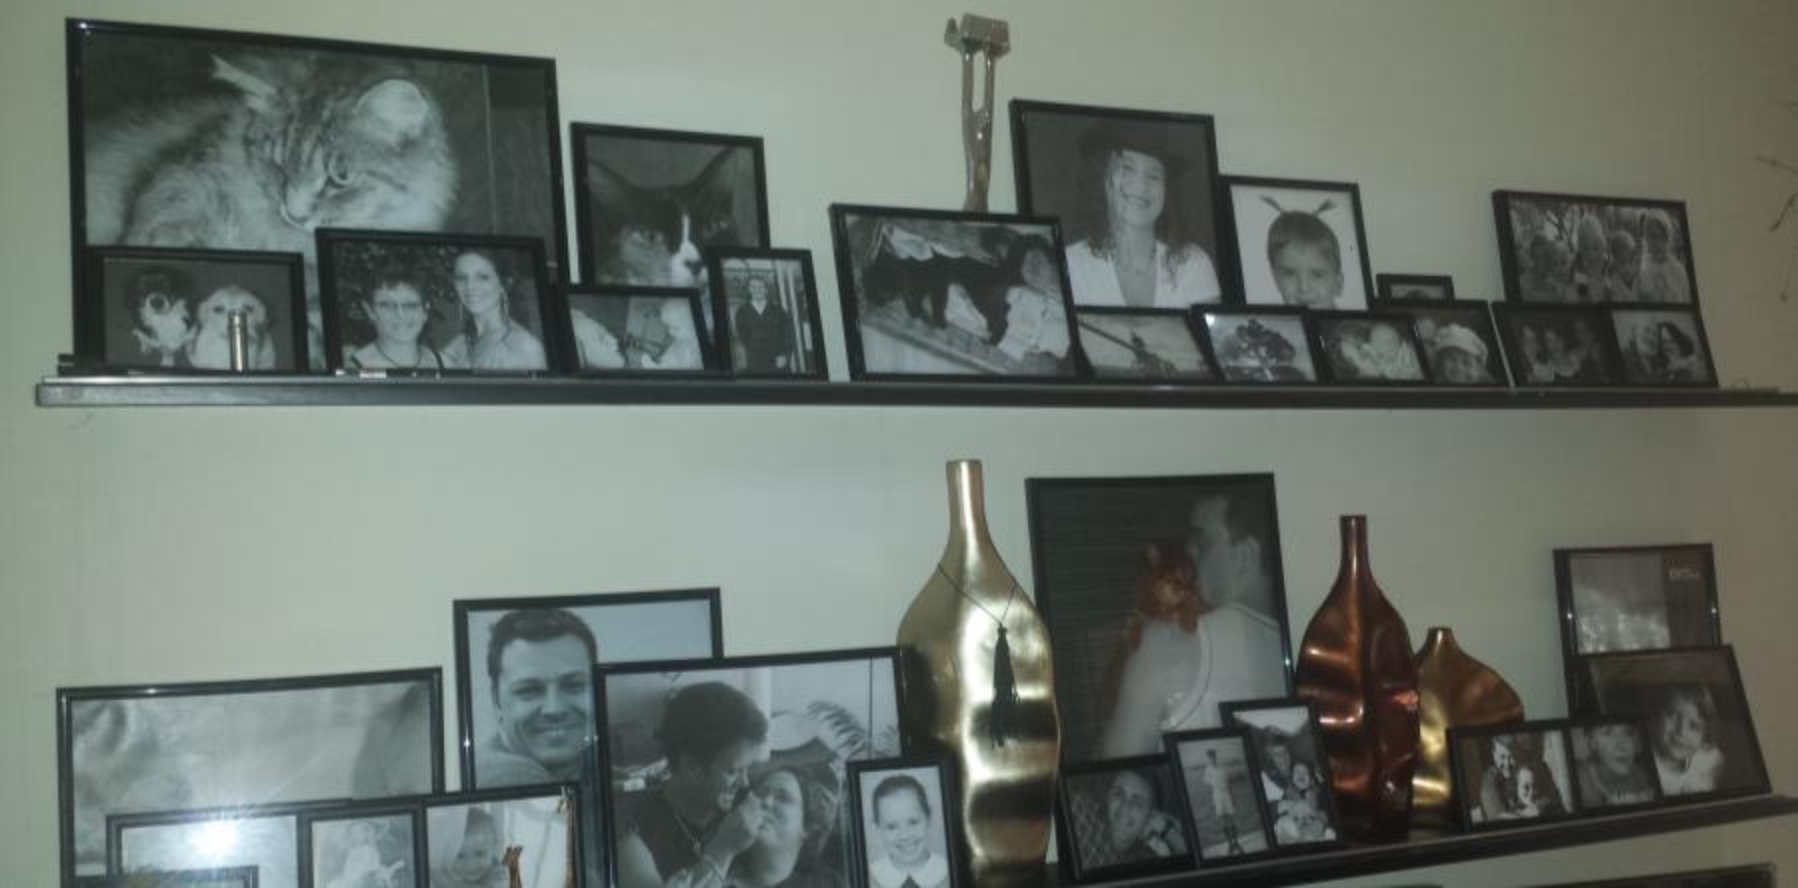
- Instead of hanging a lot of pictures in frames, opt for very narrow floating shelves do display your photos. Use these to display other items as well.
- Use old crates (similar or various sizes) as wall mounted display shelves. To add extra depth to the room, install mirrors on the bottoms of the crates.
- Lighting is very important in this room. Get rid of the single source of light in the center of the ceiling and install sets of low-voltage LED down-lighters. Wire them to switch them on in sets: Switch all of them on when hosting a get together, but only one set when you watch TV. Not only will you save money, but flush-mount down-lighters do not gather dust.
- Use your wall space in a clever way. Install a large mirror on a wall to make the space look bigger. If you need extra light or lights that form part of the dcor, cut an interesting shaped lamp in two and wall mount for both light and dcor.
- If you only use your TV occasionally, wall mount the unit and cover it with a framed picture that is hinged on one side. Neatly tie the cables together and hide them behind a vase, box or free-standing photo frame.
Font size:
Interval:
Bookmark:
Similar books «DIY Household Hacks: Discover Proven Household Hacks to Increase your Productivity, Save Time and Money»
Look at similar books to DIY Household Hacks: Discover Proven Household Hacks to Increase your Productivity, Save Time and Money. We have selected literature similar in name and meaning in the hope of providing readers with more options to find new, interesting, not yet read works.
Discussion, reviews of the book DIY Household Hacks: Discover Proven Household Hacks to Increase your Productivity, Save Time and Money and just readers' own opinions. Leave your comments, write what you think about the work, its meaning or the main characters. Specify what exactly you liked and what you didn't like, and why you think so.