Contents
Guide

CONTENTS
HOW TO USE THIS EBOOK
Select one of the chapters from the and you will be taken straight to that chapter.
Alternatively, jump to the to browse recipes by ingredient.
Look out for linked text (which is in blue) throughout the ebook that you can select to help you navigate between related sections.
You can double tap images and tables to increase their size. To return to the original view, just tap the cross in the top left-hand corner of the screen.
INTRODUCTION
This is a book for home bakers, those who bake after a long days work and those who love to bake but dont have a magical cupboard full of every baking vessel known to man.
I love baking. I spend each and every day in the kitchen playing around with butter, sugar, eggs and flour, and I sometimes joke that its the only thing I am actually any good at. Ive spent the last ten years encouraging people to embrace the flour-covered apron, the freezer full of cookie dough and the random splatter of cake batter that inexplicably appears on the ceiling. In those ten years Ive tried to write recipes that are designed for the home baker and Ive pitched recipes with varying degrees of complexity to write books that are approachable and useable, but also encourage you to try something more involved when you have the confidence. The recipes suit many different situations, from a simple dessert for the family at the weekend to recipes perfect for a party.
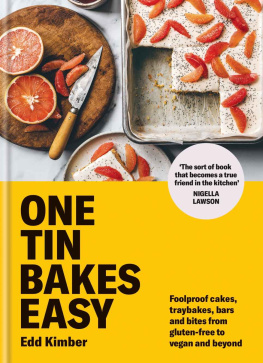
In my previous book Patisserie Made Simple, I also tried to reduce the amount of equipment needed to make beautiful and delicious bakes. One Tin Bakes is the ultimate culmination of those ideas, reducing the required bakeware to just one simple tin.
Each and every recipe in this book is baked in just one tin, a 23 x 33cm (9 x 13in) cake tin (commonly used for brownies). For this book you wont end up with bakeware falling out of every cupboard and hidden under your bed, it is just one tin bakes.
The obvious question is why this tin, why not a sheet pan, a set of round cake tins or even a loaf pan? I believe this tin is the most flexible, the most multipurpose, the most useful tin there is. It is a mainstay of any bakers arsenal and in my book (literally this book, youre reading it right now) it should be the hero. In it, you can make cookies, cakes, desserts, brownies, pies and tarts. In fact, if you can bake it, you can probably bake it in one of these tins. I also chose the tin because its already popular, it can do it all and if you bake there is a good chance you already own one, and if you dont youll find them in every cookware shop going.

THE TIN
When it comes to choosing the right tin there are a few things to bear in mind. With these recipes, depth is crucial. You will need a version of the tin that is at least 5cm (2in) deep. This will ensure everything bakes without any issues. While testing these recipes I tried many brands and variations and one thing became clear: every manufacturer measures 23 x 33cm (9 x 13in) a little differently some are a little wider, some a little shorter, they all vary. To account for these variations, use a tin that is at least 5cm (2in) deep and all the recipes will fit without any issues.
With this style of tin you also have a choice between metal, glass and ceramic, plus a variety of different finishes. For the mix of recipe styles in this book Im not a fan of glass or ceramic, for me metal suits a broader spectrum of recipes and is the obvious choice. The style I would recommend is an aluminium tin. This is a classic bakeware choice and it will happily stand the test of time. It tends to bake and brown evenly and is lightweight. My favourite comes from Nordicware, one of the oldest and best bakeware manufacturers in the world. The one style I avoid and would recommend you do too is a non-stick tin with a dark/black coating. These absorb and distribute heat more quickly, leading to recipes browning too much and possibly burning. They are also more prone to damage. If this is the tin you already own, then bake at a slightly reduced temperature and check for doneness a few minutes earlier than the recipe calls for.
HOW TO LINE THE TIN
There are four methods used to prepare the tin:
1. Simply greasing the tin without a parchment lining used for recipes served from the tin.
2. Just lining the base with parchment used for recipes portioned inside the tin as the parchment helps prevent the base from sticking.
3. Using a strip of parchment with the excess going up the long sides of the tin, held in place with metal clips used when a bake needs to be lifted from the tin after baking, with the parchment acting like a sling.
4. Lining the whole tin with one single sheet of parchment used when the recipe has a tendency to stick to the sides, making it harder to remove.


MILK CHOCOLATE CARAMEL SHEET CAKE
This recipe is the reason this book exists, my OG one tin cake that has fed countless crowds as I developed the recipe. One early version came with me to the local pub, and once my friends had devoured most of it, we handed out the rest to strangers a cake is still the best way I know to make friends. The ganache is made with a bittersweet salted caramel and topped with peanuts and cacao nibs. If there is one cake I want you to try, its this one.
SERVES 1215
FOR THE MILK CHOCOLATE SALTED CARAMEL GANACHE
200g (7oz) milk chocolate, finely chopped
400ml (14fl oz/1 cups) double (heavy) cream
200g (7oz/1 cup) caster (superfine) sugar
50g (1oz/3 tablespoons) unsalted butter
1 teaspoon flaked sea salt
1 teaspoon vanilla extract
FOR THE CHOCOLATE SHEET CAKE
250g (9oz/2 cups) plain (all-purpose) flour
75g (2oz/ cup + 2 tablespoons) cocoa powder
1 teaspoon baking powder
2 teaspoons bicarbonate of soda
teaspoon fine sea salt
300g (10oz/1 cups + 1 teaspoon) light brown sugar
2 large eggs
100ml (3fl oz/ cup + 4 teaspoons) neutral-tasting oil, plus extra for greasing
225ml (8fl oz/1 cup 1 tablespoon) sour cream
225ml (8fl oz/1 cup 1 tablespoon) hot brewed coffee
TO DECORATE
salted peanuts
cacao nibs
First, make the ganache as it needs to chill before use. Place the chocolate in a large, heatproof bowl. Pour the cream into a small saucepan, bring to a simmer, then remove from the heat. Heat the sugar in a medium-sized saucepan over a medium heat until melted and the colour of an old copper coin. Add the butter, salt and half the warm cream. Once the bubbling has subsided, you should have a smooth caramel. If not, reduce the heat and stir until smooth. Pour in the remaining cream and the vanilla and stir to combine.
While still hot, pour the caramel over the chocolate and leave for a couple of minutes, then stir until a smooth ganache. Cover and refrigerate for a couple of hours or until the texture of buttercream, soft and scoopable. If you leave it too long it will thicken and whipping the ganache will become tough.


