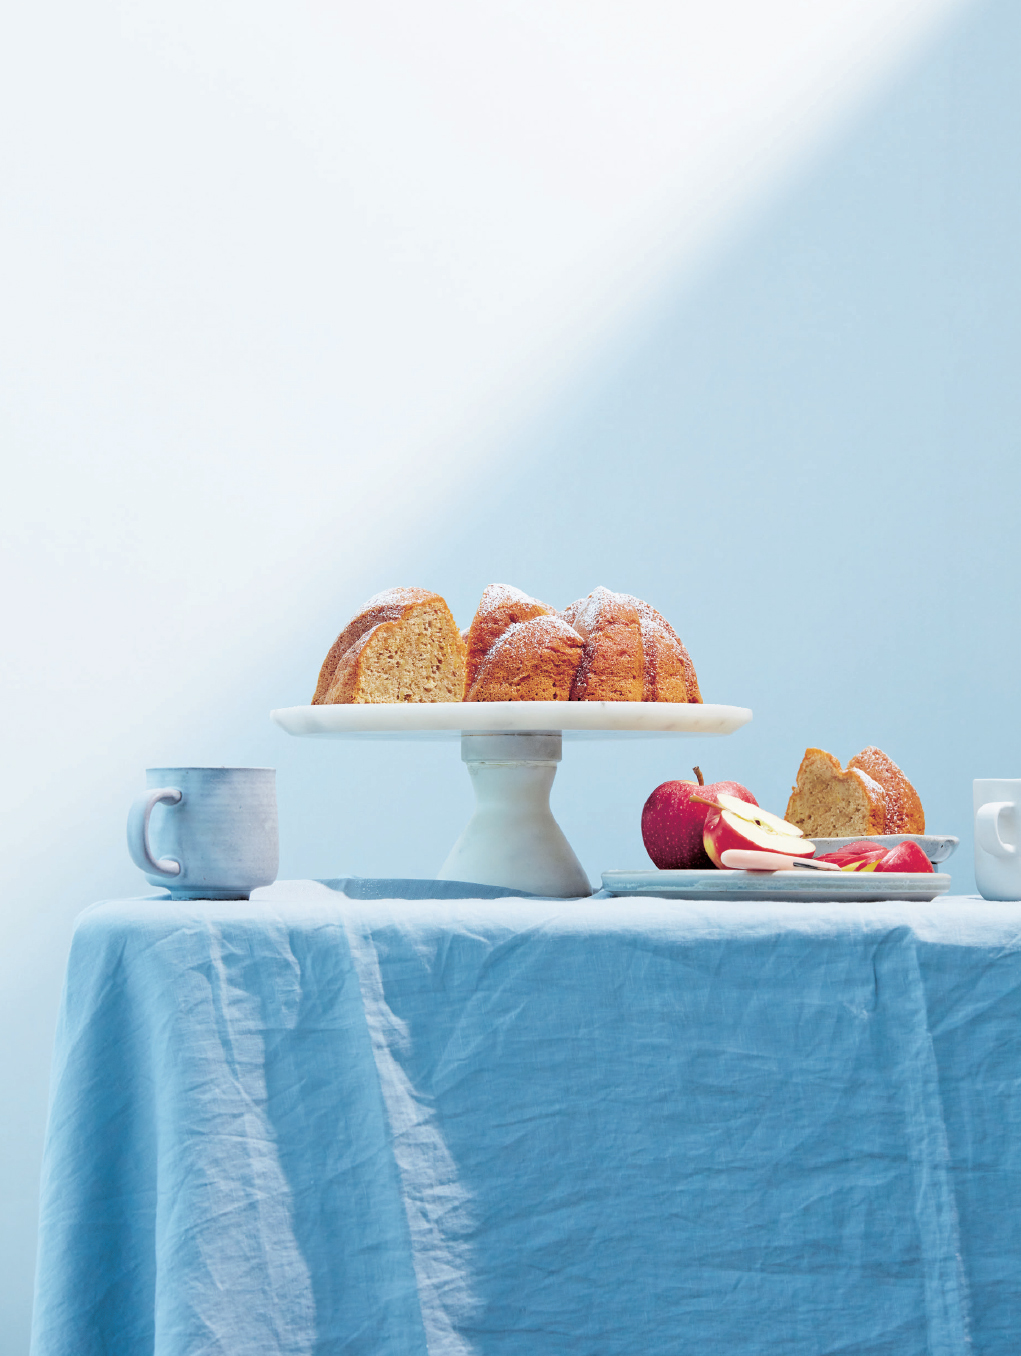
Torta Sette Vasetti alle Mele
Seven-Pot Cake with Apples
Torta Sette Vasetti is a modern Italian classic: the basic batter is made by measuring the ingredients by volume with a yogurt pot rather than by weight. I must admit that the engineering side of my brain struggled to accept the blanket ban on grams or centimetres in this recipe, but I cannot deny that the result is surprisingly good even without my usual pedantic control over measures and amounts
It all starts with a single-serving yogurt pot: this recipe works equally well whether the pot is 125ml (4fl oz) or 150ml (5fl oz). Once the yogurt has been used, the pot then becomes the unit of measure for all other key ingredients.
The traditional version of this cake is a simple sponge, but I once tried adding apples to the mixture and have never looked back. Use a sweet variety like ripe Golden Delicious or Gala for best results. Despite being a relatively simple recipe, this cake can be easily elevated to a sophisticated afternoon treat by baking it in a bundt tin.
Typically, the recipe calls for natural, unsweetened yogurt, but Greek-style or flavoured ones also work rather well. The latter may add a pleasant fruity note to the sponge, but you might want to reduce the amount of sugar in the batter to balance the overall sweetness.
SERVES UP TO 12
FOR A 24CM (9IN), 2.5-LITRE (87-FL OZ) BUNDT TIN
3 medium apples or 2 large
2 pots soft wheat 00 flour, plus 2 tbsp for dusting the apples
1 pot natural yogurt
1 pot demerara sugar
1 pot cornflour (cornstarch)
1 tsp ground cinnamon
2 tsp baking powder
3 medium eggs, at room temperature
1 pot caster (superfine) sugar
1 tsp vanilla bean paste
tsp salt
1 pot sunflower or corn oil, plus extra for greasing
zest of 1 organic lemon
icing (confectioners) sugar, for dusting
- Set the shelf so that the top of the tin sits just below the middle of the oven and preheat it to 170C (340F/Gas mark 3). Grease and thoroughly flour the bundt tin.
- Wash, peel and core the apples, then dice the flesh into pea-sized pieces. (Larger pieces are more likely to sink in the batter while baking.) Place the diced apples in a medium bowl and sprinkle them with 2 tablespoons of flour. Mix to coat them evenly and set aside. The flour coating will prevent the pieces of apple from sinking in the batter while baking and will slow their browning. In any case, a slight browning should be expected but it will not compromise their taste.
- Place the yogurt in a small bowl, rinse and dry the pot and add one measure of demerara sugar to the bowl. When measuring powders with the yogurt pot, always tap it gently on the worktop to get rid any potential air pockets. Whisk until most of the sugar has dissolved in the yogurt: the mixture should look creamy and lump-free. Set aside.
- Place a large sieve over a bowl and sift in both flours, the cinnamon and baking powder. Set aside.
- Separate the eggs, placing the yolks in the bowl of a stand mixer fitted with the whisk attachment, and the whites in another medium, metal bowl. Fill the yogurt pot with caster sugar and add half to the yolks, half to the whites. Add the vanilla to the yolks and start the mixer. Whisk the mixture on high speed for about 56 minutes until pale and foamy.
- Meanwhile, add the salt to the egg whites and whisk them with a handheld electric whisk for 23 minutes until they form glossy, stiff peaks. Set aside.
- When the yolks are light and frothy, measure one pot of oil and trickle it slowly along the sides of the bowl while whisking. Add the yogurt and sugar mixture too and let the mixer incorporate it. Remove the bowl from the mixer, add the sifted dry ingredients, then the lemon zest and fold to combine. Add the apples and fold them in. Gently fold the whipped whites into the yolk mixture in 3 batches using a silicone spatula, then pour the resulting batter into the prepared tin. Bake for 5052 minutes or until a skewer inserted into the deepest part of the tin comes out clean. The top of the cake should be caramel in colour and the rim should slightly come off the sides of the tin. Remove from the oven and let the cake cool in the tin.
- When cool enough to handle, turn the cake on to a serving plate and lightly dust with icing sugar. Store under a cake dome for up to 34 days or freeze for up to a month.
ALSO TRY
For a simpler version, omit the apples and for a different flavour combination swap them for 200g (7oz) fresh berries.

Torta della Nonna
Grandmas Pie
The original version of torta della nonna is made with a sweet shortcrust casing filled with pastry cream and decorated with pine nuts. Its origins are in Tuscany, where it became ubiquitous in restaurants in the 80s; however, this traditional and unassuming tart has now been adopted all over the country as a classic, very simple but versatile dessert. My version is filled with pistachio cream and decorated with pistachios, but this basic recipe can be the starting point for several versions using any of the cream fillings in the and a matching crunchy topping.
Both filling and pastry can be prepared in advance, making this an accessible bake even for those with little time. Torta della nonna can be enjoyed as an end-of-meal dessert but it is particularly appreciated by kids as a mid-afternoon treat.
SERVES UP TO 14
FOR A 27CM (10IN), 4CM (1IN) DEEP TIN
For the pasta frolla pastry
400g (4 cups) soft wheat 00 flour, plus extra for dusting
200g (scant 1 cup) cold unsalted butter, diced, plus extra for greasing
140g (1 cup) icing (confectioners) sugar
100g (3oz) egg (about 2 medium eggs), cold
zest of 1 organic lemon
1 tsp vanilla bean paste
tsp salt
For the cream filling
500g (2 cups) whole milk
1 tsp vanilla bean paste
75g (2oz) egg yolk (about 4 medium egg yolks)
110g (scant cup) caster (superfine) sugar
40g (scant cup) cornflour (cornstarch)
small pinch of salt
80g ( cup)
For the assembly
1 egg white, for brushing
50g ( cup) unsalted pistachio kernels
50g ( cup) pine nut kernels
icing (confectioners) sugar, for dusting
MAKE THE PASTRY CASING
- Prepare the pasta frolla following the . Pasta frolla can be prepared up to a couple of days in advance and stored wrapped in clingfilm in the fridge until needed.
- Grease and flour the tin, including the sides. Line the bottom with a disc of baking paper.
- Take the pastry out of the fridge, unwrap it and divide it into 2 pieces, one slightly larger than the other. Roll the larger piece to a thickness of 5mm (in) on a well-floured worktop, shaping it into a disc. Wrap the pastry around the rolling pin and unroll it over the prepared tin. Gently fit the pastry into the tin so that it fits snugly. Trim off the excess pastry by running a blunt knife along the rim of the tin. Set aside.
- Now prepare the pastry top: roll the smaller piece of pastry to a thickness of 5mm (in) and shape it into a disc. Leave on the worktop for later.
MAKE THE CREAM FILLING
- Prepare one batch of pistachio cream following the . The cream filling should be prepared at least 12 hours before it is needed to give it time to cool to room temperature. The pastry should never be filled with warm cream.
Next page


