
24 DESIGNS
to create and hang
Jesse
DRESBACH

CONTENTS
DEDICATION
I dedicate this book to my catsthey love string and so do I.
And also to the invention of the hammer, which really helped with the nails.
INTRODUCTION
If you grew up in the 1960s and 70s, you probably remember string art very well. Velvet-covered boards were hung in living rooms across America, portraying sail boats, owls, flowers and more. String art uses string, thread or wire to create intricate geometric designs between grids of nails or pins that have been hammered into a board. The origins of this craft date back to the end of the nineteenth century to Mary Everest Boole, who came up with the idea of curve stitching. She used these activities to help children understand various mathematical concepts. She actually published a book in 1909 called Philosophy & Fun of Algebra.
Fast-forward to 1959, when French engineer and mathematician Pierre Bzier was working for an automobile company and needed a more accurate way to describe a curve for manufacture. Influenced by an algorithm created by another French mathematician and physicist, Paul de Castejau, Bziers curve could accurately describe any type of curve with only four points. The Bzier curve is commonly used today in computer graphics programs.
When the Bzier curve was publicized in 1962, many artists used this mathematical tool as a source of inspiration. One American artist in particular, John Eichinger, used the Bzier curve to create what he called string mandalas. Mandala is a Hindu word that means circle within a circle. Once his designs were marketed to the public via popular craft kits in the late 1960s, the craft became an instant favorite.
Trends of course come and go, and string art eventually took a backseat to other popular craftsuntil recently. String art is making a bold comeback with seemingly endless new designs, silhouettes and U.S. states being the most common. Modern string art is a bit more flexible, as the designs dont always have to be strictly mathematically based. This opens up new territory in string art, limiting the projects only to your imagination.
While I wasnt around yet in the sixties, a few of these relics still adorned the homes of many of my family members, and I was so intrigued by the designs. Ive always dabbled in different arts and crafts, jotting down my ideas in a never-ending list of must-try projects. Inspired by a large-scale string art installation done in one home, I decided to explore some new patterns. My first handful of design ideas were the silhouette of a bird, a simple J done in an Old English font, and a retro throwback of a geometric crescent moon. After much trial and error, I found my rhythm and was hooked. After my home was beginning to overflow in the designs, I listed a few in my Etsy shop, Nine Red, to find some new homes for my overstock. I received a great response from the Etsy community and was soon taking orders for more personalized art.
Now its your turn! If youre reading this, youre clearly just as intrigued by the texture, design and dimension of string art. This book is full of patterns that help you quickly get to the fun part of the craft: the stringing! With easy-to-follow directions and projects ranging in skill level, theres something for everyone.
One wonderful aspect of using such sturdy materials as wood and nails is that your string art creations will really last. Youve probably seen designs online and thought to yourself, Ive got to try that! Well, theres no time like the present, and I guarantee after you complete your first string art project, youll want to create many more.
MATERIALS & TOOLS
Lets get familiar with some of the materials and tools you will need to make string art. Some of these you probably have around the house.
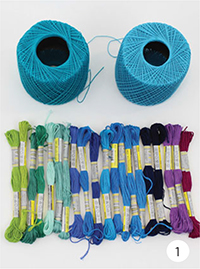
- String. Use craft string, embroidery floss, or crochet thread. For larger projects, it is much easier to work with a spool of crochet thread than to start and stop each time you run out of smaller amounts. DMC is the largest manufacturer of embroidery floss and commonly seen as the industry standard in colors (dmc-usa.com). This books projects reference the DMC numbers, if you wish to use the same colors shown. Your local craft store should have a DMC chart with numbers and their equivalents in other brands. I commonly use the brand Sullivans, as its what my nearest store carries.
Always buy more string than you think youll needits relatively inexpensive and beats another trip to the store mid-project.
- Wood. To make the stringing surface, I like to cut different lengths from 1" (2.5cm) thick pine boards that are 8" (20.5cm), 10" (25.5cm) and 12" (30.5cm) wide. Each project will specify further.
You can also purchase wood boards, round wood cuts, and beveled shapes at your local craft store. These usually come unfinished, giving you design freedom.
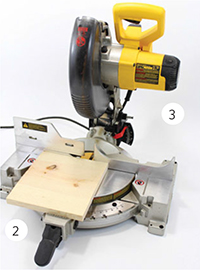
- Saw. This is for cutting your wood to size. Or, most hardware stores will cut the wood for you to any length you need.
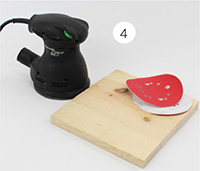
- Sandpaper/electric sander. Before staining or painting your surface, you will need to sand it with medium-grit (120) and fine-grit (220) sandpapers. This can be done by hand or with an electric sander.
- Stain or paint. You can either paint your board or use an oil-based or water-based wood stain, both which come in a variety of colors. Keep in mind that oil-based stain will take at least twenty-four hours to dry. Water-based stain dries quickly enough that you can seal your project shortly after staining.
- Paint brushes. Disposable foam brushes work well, or use any brushes you prefer for applying stain, paint, and sealer.
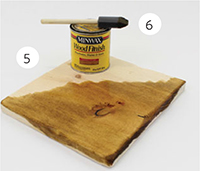
- Clear top coat. I prefer a water-based seal, such as Minwax Polycrylic. It has far less fumes and makes cleanup a lot easier.
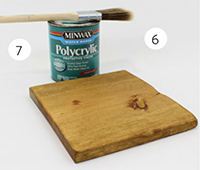
- Nails. My favorite by far are 58" (1.6cm) silver nails (#18 58" [1.6cm]). The choice is yoursjust be sure their heads are large enough to catch and hold the string.
- Hammer. You dont need one too big and heavy; a medium- to lightweight hammer is fine.
- Needle-nose pliers. These come in handy for working in areas your fingers have trouble reaching, as well as removing bits of the paper pattern from the nails.
- Picture-hanging hardware. Sawtooth hangers are perfect; kits are available at any hardware store.
- Felt furniture pads.



![Jesse Schell [Jesse Schell] - The Art of Game Design, 2nd Edition](/uploads/posts/book/119435/thumbs/jesse-schell-jesse-schell-the-art-of-game.jpg)


