DIY Braids
From Crowns to Fishtails, Easy, Step-by-Step Hair-Braiding Instructions
SASHA COEFIELD
Creator of the Beauty YouTube Channel asksash88

Avon, Massachusetts
CONTENTS
INTRODUCTION
Creating amazing braid designs is not only fun, its incredibly easy with just a few simple tools. It really requires no experience, and instantly adds a personal touch to any hairstyle. You just need to learn about a few basic tools and master the most basic braids to get the best results and achieve the hair designs in this book.
The most important thing to remember is this: Practice makes perfect. You shouldnt get discouraged if your first braid doesnt come out exactly like the picture. While many of the hairstyles in this book are simple, others require a lot more braiding experience or a solid understanding of different braiding styles. But dont worryafter a few tries and with the right tools, youll master these intricate braids and even be able to create your own original ones.
So say goodbye to boring hairstyles that leave you wanting more, and hello to attention-grabbing braids! With this book, youll have everything you need to turn uninspired hair into fun, one-of-a-kind styles.
CHAPTER 1
HOW TO USE THIS BOOK
You might think that hairstylists are the only ones who can create beautiful, intricate braids. After all, theyve taken classes and have made a career out of giving thousands of clients the perfect style. But creating complex braids isnt nearly as difficult as you might think. In fact, once you get started, youll wonder why you were ever intimidated by the designs you see in magazines and online. Best of all, youll have the satisfaction of knowing that not only did you accomplish this salon-quality look on your own, but you didnt have to spend a lot of money doing so. There are just a couple of things you need to know before you get started.
Prepping Your Hair for Creating Braids
In order to get the most beautiful braids possible, you will want to make sure you prep your hair according to what best suits your hair type. Most women will be able to create the styles in this book using dry hair, but if you are new to braiding, you may want to start off with damp hair. Dampening your hair with a spritz of water will make your hair more manageable, make the braids look sleeker, and help prevent the hairstyle from falling out. If you have very fine, straight hair that tends to loosen up in braids, applying mousse right before braiding may help braids stay in place and reduce flyaways. Those with curly hair will want to apply a smoothing serum or curl cream before braiding to avoid frizz. It may also be helpful for you to try out these braided hairstyles with unwashed hair since the oils in your hair will help you create tight, intricate-looking braids without having to use a lot of product.
Hair Tools
While every braid is different, there are a few things you should keep on hand when youre creating these intricate styles. Since many of the braids in this book require that you part your hair before you do anything else, youll always want a comb close by to make sure that your part is even and that you can easily separate sections of hair. A comb will also come in handy for styles that require teasing the hair to create more volume. When securing a braid or ponytail, youll want to use clear hair elastics or ones that match your hair color so they will be barely visible and will not distract from the hairstyle. Bobby pins are another item used throughout the book, and they will become your new best friends. Beauty supply stores often have higher quality bobby pins that will grip your hair better and hold the hairstyle in longer than the bobby pins youll find at your local drug store. Many times people buy brown bobby pins by default, but you can find them in a range of colors to best match your hair tone. You may also want to finish all of the hairstyles in this book with a little hairspray, particularly if you have fine, sleek hair that falls out of hairstyles easily. The hairspray will help define your braids and ensure that the hairstyle lasts all day. No matter what tool you use, be sure to clean it after you finish the braid designs, especially if youre using hairspray, in order to extend its life and get a clean look every time.
Braiding Techniques
People always seem to feel the grass is greener on the other side when it comes to hair. But the truth is, braids lend themselves to a variety of hair colors and textures, so dont dismiss a hairstyle simply because you dont think it could work on your hair type. Curly hair, for instance, works beautifully with these styles because it adds to the messy, bohemian vibe that braids naturally lend themselves to. If you find that one hairstyle doesnt suit you quite well, feel free to change it around, such as by parting your hair differently or adding a bit of texture to it. Get creative and have fun! Let these hairstyles provide you with inspiration to create your own and adjust them to best fit your face shape, style, and preferences.
If you try out a hairstyle and really dont think it looks good with your hair because its too thick or too thin, consider increasing or reducing the amount of hair incorporated into the braid. If you are not happy with your hair texture for a particular style, use a flat iron to make your hair sleek and straight, or add volume and dimension with a curling iron. A quick fix for hair that doesnt have the length or thickness you desire is to add a few clip-in hair extensions. These can really help make braids look luscious and beautiful without any long-term commitment.
Basic Braids
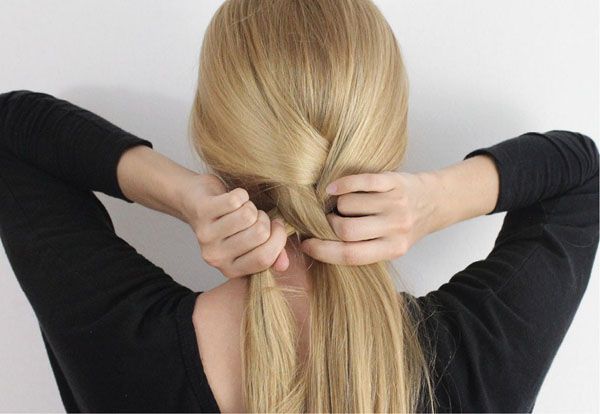
The Regular and Reverse Three-Stranded Braids are the basis for learning many of the other braids in this book. While they may look similar, they use slightly different techniques. With the Regular Three-Stranded Braid, you take the strands from the outside and place them over the middle section as you braid. This technique is utilized in the French braid. When braiding the Reverse Three-Stranded Braid, you take the outside strands and place them under the middle strand as you braid. This technique of braiding under is used in the Dutch braid.
Regular Three-Stranded Braid


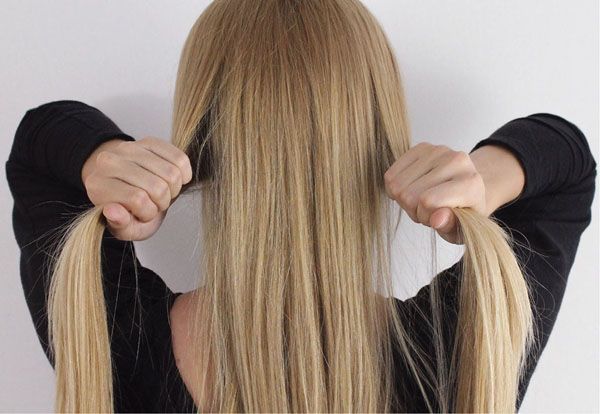
- Begin by dividing your hair into three sections.
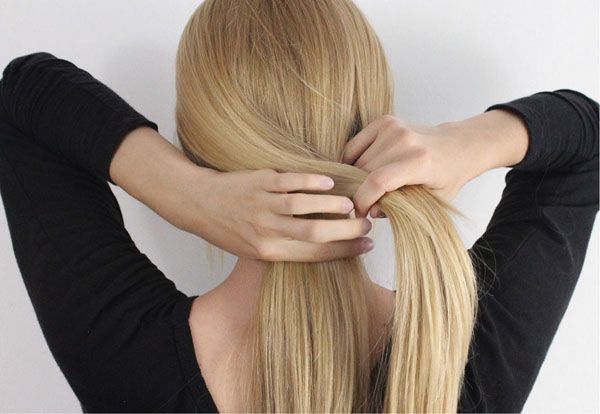
- Place the left strand over the middle strand. The section that was on the left is now in the middle.
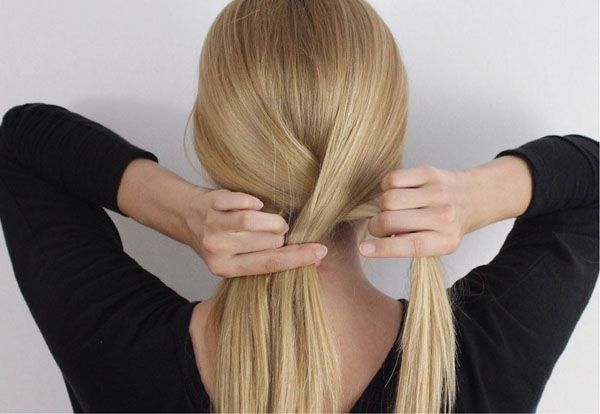
- Next, place the right section over the middle section.
- Now go back to the left side and place the left strand over the middle strand.
