Publisher: Amy Marson Creative Director: Gailen Runge Art Director : Kristy Zacharias Editor: Liz Aneloski Technical Editors: Nan Powell and Mary E. Flynn Cover Designers: Christina Jarumay Fox and April Mostek Book Designer: Christina Jarumay Fox Production Coordinators: Jenny Davis and Zinnia Heinzmann Production Editor: Alice Mace Nakanishi Photo Assistant: Mary Peyton Peppo Photography by Diane Pedersen, unless otherwise noted Published by C&T Publishing, Inc., P.O. Box 1456, Lafayette, CA 94549 DEDICATIONTo my lovely husband, Ismael Candido Pereira Faustino, who has always encouraged me to make quilts and write this book. He was with me at all the quilt shows, handling and holding my quilts during my presentations and driving me all over the states. He makes my life complete.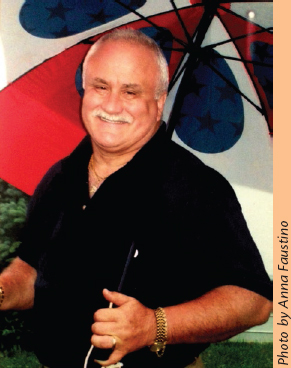 ACKNOWLEDGMENTS I want to thank my best-ever editor, Liz Aneloski, for her great work and patience, and for being fast at responding to my questions and overall helpful while working on this book. Foreword
 I learned to use textiles and create art by experimenting and just doing. Foreword
 I learned to use textiles and create art by experimenting and just doing.
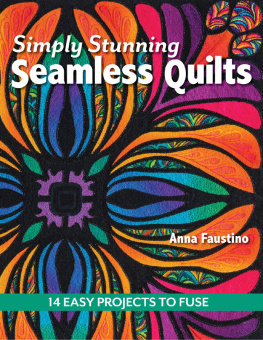
The journey since my first book, Simply Stunning Woven Quilts, has been like navigating my way through a labyrinth and into an absolutely unexpected direction in textile art. Im anxious to share this new direction with you. I hope you will embrace the ideas in this book and allow it to lead you on a creative adventure. As you work your way through the book, whether you are a beginning or experienced quilter, I hope you are excited and inspired by the quilts, the projects, and this wonderful technique and that it leads to an unending supply of ideas for future quilts. The exciting secret is that you get to be responsible for the choices: design, color, fabric, embellishments, and finishing. It can be a little frightening, but so exhilarating.
Thats a big part of the creativity. Its all up to you. There are no limits. I love creative work. Let it be so!  WHAT IS AN OUTLINE DESIGN? An Outline Design is made up of lines in a variety of widths that form shapes. After the design is cut out of a prefused wholecloth surface (raw-edge appliqu style), the shapes of the openings are filled with one or more different fabrics.
The Outline Design inspiration can be abstract or representational. This bold and simple technique, shown in the projects and inspiration quilts throughout the book, has endless possibilities. It is a cross between putting together a puzzle and painting by number. Follow one of the projects, step by step, or create your own original design; anybody who can create a doodle or line drawing can create or adapt almost any design into an original quilt. This book will help you to find new and exciting ways to create artistic, original quilts. Explore portraits, still life, landscapes, traditional-style quilts, even crazy quilts.
The cutting method for this technique is to freehand cut with a craft knife. This tool is easy and comfortable to use if you are familiar with the rotary cutter. After a couple hours of practice you will be a professional. Each project includes an Outline Design pattern; some will need to be enlarged, but there are two full-size patterns on the pattern pullout page that are ready to trace. This technique allows us to cut the very detailed, delicate elements of the Outline Designs, creating perfect curves, circles, and intersections.  Here are a few benefits of the Outline Design technique: These quilts have no piecing or seams.
There are no hand stitches or turned-under edges. The Outline Design can be any color or print and lines can be a variety of widths. You can audition and change the fabrics that fill the openings between the Outline Design and the background fabric or directly onto prefused batting many times before permanently fusing them in place. You can save the cutout pieces from cutting out the Design Outline to make a second quilt in a reverse value negative image (see Butterfly Garden, and Night Butterfly, as examples). The design possibilities are endless. Please consider personalizing the projects.
If you try by making small changes in the designs, you will gain confidence and soon will become a great art quilter and be designing your own quilts. NOTES TO GET YOU STARTED The chapters are in order of difficulty. Small quilts that have Outline Designs with short, straight lines are easier to cut than large quilts having Outline Designs with long, curvy lines and big elements of design. Use a tightly woven fabric (such as a batik) for the Outline Design. Since these quilts are made as display pieces and will not need to be washed, you do not need to prewash the fabrics. Fabric amounts are based on 40 width.
I use HeatnBond Lite paper-backed fusible web (17 wide). For quilts wider than the width of your paper-backed fusible web, use multiple widths, overlapping them and taping with masking tape to create one large piece. Save the Outline Design cutouts to make a second quilt (see Butterfly Garden, and Night Butterfly). A designing board gives a good work surface to create and design small quilts. When adding the small background pieces under the Outline Design, you can either pin or fuse-baste a tiny area of the pieces using a small craft iron or the tip of a regular iron (see Diamond Cut, Add the Fabric Background, Step 8 photo). Outline Design Technique at a Glance Refer to the individual projects and Basic Instructions for more detailed instructions, information, and additional methods of technique. Choose the design.
Trace the design onto paper-backed fusible web.  Fuse the paper-backed fusible web onto the fabric that will be the Outline Design.
  Background and Outline Design fabric Cut out the Outline Design. Remove the paper backing, position the Outline Design onto the background fabric, making sure you choose an area that gives good contrast between the Outline Design and the background. Fuse.
  Finish the raw edges.
Layer with batting and backing, and quilt. Bind. CHAPTER 1Cutting Techniques and Project SamplesCUTTING TECHNIQUES If you take a little time to master using a craft knife to cut out the Outline Design, you will see its benefits. Choosing a Craft Knife I use a small, sharp craft knife created for cutting different surfaces. A few manufacturers make them: X-ACTO, Utility, and Hobby to name a few. Knives have a plastic or metal handle in different sizes and interchangeable blades in a variety of shapes and sizes.
Next page


 ACKNOWLEDGMENTS I want to thank my best-ever editor, Liz Aneloski, for her great work and patience, and for being fast at responding to my questions and overall helpful while working on this book. Foreword
 I learned to use textiles and create art by experimenting and just doing. Foreword
 WHAT IS AN OUTLINE DESIGN? An Outline Design is made up of lines in a variety of widths that form shapes. After the design is cut out of a prefused wholecloth surface (raw-edge appliqu style), the shapes of the openings are filled with one or more different fabrics.
 Here are a few benefits of the Outline Design technique: These quilts have no piecing or seams.
 Fuse the paper-backed fusible web onto the fabric that will be the Outline Design.
  Background and Outline Design fabric Cut out the Outline Design. Remove the paper backing, position the Outline Design onto the background fabric, making sure you choose an area that gives good contrast between the Outline Design and the background. Fuse.
  Finish the raw edges.