Gunderson - Crocheted Mitts & Mittens
Here you can read online Gunderson - Crocheted Mitts & Mittens full text of the book (entire story) in english for free. Download pdf and epub, get meaning, cover and reviews about this ebook. City: Mechanicsburg;PA, year: 2015, publisher: Stackpole Books, genre: Home and family. Description of the work, (preface) as well as reviews are available. Best literature library LitArk.com created for fans of good reading and offers a wide selection of genres:
Romance novel
Science fiction
Adventure
Detective
Science
History
Home and family
Prose
Art
Politics
Computer
Non-fiction
Religion
Business
Children
Humor
Choose a favorite category and find really read worthwhile books. Enjoy immersion in the world of imagination, feel the emotions of the characters or learn something new for yourself, make an fascinating discovery.
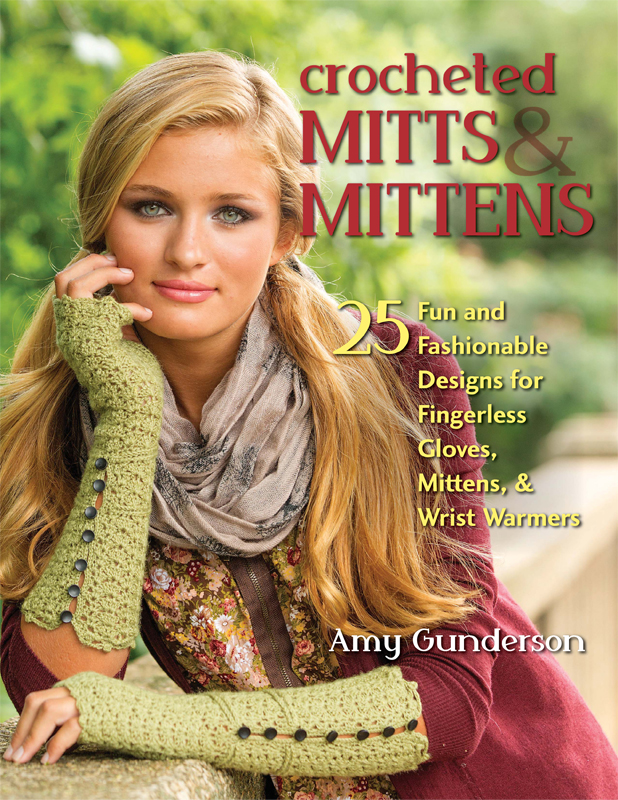
- Book:Crocheted Mitts & Mittens
- Author:
- Publisher:Stackpole Books
- Genre:
- Year:2015
- City:Mechanicsburg;PA
- Rating:5 / 5
- Favourites:Add to favourites
- Your mark:
Crocheted Mitts & Mittens: summary, description and annotation
We offer to read an annotation, description, summary or preface (depends on what the author of the book "Crocheted Mitts & Mittens" wrote himself). If you haven't found the necessary information about the book — write in the comments, we will try to find it.
Gunderson: author's other books
Who wrote Crocheted Mitts & Mittens? Find out the surname, the name of the author of the book and a list of all author's works by series.


Crocheted Mitts & Mittens — read online for free the complete book (whole text) full work
Below is the text of the book, divided by pages. System saving the place of the last page read, allows you to conveniently read the book "Crocheted Mitts & Mittens" online for free, without having to search again every time where you left off. Put a bookmark, and you can go to the page where you finished reading at any time.
Font size:
Interval:
Bookmark:
T his section covers most of the techniques used in this book, but not every single aspect of every pattern. Do not forget there is a wealth of information available on the Internet! A quick search of the web and sites like YouTube will result in many videos and tutorials on virtually any crochet technique you want to learn.
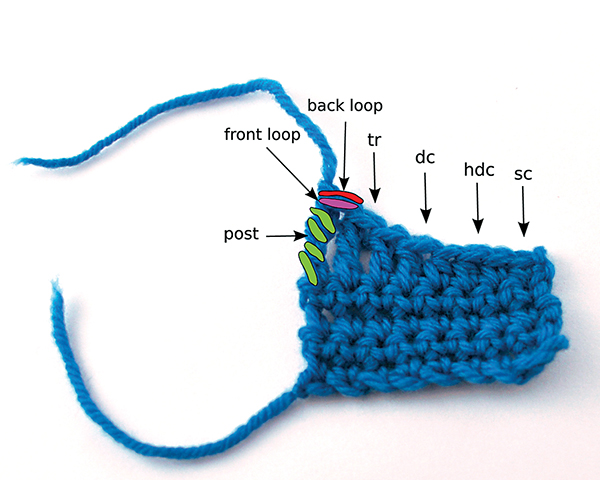
Anatomy of a Stitch
Here are the most commonly used basic stitches in crochet. From right to left are single crochet, half double crochet, double crochet, and triple crochet stitches. In each of these stitches, the front and back loops are the same. But the taller the stitch gets, the taller the post gets.
Getting Started
There are numerous ways to begin a project. The following techniques are the most common ways of doing so.
Slipknot
The very beginning of almost every crochet piece is a slipknot. Its the first step in the beginning chain. There are different methods of making a slipknot. Shown here is just one way of getting the job done.
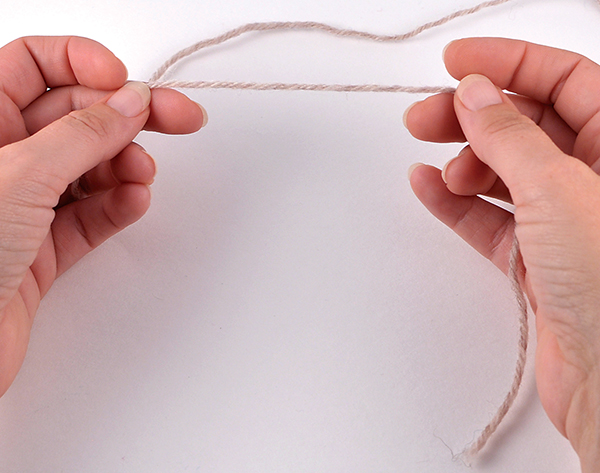
Hold the yarn in both hands, leaving a tail several inches long.
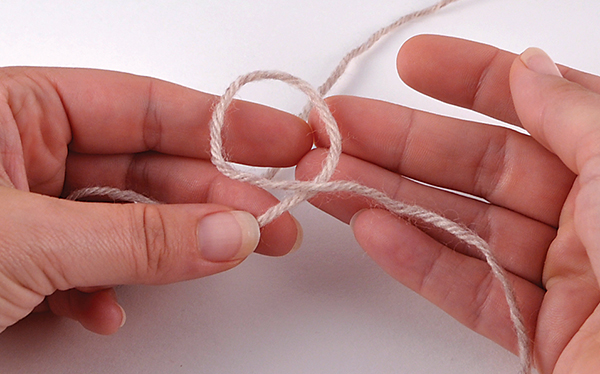
Make a single loop with the yarn.
Rotate the loop so its over the top of the strand thats coming from the ball of yarn.
Pull the strand coming from the ball of yarn through the loop that was formed, making sure not to pull out the tail end from this loop.
Tighten the knot securely.
Place your hook into the loop.
Tighten the loop around the hook, but not too tightly. The loop needs to be loose enough so that the hook moves back and forth easily.
Beginning Chain
Most crochet projects start with a beginning chain. This is a series of loops into which stitches will be worked. Try to work the beginning chain at an average tension. Working the chains too tightly makes it difficult to work the first row of stitches into them. Making the chains too loose can give a sloppy look to the edge. If you have difficulty making the chain loose and even, try going up one hook size for this beginning chain and returning to the hook size used for the remainder of the project after the chains are made.
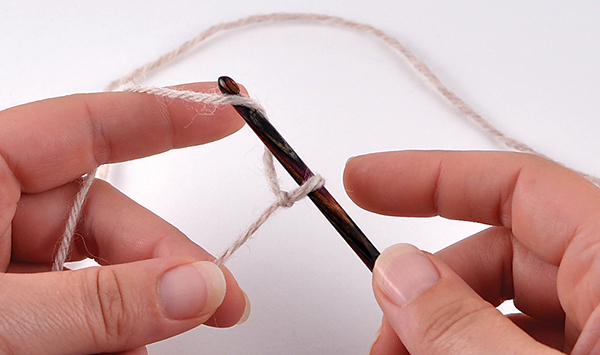
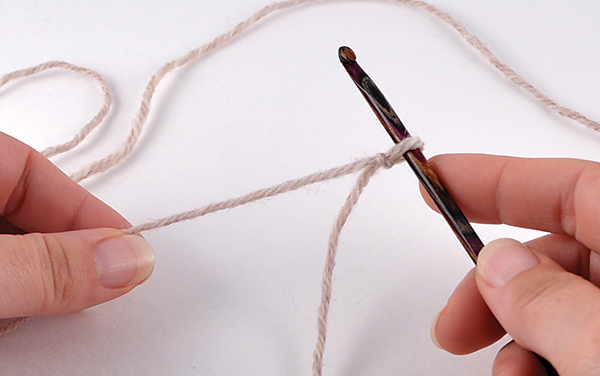
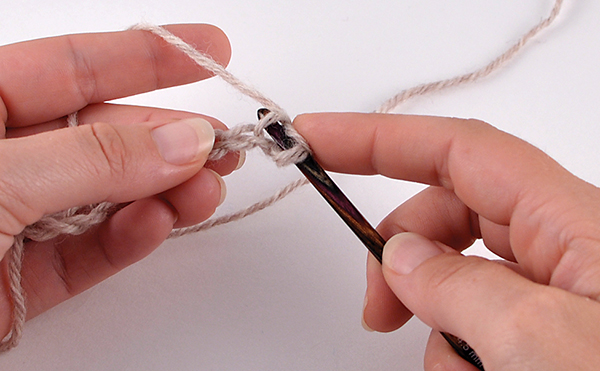
Make a slipknot and place it on your hook. Yarn over by bringing the yarn from back to front over the top of the hook.
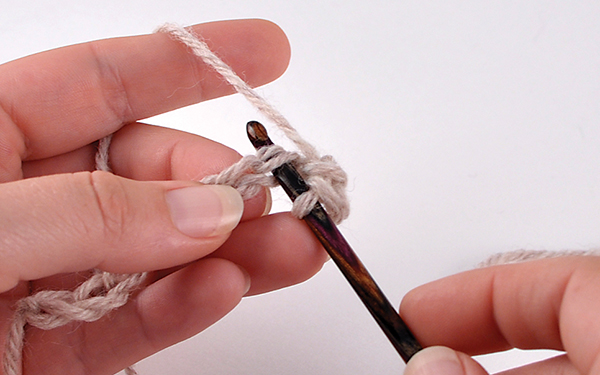
Bring the yarn through the slipknot1 chain formed.
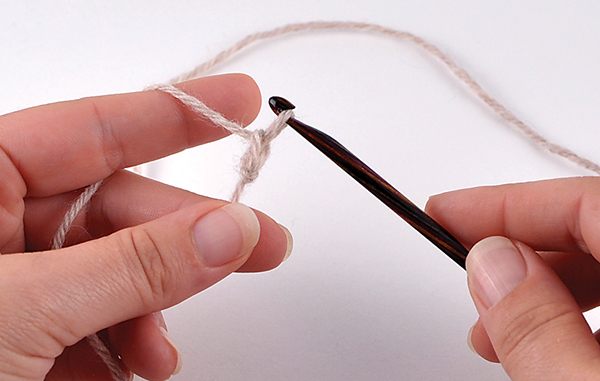
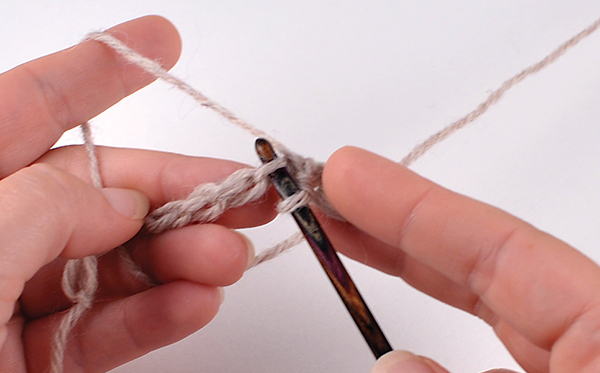
Make as many chains as called for in the pattern. The loop on the hook does not count as a chain.
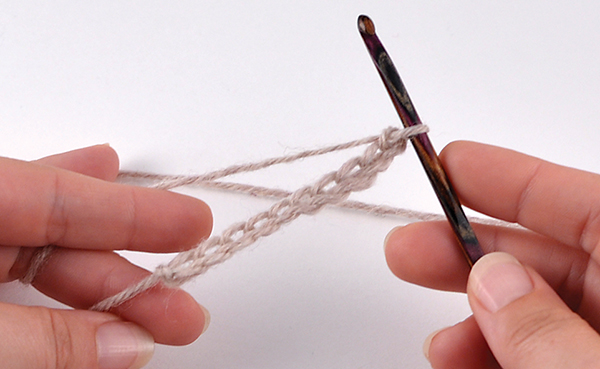
Working into the Chain
If you take a look at your crochet chain, youll see that there are different parts of each chain. On the top of the chain, you can see that there is a V shape for each chain. These are called the top loops. The loop closest to you is the front top loop; the loop furthest from you is the back top loop. On the bottom side of the chain there are little bumps. These are called the bottom bumps. There are different reasons for working into different parts of the chain, depending on the final outcome of the beginning edge.

Here is what the top side of the chain looks like.
To work into the back top loop, insert your hook into the chain this way.
To work into both the back top loop and bottom bump, insert your hook into the chain this way. If a pattern does not specify, this is the most common way to begin.

Here is what the bottom side of the chain looks like.
To work into the bottom bump, insert your hook into the chain this way.
Adjustable Ring
The adjustable ring is a way to begin work in the round. It is often used in center-out motifs and top-down hats. This way of beginning allows for the center to be tightened so there is no hole in the middle of the project. Like the slipknot, there are different methods of making an adjustable ring, and this is the way I do it.
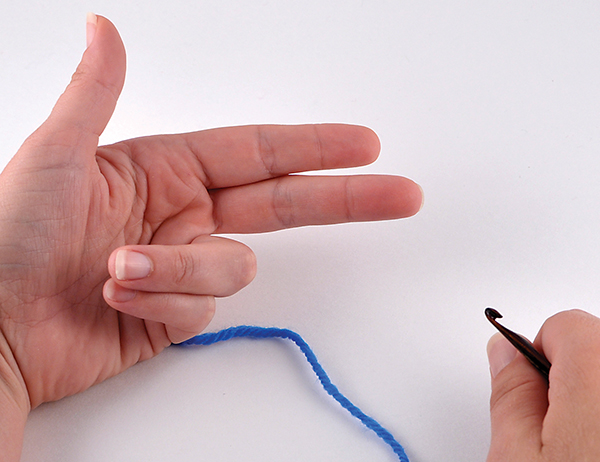
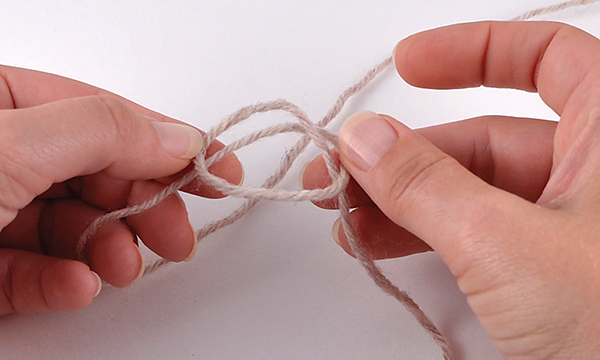
Hold out the index and middle fingers on your left hand.
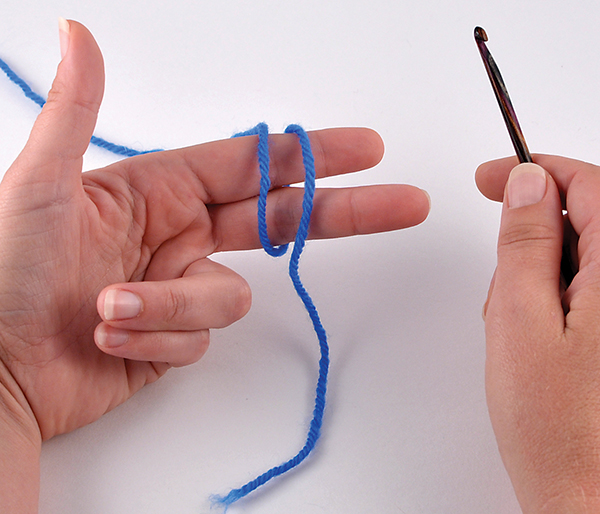
With the end in front, wrap the yarn clockwise around the two fingers 1 times so that the ball end of the yarn is hanging in the back.
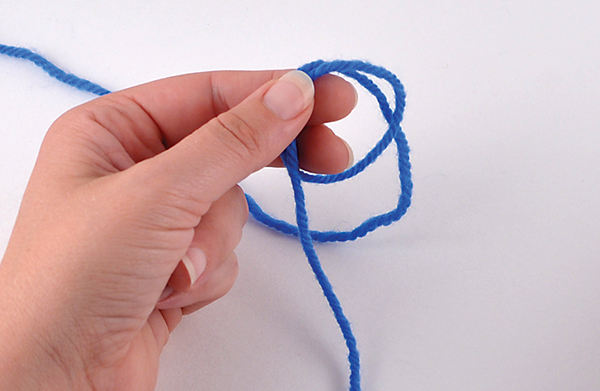
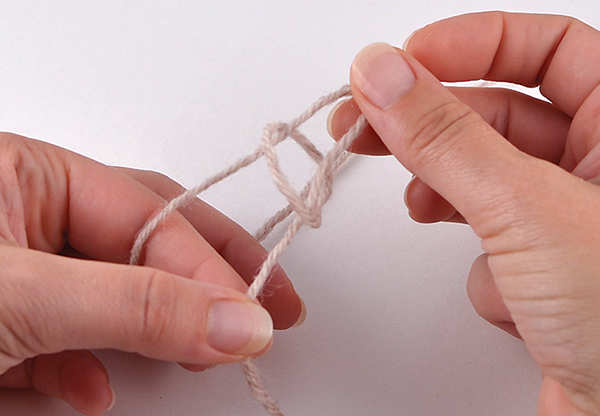
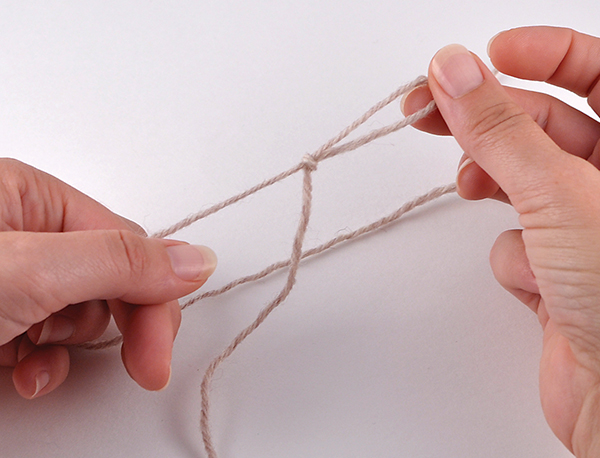
Take the resulting ring off your fingers and hold the strands together, being careful that the ring does not come apart.
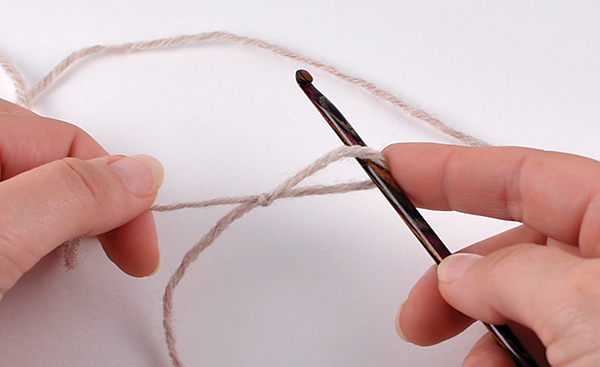
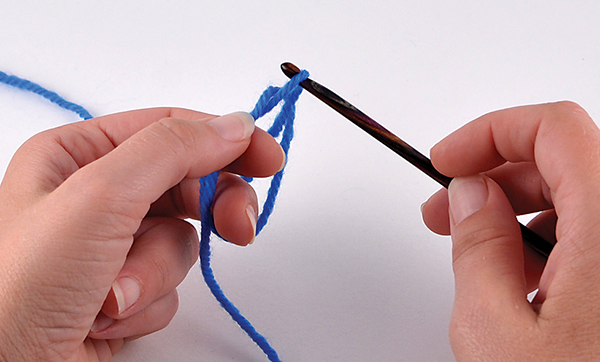
Insert the hook into the ring. Grab the back part of the loop which is attached to the ball end of the yarn, like a yarn over.
Font size:
Interval:
Bookmark:
Similar books «Crocheted Mitts & Mittens»
Look at similar books to Crocheted Mitts & Mittens. We have selected literature similar in name and meaning in the hope of providing readers with more options to find new, interesting, not yet read works.
Discussion, reviews of the book Crocheted Mitts & Mittens and just readers' own opinions. Leave your comments, write what you think about the work, its meaning or the main characters. Specify what exactly you liked and what you didn't like, and why you think so.