ACKNOWLEDGMENTS
A special thanks to: My editors, Pam Hoenig and Candi Derr, for their guidance and faith in me throughout this journey. Thank you for giving me the creative freedom I needed to complete this book. My husband and daughters for their help with lighting, photography, proofreading, styling, and their endless encouragement. My models, Amber Cox, Danielle Cox, Greg Pretti, McKenna Coffey, Lily Adair, Michael Lenhardt, and Manuel Montoya. Thank you for enduring snow, wind, and a blinding reflector in your eyes. CinDWood and Cottage Looms for supplying some of the looms used in this book; your looms are a joy to work with.
The loom knitting community; without you, this book never would have happened. LESSON 1
Casting On, Knit Stitch, and Binding Off
I n this lesson, I will teach you what you need to know to make your very first round loom project. Its the most basic of basics: cast on, knit, bind off. Casting On In round loom knitting, there are many ways to cast on (and how you do it will affect how the edge of the piece will look), but we will start with the two most popular methods: the e-wrap cast-on and the chain cast-on. With all cast-ons, try to maintain a medium tension on the working yarn. Your stitches/wraps should be just tight enough to stay on the pegs but loose enough to pull over the pegs without struggling.
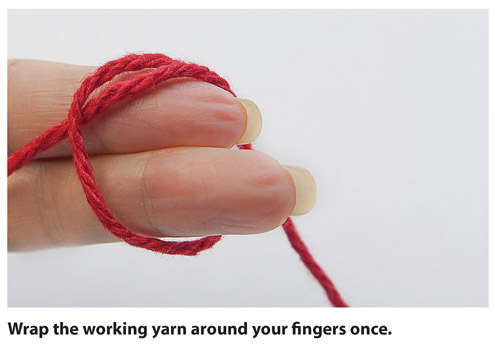
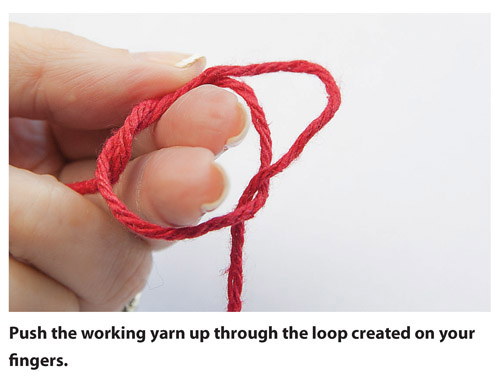
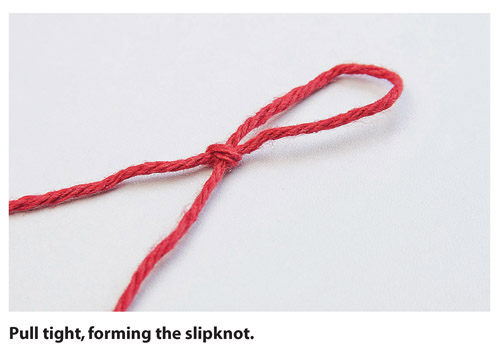
If the pattern you are following does not specify which direction you should work around the loom (clockwise or counterclockwise), then it is unimportant to the execution of the pattern and you can work in whichever direction is most comfortable for you. This is really only an issue if you are working in the round (see page 21). E-WRAP CAST-ON This creates a very loose edge, suitable for when you will be joining panels together. To do the e-wrap cast-on, first you need to know how a slipknot is made and how the e-wrap is done. Making a Slipknot To make a slipknot, make a loop at the end of your working yarn by winding the yarn once around your index finger, then pull a loop of the working end of the yarn through and pull tight on this new loop to create the slipknot.
Making an E-Wrap (ew) In loom knitting, the e-wrap can be used to make stitches (as in the e-wrap knit stitch), to cast on, to make lace stitches (when combined with different kinds of decreases), and to increase your stitch count at the end of a row (youll find more about the last two in Lesson 6).
Making an E-Wrap (ew) In loom knitting, the e-wrap can be used to make stitches (as in the e-wrap knit stitch), to cast on, to make lace stitches (when combined with different kinds of decreases), and to increase your stitch count at the end of a row (youll find more about the last two in Lesson 6).
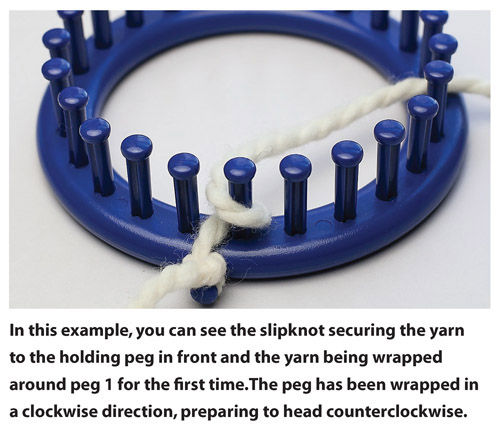
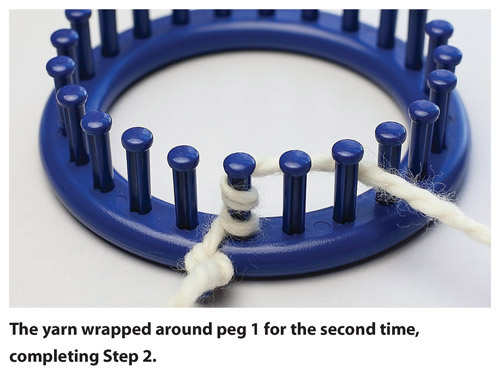
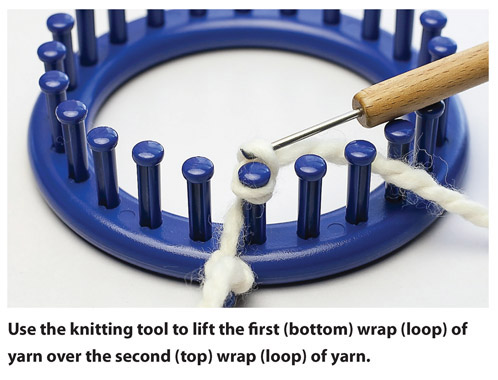
To e-wrap a peg, wind your working yarn completely around the peg, from back to front. If you are working counterclockwise around the loom, you will wrap the peg in a clockwise direction. If you are working clockwise, you will wrap the peg in a counterclockwise direction. How to E-Wrap Cast-On Place a slipknot on the holding peg or wind the yarn around the holding peg and hold. Starting with the peg (peg 1) to the right or left of the holding peg, depending on the direction you will be working in, e-wrap the peg two times. There will now be two wraps (loops) of yarn on peg 1; with the knitting pick, lift the bottom loop over the top loop.
Repeat Steps 2 and 3 for the number of pegs indicated in the pattern.
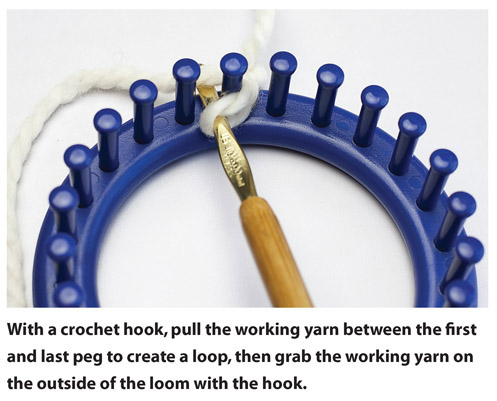
CHAIN CAST-ON This creates a chain edge that is tighter than the e-wrap cast-on. Place a slipknot on the holding peg. Position the loom so that you are working from inside the loom. With a crochet hook, grab the working yarn and pull it between the first and last pegs toward the center of the loom. This creates a loop in the working yarn.
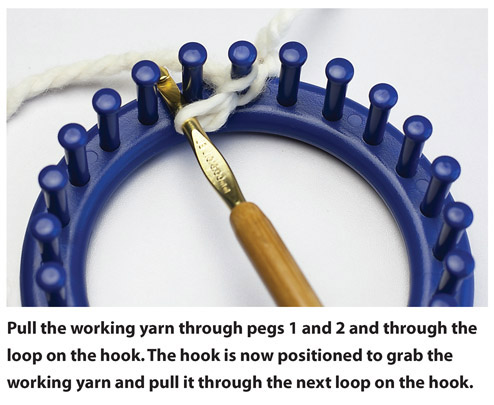
With the crochet hook still in the loop, move the hook so it is now between pegs 1 and 2 and grab the working yarn. Pull the working yarn through pegs 1 and 2 and through the loop on the hook. Repeat Steps 24 for the number of pegs indicated in the pattern. If you will be working in the round (see right) and the pattern states join to work in the round, after you have cast on to your last peg, place the last loop on your crochet hook on to peg 1; you will work these two loops together as a single stitch to begin the next round.
Working in the Round vs. Working Flat Knitting in the round is just what is sounds like.
When you have worked the last peg around the loom, you will continue in the same direction, constantly working around the loom in rounds. Doing so will create a seamless cylinder, perfect when making garments like cowls or socks. To work flat, when you come to the last peg of the loom, you will begin working in the opposite direction (without flipping the loom; loom knitting is always done with the right side facing out), and continue in this way, working back and forth in rows. The Knit Stitches There are four ways to do the knit stitch on the loom: the regular knit stitch, flat knit stitch, u-knit stitch, and e-wrap knit stitch. The first three kinds of knit stitches produce a V pattern, referred to as the stockinette stitch, and a tighter knit weave. Though they all produce the stockinette V, these knit stitches vary in tension and may be specifically called for in a pattern.
For intarsia and Fair Isle, I use the regular knit stitch exclusively to ensure that the design in the fabric stands out clearly, but I prefer the flat or u-knit stitch for items that require durability (like socks) because of the tighter tension both of those stitches have. The e-wrap knit stitch creates what is known as the twisted stockinette stitch, which results in a much looser knit weave. REGULAR KNIT STITCH (K) This stitch is most like the knit stitch created using knitting needles. Insert the knitting tool upward through the loop and grab the working yarn, keeping the working yarn to the outside of the frame. Pull the working yarn down through the loop, creating a new loop.


