• Complain

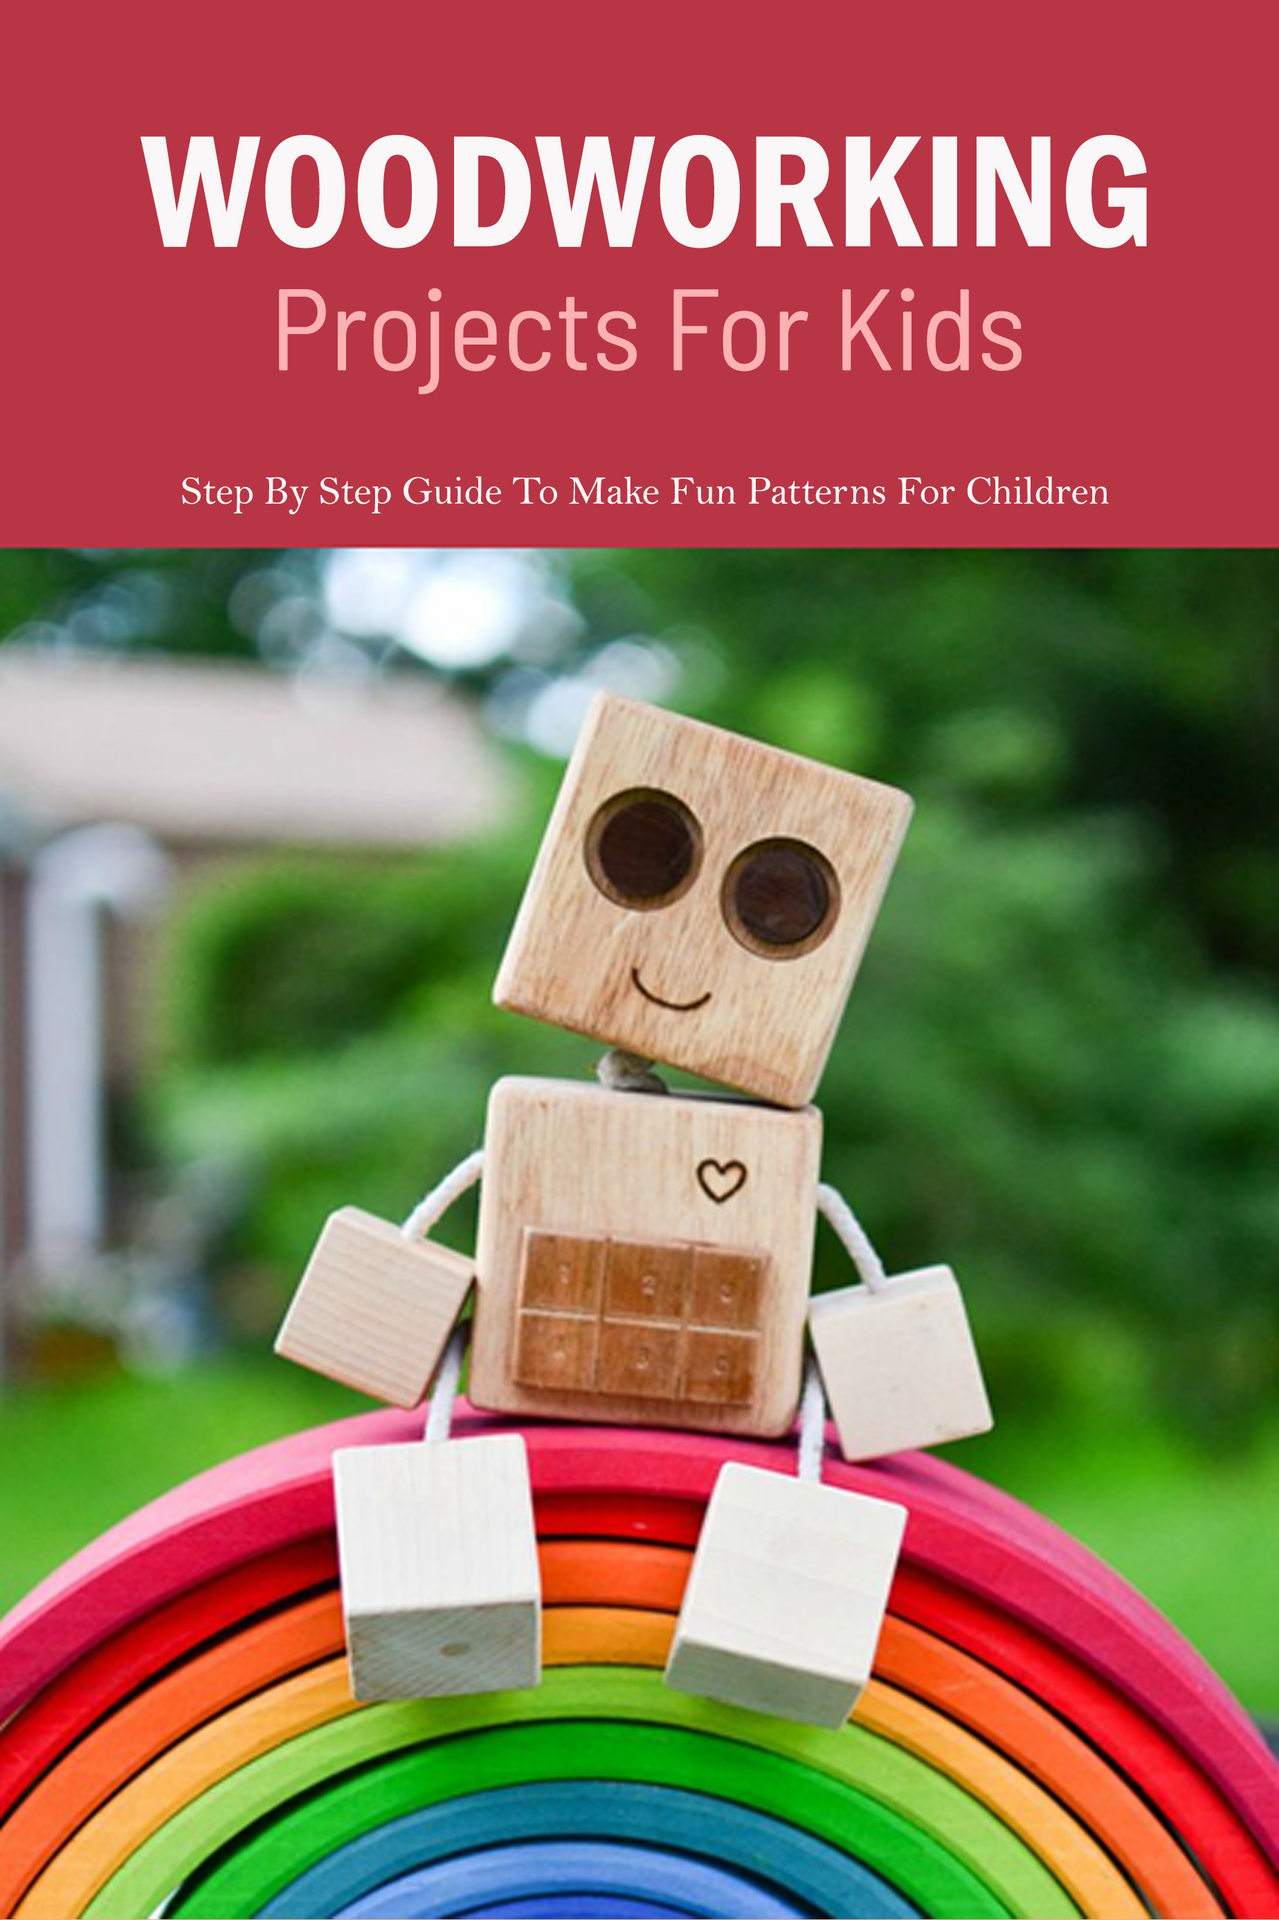
Mullangi - Woodworking Projects For Kids: Step By Step Guide To Make Fun Patterns For Children: Step By Step Guide To Make Fun Patterns For Children

Here you can read online Mullangi - Woodworking Projects For Kids: Step By Step Guide To Make Fun Patterns For Children: Step By Step Guide To Make Fun Patterns For Children full text of the book (entire story) in english for free. Download pdf and epub, get meaning, cover and reviews about this ebook. year: 2020, genre: Home and family. Description of the work, (preface) as well as reviews are available. Best literature library LitArk.com created for fans of good reading and offers a wide selection of genres:

Romance novel Science fiction Adventure Detective Science History Home and family Prose Art Politics Computer Non-fiction Religion Business Children Humor

Choose a favorite category and find really read worthwhile books. Enjoy immersion in the world of imagination, feel the emotions of the characters or learn something new for yourself, make an fascinating discovery.

No cover
  • Book:
    Woodworking Projects For Kids: Step By Step Guide To Make Fun Patterns For Children: Step By Step Guide To Make Fun Patterns For Children
  • Author:
  • Genre:
  • Year:
    2020
  • Rating:
    4 / 5
  • Favourites:
    Add to favourites
  • Your mark:
    • 80
    • 1
    • 2
    • 3
    • 4
    • 5

Woodworking Projects For Kids: Step By Step Guide To Make Fun Patterns For Children: Step By Step Guide To Make Fun Patterns For Children: summary, description and annotation

We offer to read an annotation, description, summary or preface (depends on what the author of the book "Woodworking Projects For Kids: Step By Step Guide To Make Fun Patterns For Children: Step By Step Guide To Make Fun Patterns For Children" wrote himself). If you haven't found the necessary information about the book — write in the comments, we will try to find it.

Mullangi: author's other books


Who wrote Woodworking Projects For Kids: Step By Step Guide To Make Fun Patterns For Children: Step By Step Guide To Make Fun Patterns For Children? Find out the surname, the name of the author of the book and a list of all author's works by series.

Woodworking Projects For Kids: Step By Step Guide To Make Fun Patterns For Children: Step By Step Guide To Make Fun Patterns For Children — read online for free the complete book (whole text) full work

Below is the text of the book, divided by pages. System saving the place of the last page read, allows you to conveniently read the book "Woodworking Projects For Kids: Step By Step Guide To Make Fun Patterns For Children: Step By Step Guide To Make Fun Patterns For Children" online for free, without having to search again every time where you left off. Put a bookmark, and you can go to the page where you finished reading at any time.

Light

Font size:

Reset

Interval:

Bookmark:

Make
Woodworking Projects For Kids Step By Step Guide To Make Fun Patterns For - photo 1
Woodworking Projects For Kids
Step By Step Guide To Make Fun Patterns For Children
Copyright 2020
All rights reserved.
DEDICATION
The author and publisher have provided this e-book to you for your personal use only. You may not make this e-book publicly available in any way. Copyright infringement is against the law. If you believe the copy of this e-book you are reading infringes on the author's copyright, please notify the publisher at: https://us.macmillan.com/piracy
Contents
Make a Homemade Candy Dispenser
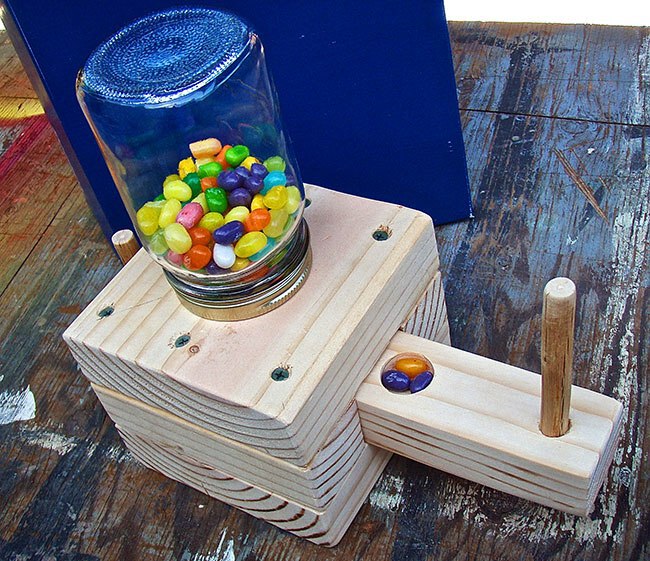
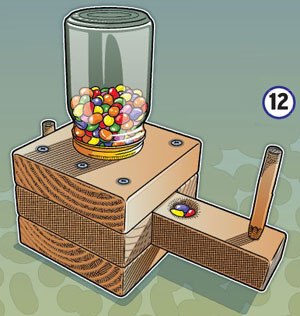
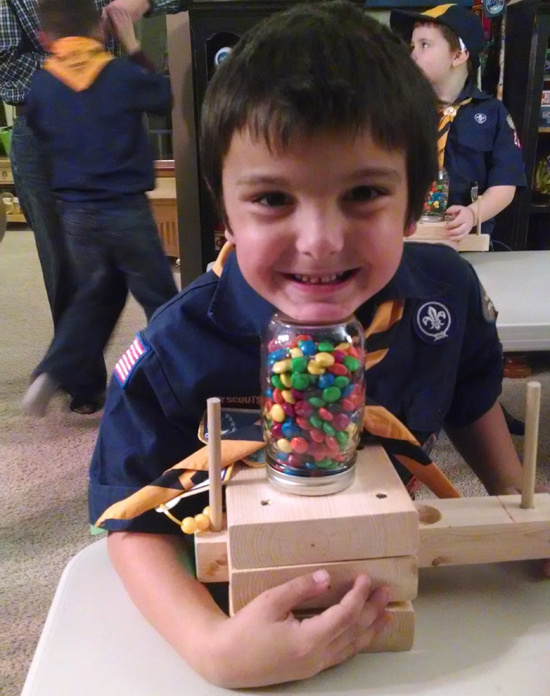
You can make this dispenser for jelly beans, gumballs or any other hard candy that will fit in it.
WHAT YOULL NEED 2 x 6 board 24 long The actual size of a 2 x 6 board is 1 12 - photo 2
WHAT YOULL NEED
2 x 6 board, 24 long (The actual size of a 2 x 6 board is 1 1/2 x 5 1/2.)
Cut the board as follows:
2 1 1/2 x 5 1/2 x 5 1/2 boards (top and base)
2 1 1/2 x 1 3/4 x 5 1/2 boards (sides)
1 x 1 7/8 x 11 board (slide)
Tape measure
Pencil
Pocketknife
Sandpaper
Wood glue
1 dowel or peg about 1/4 in diameter, 4 long
1 dowel or peg about 1/4 in diameter, 2 long
A clean quart or pint canning jar with its metal ring
Crosscut saw for sawing across the grain
Ripsaw for sawing with the grain
Drill
Drill bit, sized for pre-drilling 2 1/2 holes
7/8 spade bit
Countersink bit (so driven screws are flush)
Screwdriver
12 wood screws, 2 1/2 long
4 flat-head brads for nailing jar ring to top of dispenser
Small drill bit for pre-drilling brad holes in jar ring
Jelly beans or gumballs
WHAT YOULL DO
Cut all the boards to size and sand smooth Glue and screw the base onto - photo 3
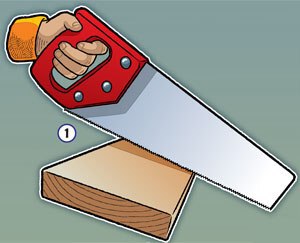
Cut all the boards to size and sand smooth.
Glue and screw the base onto the sides Pencil an X from corner to corner - photo 4
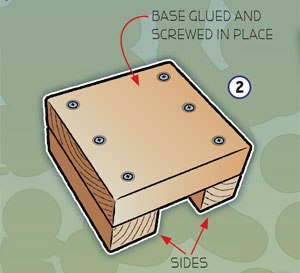
. Glue and screw the base onto the sides.
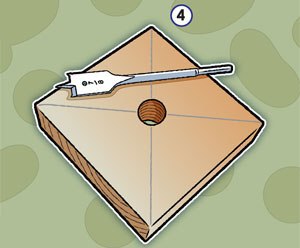
Pencil an X from corner to corner on the top board Drill a 78 hole through - photo 5
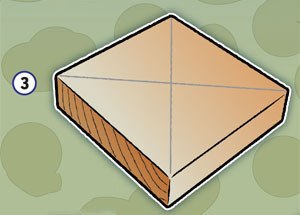
Pencil an X from corner to corner on the top board.
Drill a 78 hole through the center of the top board Glue and screw the top - photo 6
Drill a 7/8 hole through the center of the top board.
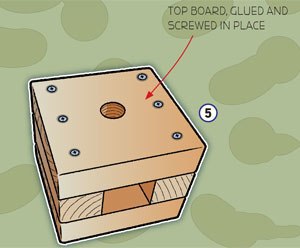
Glue and screw the top board onto the sides and base Sand the slide until it - photo 7
Glue and screw the top board onto the sides and base. Sand the slide until it moves smoothly in the square hole in the center of the dispenser.
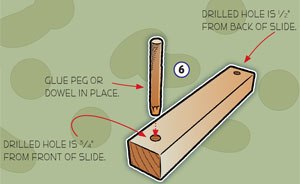
Drill a hole 34 from the front of the slide This is for the 4 peg or dowel - photo 8
Drill a hole 3/4 from the front of the slide. This is for the 4 peg or dowel. Drill a hole 1/2 from the back of the slide. This is for the 2 peg or dowel. Glue the 4 peg or dowel in the front hole on the slide.
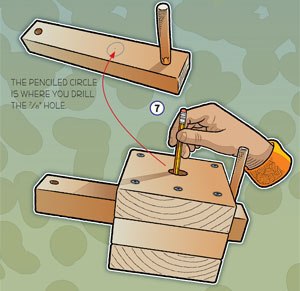
Push the slide into place until it stops at the 4 peg Draw a circle through - photo 9
Push the slide into place until it stops at the 4 peg. Draw a circle through the 7/8 hole on the top board onto the slide.
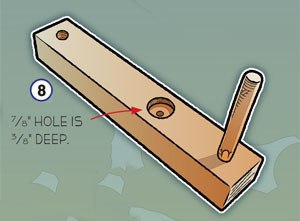
Drill a 78 hole 38 deep into the slide as shown Bevel the 78 slide hole - photo 10
Drill a 7/8 hole 3/8 deep into the slide as shown.
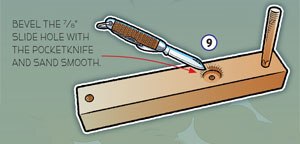
Bevel the 78 slide hole with the pocketknife and sand smooth Drill and - photo 11
Bevel the 7/8 slide hole with the pocketknife and sand smooth.
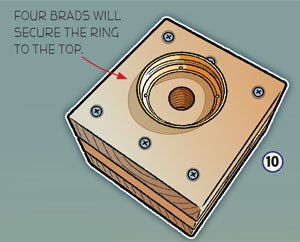
Drill and nail the jar ring onto the top board Push the slide into place - photo 12
Drill and nail the jar ring onto the top board.
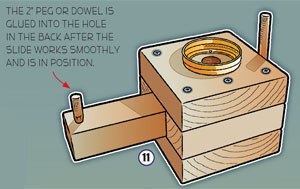
Push the slide into place When the slide is pushed in all the way the hole in - photo 13
Push the slide into place. When the slide is pushed in all the way, the hole in the top and the hole in the slide should line up. Glue the 2 peg or dowel onto the back of the slide.
Fill the jar with candy screw it onto the ring and your dispenser is complete - photo 14
Fill the jar with candy, screw it onto the ring and your dispenser is complete.
How to Build a Simple Toy Catapult in Minutes What is a catapult and what - photo 15
How to Build a Simple Toy Catapult in Minutes
What is a catapult and what does it do A catapult is a tool used to throw - photo 16
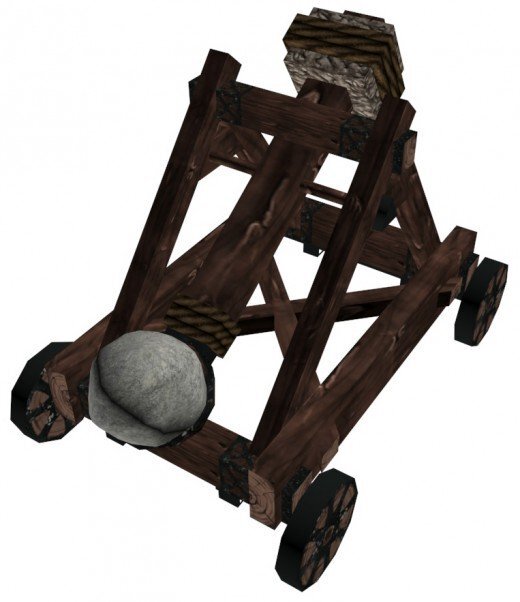
What is a catapult, and what does it do?
A catapult is a tool used to throw large objects over a long distance. They were also used to throw large rocks covered in tar that were set on fire over a distance. In battle, the catapult was used mainly as a siege engine to smash castle walls and combined with fire to burn wooden structures. Sometimes a catapult bucket would be filled with metal shrapnel such as nails that were then fired over the top of castle walls with the intent to maim as many of the enemy as possible.
The catapult I show how to build only fires a table tennis ball, but it is a fun toy and can be used in a target game.
Modern-Day Catapult Clay pigeons used for shooting practice and sport are fired - photo 17
Modern-Day Catapult
Clay pigeons used for shooting practice and sport are fired from a modern-day catapult. The trap machine uses a mechanical arm to fire the clay pigeon into the air.
How To Build A Toy Catapult
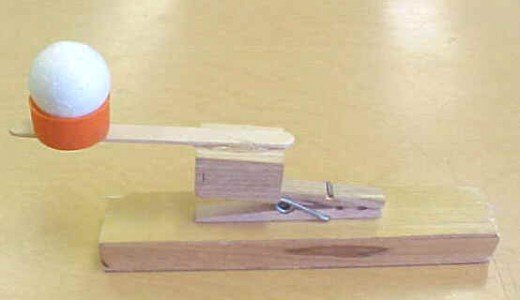
The catapult fires a ping pong ball for a distance of about 20-30 feet, and it can be used to play a fun target game with your friends.
What You'll Need
Wood Block: It needs to be approx 6"x2"x1".
Clothespin With a Spring
1" Wood Cube
Popsicle Stick: You can double up and stick 2 sticks together for extra strength.
Plastic Bottle Cap
Wood Glue
Instructions
Take the 6" block and lay it on a flat surface.
Glue the clothespin to it, centered lengthwise.
When the glue has set, glue the 1" cube to the open end of the clothespin.
Glue the Popsicle stick to the cube.
Glue the bottle lid to the Popsicle stick, leaving enough space at the tip of the Popsicle stick to push it down with the tip of your finger to fire your catapult.
How to Use Your Catapult
Load your catapult by placing a ping pong ball into the bottle lid.
Move your catapult around to aim at your target.
When ready to fire, hold down the front end of your catapult, pull down the Popsicle stick with the tip of your finger, and release.
Next page
Light

Font size:

Reset

Interval:

Bookmark:

Make

Similar books «Woodworking Projects For Kids: Step By Step Guide To Make Fun Patterns For Children: Step By Step Guide To Make Fun Patterns For Children»

Look at similar books to Woodworking Projects For Kids: Step By Step Guide To Make Fun Patterns For Children: Step By Step Guide To Make Fun Patterns For Children. We have selected literature similar in name and meaning in the hope of providing readers with more options to find new, interesting, not yet read works.


Reviews about «Woodworking Projects For Kids: Step By Step Guide To Make Fun Patterns For Children: Step By Step Guide To Make Fun Patterns For Children»

Discussion, reviews of the book Woodworking Projects For Kids: Step By Step Guide To Make Fun Patterns For Children: Step By Step Guide To Make Fun Patterns For Children and just readers' own opinions. Leave your comments, write what you think about the work, its meaning or the main characters. Specify what exactly you liked and what you didn't like, and why you think so.