PUBLISHER: Amy Marson
CREATIVE DIRECTOR: Gailen Runge
ART DIRECTOR: Kristy Zacharias
EDITOR: Lee Jonsson
TECHNICAL EDITORS: Ann Haley and Gailen Runge
COVER/BOOK DESIGNER: April Mostek
PRODUCTION COORDINATOR: Rue Flaherty
PRODUCTION EDITOR: Katie Van Amburg
ILLUSTRATOR: Jessica Jenkins
PHOTO ASSISTANT: Mary Peyton Peppo
STYLED PHOTOGRAPHY by Nissa Brehmer, unless otherwise noted
INSTRUCTIONAL PHOTOGRAPHY by Diane Pedersen, unless otherwise noted
Published by FunStitch Studio, an imprint of C&T Publishing, Inc., P.O. Box 1456, Lafayette, CA 94549
Concept by Robie Rogge
DEDICATION
To Wooflet, for believing
And to Robie, for opening doors
Introduction
How many fashion accessories have been shared by outlaws and preppies, pirates, cowgirls, hippies, and ninja turtles? Only one that I can think ofthe bandana. Its been a wardrobe classic for more than 200 years and shows no signs of disappearing.
On these pages youll find ideas for turning bandanas into tops, skirts, belts, bags, and headbands, as well as a few things for decorating your room. Some of the projects require nothing more than scissors and glue, but if youre ready to sew, youll discover that bandanas are a great place to start. Theyre already hemmed, so projects go together quickly, and the printed borders make cutting and following stitching lines easy. This book includes projects for all skill levels; some can be made with a single bandana. By combining colors and mixing and matching border patterns, youll be creating one-of-a-kind designs of your own in no time.
Also on these pages, youll learn a few hand-sewing basics, which are at the heart of all dressmaking and craft needlework. Even when you do most of your sewing on the machine, from time to time youll still need to pick up a needle and thread to repair a hem, baste a seam, or sew on a button. In other words, youll find many uses for these simple stitches.
Enjoy! Judith
Bandana Basics
A little history and everything else you need to know.
A LITTLE HISTORY
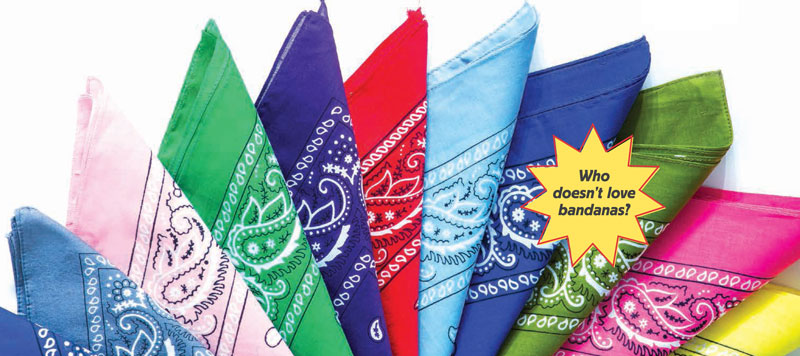
When the first Indian silk scarves showed up in European shops in the 1600s, everyone had to have one. The brilliantly colored scarves were woven with a fluid teardrop design called the boteh. No one in Europe had seen anything like itit was so exoticand merchants could barely keep up with the demand. The scarves were known as bandanas, from the Sanskrit word bandhana, which means to tie.
By the 1700s, French and British manufacturers were printing their own versions of the designs onto cotton scarves, which were as popular as the originals. In fact, one cotton-weaving center in Scotland, the town of Paisley, became so identified with the scarves that the boteh teardrop shape took on the name of the town.
After the American cotton industry was launched around 1800, manufacturers in the United States began producing their own bandanas. Theyve been with us ever sinceequally at home on the range, on the railroads, at casual summer picnics, and on fashion photo shootsno longer exotic, but beloved and wildly popular just the same.
EVERYTHING ELSE YOU NEED TO KNOW
Size and Shape
Some bandanas are the size of a handkerchief; others are large enough to wear as a sarong. The standard size is a 22 square. All of the projects in this book are made with standard bandanas. With that said, youll soon discover that bandanas are never truly square and they never measure exactly 22 (in fact, each of the four sides of a bandana might be a slightly different measurement). The border designs (along each side) can also vary in width on a single bandana. This can be frustrating when youre trying to line up border patterns, but try to work around it. Part of the bandanas charm, after all, is its casual look.
Washing and Ironing
Most bandanas are 100% cotton, which is one of the nicest fabrics to work with. If youre not certain whether your bandana will shrink or if the colors will run in the wash, youll want to check before you start your project. (If youre making a headband or something else that will never be washed, you can skip this step.)
Wash the bandana in hot water by itself or with other like colors. Tumble it dry in a hot dryer. It will definitely need ironing afterward. If you need help, be sure to ask an adult! Press the bandana with a steam iron on the cotton setting. If you want the bandana to be as crisp as it was before washing, spritz it with spray starch several times as you iron it.
Fraying
The most common fabric for bandanas is loosely woven cotton muslin, which frays (unravels) easily after it has been cut. Cutting bandanas with pinking shears will help prevent fraying. For a more permanent solution, use fusible (iron-on) interfacing on the back of the bandana, and finish edges with hems or blanket stitching.
Reversibility
Typically, bandanas are printed on both sides. They appear to be reversible, but one side often has better-quality printing than the other (usually the side without the hem fold). Throughout this book, I call these the right side and the wrong side of the bandana. For some projects, its important to have the right side showing, so be sure to take a look before you sew.
Tools and Materials
The tools and materials used in this book
can be found at most sewing and craft stores and through online suppliers. See for additional information.
Chalk pencil: Use a chalk pencil to draw cutting or sewing lines on fabric. You can sharpen a chalk pencil in a regular pencil sharpener to draw a fine line. Later, you can erase the line with a damp cloth. An erasable fabric marker works well, too.

Darning needle: Few people do much darning (mending holes in fabric) any more, but oversize darning needles have large eyes, so they are just the tools youll need if you are sewing a blanket stitch or other detail with yarn.

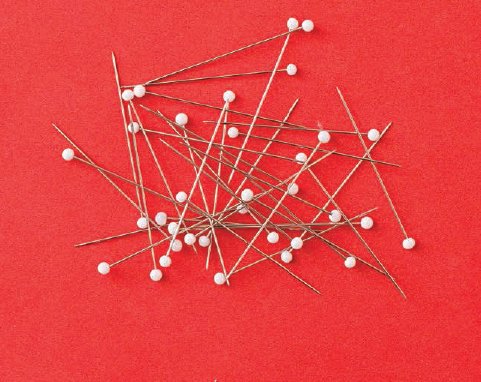
Dressmakers pins: Always keep a pincushion full of pins close at hand. Youll need them constantly. I like glass- or pearl-head pins best because theyre the easiest to grab.
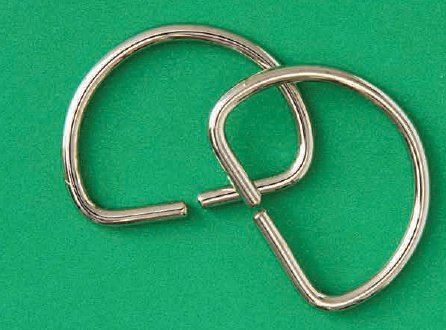
D-rings: Just as their name suggests, these belt rings, found in button and fabric shops, are D-shaped. Two rings are needed for making an adjustable belt. In a pinch, circular binder rings, found in any stationery store, will work just as well for a belt buckle.
Embroidery floss: Used for decorative handwork and edging, embroidery floss comes in a gorgeous array of glossy colors. Its sold in skeins of six threads that are loosely twisted together. To use it, cut the length you want, and then separate and pull out the number of strands you need.
Next page
