Publisher: Amy Marson Creative Director: Gailen Runge Art Director: Kristy Zacharias Editor: Liz Aneloski Technical Editors: Debbie Rodgers and Julie Waldman Cover/Book Designer: April Mostek Production Coordinators: Jenny Davis and Rue Flaherty Production Editor: Katie Van Amburg Illustrator: Zinnia Heinzmann Photo Assistant: Mary Peyton Peppo Style photography by Nissa Brehmer; Gallery photography by Diane Pedersen; How-to photography by Sue Kim, unless otherwise noted Published by Stash Books, an imprint of C&T Publishing, Inc., P.O. Box 1456, Lafayette, CA 94549 Dedication To all those readers who enjoyed my very first book, BagsThe Modern Classics. Without them, I would not be here right now. Also, to those who strive to create their own bags, whether for themselves or as a special present to others. Acknowledgments As always, I would like to thank my husband and best friend, Jung; my three children, Chan, Caleb, and Veronica; June, who always assists me in making the sample bags; and John, for his assistance with drawing the patterns. I would like to convey my sincere gratitude to Patrick, never short on advice and always an immense help with the manuscript!  Introduction I wrote my first book, BagsThe Modern Classics, with beginning-level sewists in mind, so I kept the supplies to a minimum.
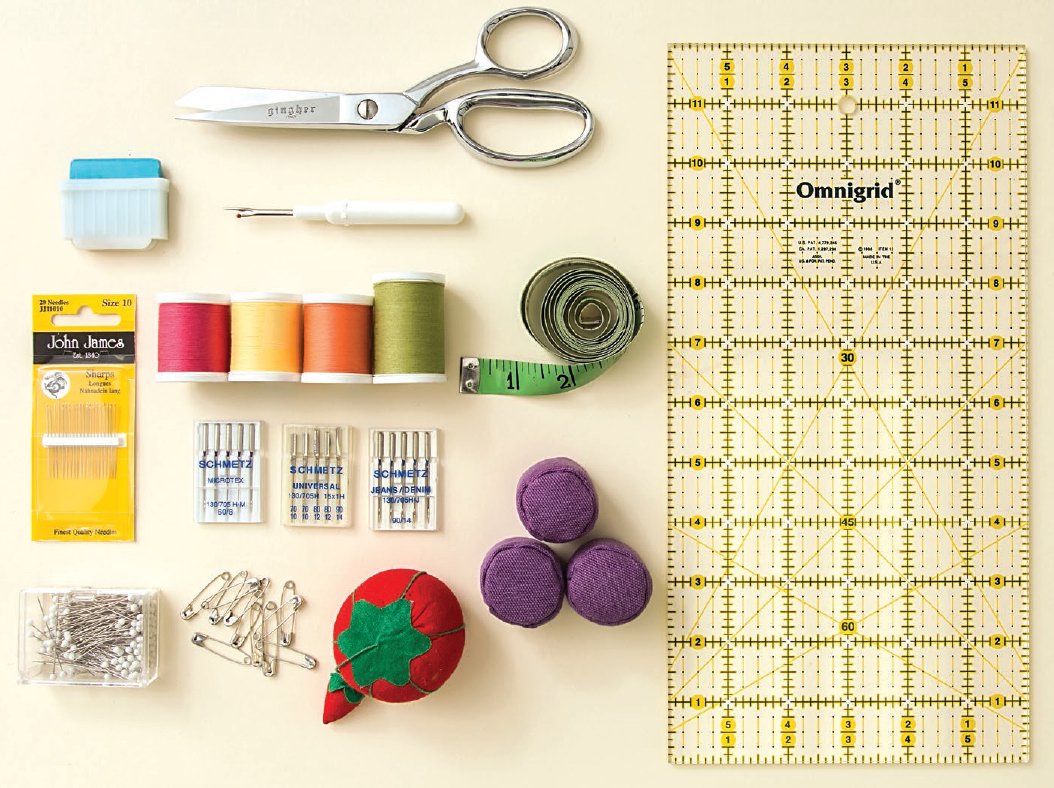
This new book still includes many projects that are achievable for beginning sewists, but it also includes a few more intricate designs that use various types of materials including metal frames, leather handles, buckles, and so on. My goal is to help you gain confidence in your sewing skills and take the next step forward.  Tools, Supplies, and Basic Techniques Tools and Supplies You will need a few basic tools and supplies: sewing machine, all-purpose sewing thread, hand and machine needles, pincushion, ruler, safety pins, straight pins, scissors, seam ripper, pattern weights, measuring tape, and chalk; a serger is a nice bonus but not mandatory.
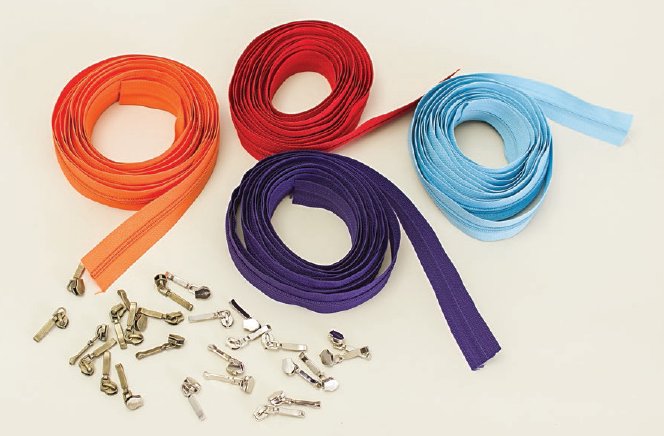 I use linen, cotton, home decor fabric, quilting-weight cotton, faux fur, and waterproof fabric for the exterior fabric and quilting-weight cotton for lining. I use light- to medium-weight interfacing, depending on the weight of the bag fabric. I use roll zippers, so I can trim to any length I need!
 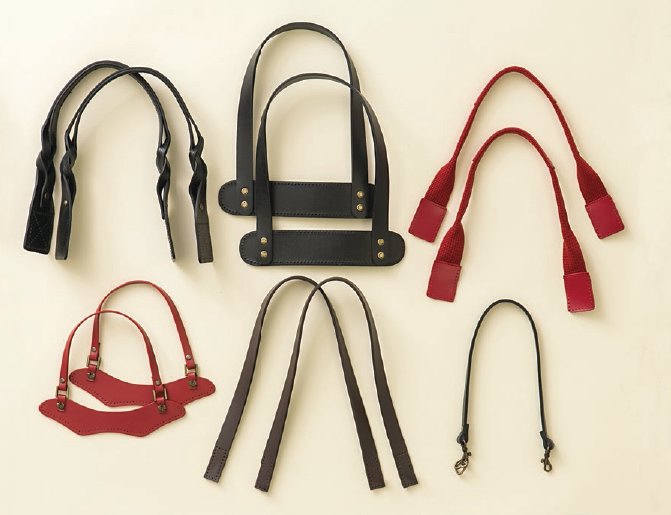 There are several different kinds of leather handles available to suit your bags design.
Some include pre-punched holes so you can sew on the handles after completing the bag. Other options include O-ring or D-ring attachment varieties. Find the perfect handle for your bag and make it! 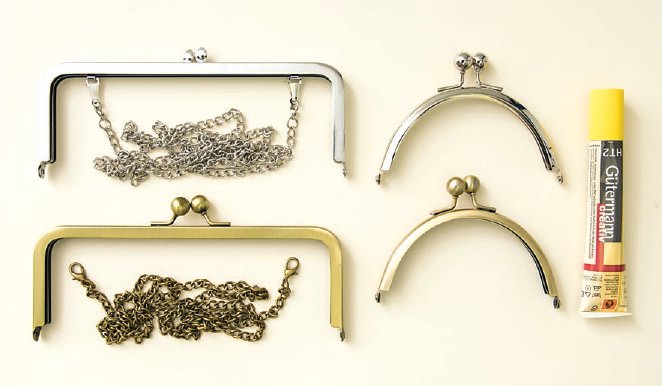 Some metal purse frames include an attached chain to utilize it as a handbag style. Others have a detachable chain, for optional use. The fabric edge of the bag is glued into the channel of the frame, so even beginners will have a fun time using this frame! Basic Techniques Applying a Magnetic Snap Attach the magnetic snap following the manufacturers instructions. Most snaps attach with the following steps: Cut a small piece of fusible interfacing at least larger on all sides than the snap.
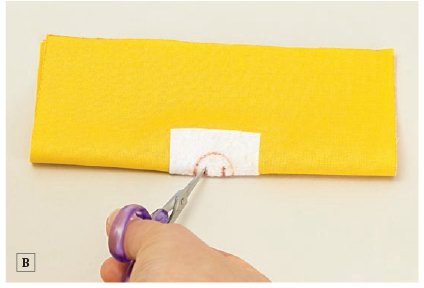
Apply the interfacing to the wrong side of the fabric, centered on the snap location. Center the snap on the piece of interfacing. FIGURE A 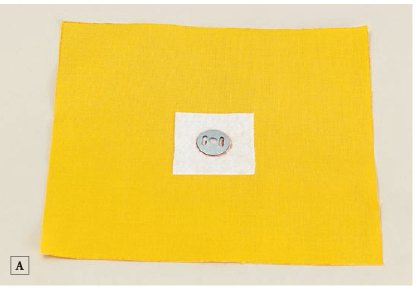 Use a pencil to draw the lines on the fabric where it will need to be cut for the prongs. Mark and carefully snip the slits for the prongs. FIGURE B
  Insert the prongs of a magnet on the right side of the fabric. FIGURE C
 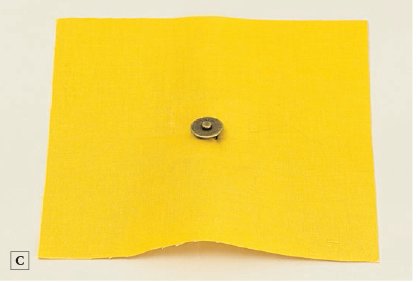 Place the disk over the prongs on the wrong side of the fabric and fold the prongs outward over the disc.
Finish by attaching the other half of the magnetic snap on the other piece in the same manner. FIGURE D 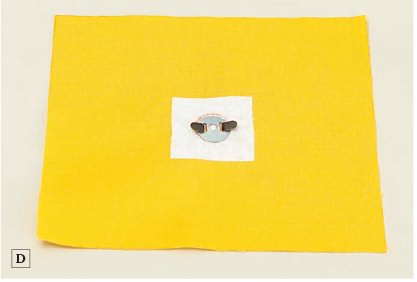 Attaching an O-Ring Cut 2 pieces of ribbon each 2 long. Press both short edges of a piece of ribbon under . FIGURE E
 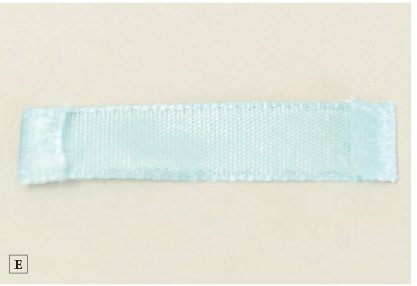 Press the ribbon in half. Slip the O-ring onto the ribbon. Stitch the ribbon ends together.
FIGURE F 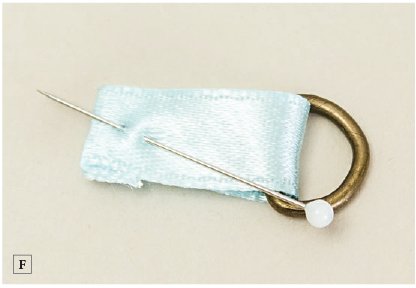 Position the ribbon on the side seam of the lining. Pin in place and stitch. FIGURE G
 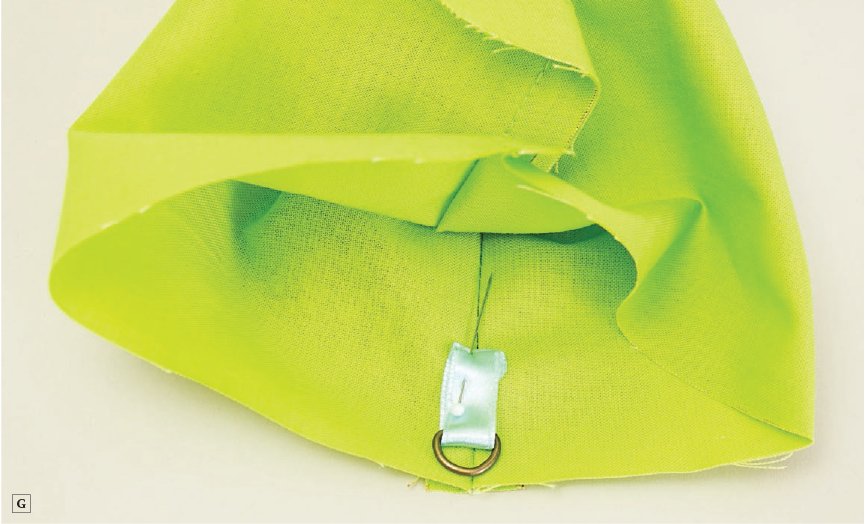 Repeat Steps 13 for the other ribbon O-ring holder. Attaching a Twist Lock Using a screwdriver, disassemble the lock. Place the back piece onto the lining flap. Trace the back piece onto the lining.
FIGURE H 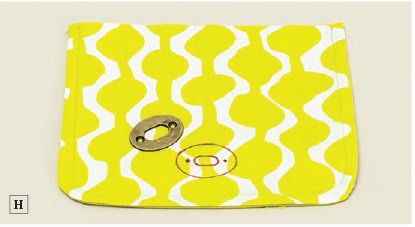 Cut out the center area of the back piece on the flap; punch the screw holes on each side with an awl or the tip of the scissors. FIGURE I
 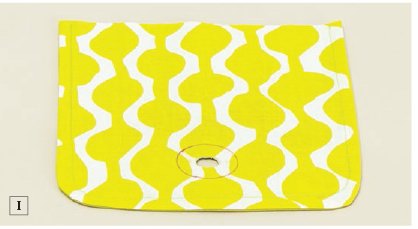 Lay the front lock piece onto the exterior, match the back lock piece with the front, and then screw them together. FIGURE J
 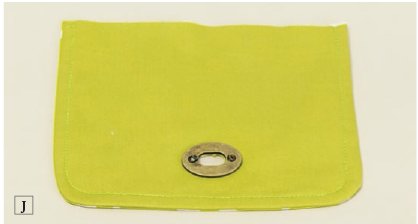 Draw the cutting line onto the front clutch piece as provided on the pattern. FIGURE K
 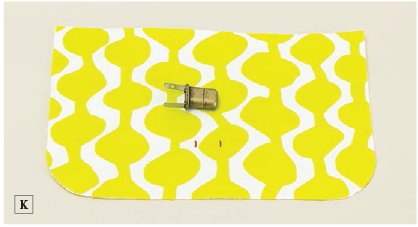 Insert the lock piece, place the washer onto the prongs, and fold the prongs outward. If you would like, you can add a piece of interfacing to stabilize the lock. FIGURE L
 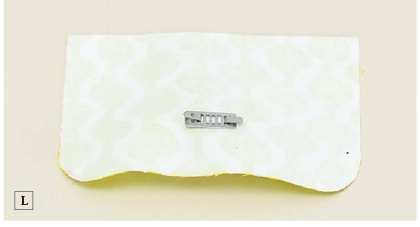 Clipping and Trimming a Seam CLIPPING Making small V-shaped cuts on the inner (concave seams) or outer (convex seams) curves help them lie flat when turned to the right side.
Always notch within the seam allowance, not beyond it. FIGURE M 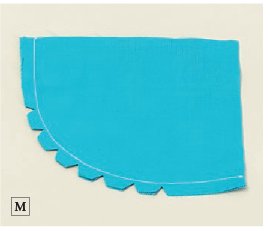
Next page













 Introduction I wrote my first book, BagsThe Modern Classics, with beginning-level sewists in mind, so I kept the supplies to a minimum.
 Tools, Supplies, and Basic Techniques Tools and Supplies You will need a few basic tools and supplies: sewing machine, all-purpose sewing thread, hand and machine needles, pincushion, ruler, safety pins, straight pins, scissors, seam ripper, pattern weights, measuring tape, and chalk; a serger is a nice bonus but not mandatory.
 I use linen, cotton, home decor fabric, quilting-weight cotton, faux fur, and waterproof fabric for the exterior fabric and quilting-weight cotton for lining. I use light- to medium-weight interfacing, depending on the weight of the bag fabric. I use roll zippers, so I can trim to any length I need!
  There are several different kinds of leather handles available to suit your bags design.
 Some metal purse frames include an attached chain to utilize it as a handbag style. Others have a detachable chain, for optional use. The fabric edge of the bag is glued into the channel of the frame, so even beginners will have a fun time using this frame! Basic Techniques Applying a Magnetic Snap Attach the magnetic snap following the manufacturers instructions. Most snaps attach with the following steps: Cut a small piece of fusible interfacing at least larger on all sides than the snap.
 Use a pencil to draw the lines on the fabric where it will need to be cut for the prongs. Mark and carefully snip the slits for the prongs. FIGURE B
  Insert the prongs of a magnet on the right side of the fabric. FIGURE C
  Place the disk over the prongs on the wrong side of the fabric and fold the prongs outward over the disc.
 Attaching an O-Ring Cut 2 pieces of ribbon each 2 long. Press both short edges of a piece of ribbon under . FIGURE E
  Press the ribbon in half. Slip the O-ring onto the ribbon. Stitch the ribbon ends together.
 Position the ribbon on the side seam of the lining. Pin in place and stitch. FIGURE G
  Repeat Steps 13 for the other ribbon O-ring holder. Attaching a Twist Lock Using a screwdriver, disassemble the lock. Place the back piece onto the lining flap. Trace the back piece onto the lining.
 Cut out the center area of the back piece on the flap; punch the screw holes on each side with an awl or the tip of the scissors. FIGURE I
  Lay the front lock piece onto the exterior, match the back lock piece with the front, and then screw them together. FIGURE J
  Draw the cutting line onto the front clutch piece as provided on the pattern. FIGURE K
  Insert the lock piece, place the washer onto the prongs, and fold the prongs outward. If you would like, you can add a piece of interfacing to stabilize the lock. FIGURE L
  Clipping and Trimming a Seam CLIPPING Making small V-shaped cuts on the inner (concave seams) or outer (convex seams) curves help them lie flat when turned to the right side.